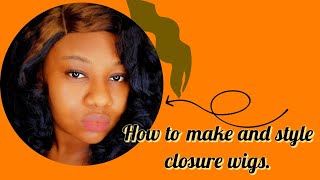
Amazon Closure Install | Updated/Detailed | Beginner Friendly | Muokass Hair
- Posted on 29 June, 2022
- Closure Wig
- By Anonymous
Welcome back to my channel babes ❤️❤️
This video will show how I install a 5x5 closure from amazon. This video is 100% beginner friendly and done step-by-step.
Wig link:
https://www.amazon.com/gp/aw/d/B08YJBG...
Comment. Like. Subsricbe ❤️❤️❤️
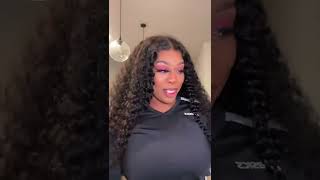
Hey babes welcome back. If you want to see how i achieved this flawless install stay tuned and by the way i want to give a super shout out to all my new subscribers. What'S up y'all all right, jumping right into it, i will be installing this 5x5 closure wig today um. This wig is from amazon. It'S from the hair company, uh muchas. I thought it was on the bag that i showed previously, but i was dead wrong, but i'll leave the link in the description. This wig ran me about 190. I know it definitely wasn't anything over 200, so i'll say about 190 um. I got. I can't remember if i got 26 or 28, i'm just gon na, say 26 to be on the safe side. Um this hair was good. The only thing that i will say is there was a little bit of shedding. I really don't like that. Um, this wig was plucked and bleached by moi, of course, and if you guys want any more extra details on plucking and bleaching, i do have a video um about two videos back and i go into detail about all that, but other than that i'll give this Hair a 7 out of 10 and let's install so because we want our wig to look like our scalp. We are going to add either foundation or concealer, whichever you have that matches your skin tone, you're going to apply that to your ball cap and then you're going to apply that to your wig as well. And after i do that. I like to place the wig on my head a little bit just to see how everything blends and then once i like how everything is i'm just gon na clean up that area that my closure is gon na? Go i'm gon na clean up that area with um some alcohol just because you may have any like dirt or oils or makeup in my case, and you don't want that to affect how the glue applies to your lace so make sure make sure you clean off Clean it uh clean it with some alcohol. Ladies get that dirt off. Next, i want to mark how far um i want to put my glue down, so i just take a brown lip liner. That is what works best for me and i just make four little dots along my forehead, where my closure is so when i apply my lace, i'm not doing it too low and i'm not doing it too far back next, i'm going in with my ghostbun glue And i'm just going to apply that i'm going to do that like on top and behind of those dots and i'm just going to mark it not a lot. You don't need a lot. A little. A little goes a long way and i'm just going to pat that on there and then i'm going to take the end of my rat tail comb and i'm just going to spread that out evenly and i'm going to do this three different times and each time Before i go in with the next dot of glue, i'm going to make sure that it's nice and clear, because if it's not it, that could affect how my lace lays as well. Once your glue is nice and tacky and clear no white spots, you are going to lay that lace directly on top see how those marks come in handy you're, going to lay that lace directly on top of that uh glue. And then i like to press that in with a comb or my finger, do whatever works for you. I know some people say: don't use your finger, use your finger if that works um, and you just want to press that lace into that glue, and i do this just a couple times make sure i get it nice and um steady and then i wrap that With my elastic band, hey um, while my uh glue lace, whatever is melon, i'm just gon na go in with my flat irons and press my hair out, i'm just going for a simple straight. Look! Nothing too extra! I wanted this install to just be as simple as possible so straight here and i let that band sit for about 30 minutes then, after that i just undo it let it come off, and now i want to cut start cutting that lace off. So i'm going to start by cutting off those tabs that are on the sides. They can sometimes bulk up your wig and you don't want that and then i'm just going to take some scissors and cut down the middle of the lace just to make it easier. Just so i could do one side than the other and, as you can see, i'm just holding down that piece of lace and then using some type of razor and then just cutting as i'm pee as i'm pulling. So i'm like cutting as i'm pulling uh by the way i've been asked um. If you can use that lace that i'm cutting off again once you cut it off, no, you cannot. So after you cut that's off, that's it! That'S a wrap like that pieces going with the wings, i'm just plucking off any hairs that are in my way i'm trying not to touch it with my fingers as much so i'm going in with tweezers and, as i finish, cleaning up my front, i'm just going To section and comb out my baby hairs um, i'm actually gon na try to pay attention this time and not make them all uneven as last time, y'all real fake for not saying that in the comments y'all could have told me my baby hairs was off. I wouldn't have been mad, i would i would have laughed because they was off. It was off okay. So after i separate my baby hairs, i like to separate the hairs from the rest of the hair because they can get tangled up pretty fast. So i just put it in a little hole: don't knot up your hair and then ask me what to do. I don't know i did not minds up, so i understand how you cannot dress up, but i'm going to take that same concealer i used earlier, and i'm just going to apply that to the top of my lace and just to make it more flat. I'M going to go in with my hot comb: i'm going to go, i'm going to go with the hot comb with the baby hairs and also i'm going to hot comb. Some of that hair on top too just to give it a more natural and flatter. Look. Okay, okay, we'll see what's about to happen next: okay, okay, okay, we'll see, hey, hey, i'm also going to tweeze those baby hairs a little bit. I like them thick, but i don't want them too thick, so i like them. I like to tweeze them a little bit and then i also tweeze the other section of the hair as well to give it a natural change. Today the look bit taking the pain away. I heard you was giving your chain away next, i'm going to go in with this tresemme extra hold hairspray and i'm just going to apply that along my lace and above my baby ears, and i couldn't reach my hair dryer. So i just had to use my little fan and i wanted to let that hair hairspray dry a little bit before i applied my band. So i let this dry for, like maybe three minutes, and then i apply my elastic band. So i let my headband sit for about an extra 10 minutes then, after that i like to comb out my baby ears, because they probably got a little flat from that second headband. So i like to comb them out and then cut them to the desired length that i want and then from there i'm going to take my flat irons. I think they're like a half an inch for flat irons, i'm going to take them and i'm going to curl them in an upright position. Um. I like the way that the curling iron makes the curls extra fluffy. So that's why i always choose a curling iron. If i was going for something flat, i would just uh lay my baby hairs down, but i like that whole curl effect um. Now i'm going in with that same tresemme hairspray from before, and i'm just tapping that on t to the top part of the hair, you don't want to push that product all the way through because it can make it look. Uh really fake that fake, looking type hair. So, that's why you don't want to press that uh hairspray, all the way through or any type of product you put on your baby hairs, never press it all the way through always apply it to the top, and what i'm doing here is i'm just taking my Comb and pretty much using that comb and going in a c shape. That'S how you create your baby hairs, so just move your comb in a c shape and you'll get that desired. Look that you're! Looking for the only reason um, i used my fingers for this was because i wanted that little extra curl that was there - you don't have to use your fingers. I was just being extra once i have my desired style on the one side, i'm just going to do that same exact approach over on the other side. Remember to use my comb and put that in a c-shape and if you want to be like me and add any extra curls just define that curl a little bit with your fingers and just to flatten uh those baby hairs down. I'M just gon na go in with my headband. This was the first time i actually tried it. So i just i don't know, but i just wanted to flatten them down. So i just put my headband back over and now i'm just gon na go in with some touch up root spray in the color black, we're just going to get that part to look a little bit more natural and then, after that, i'm going to use that Same concealer from earlier, and i'm just going to go to define that part a little bit more next, i'm going to take my wax stick and then i'm going to apply that to the top of the wig and then the parts where my baby hairs are. I'M going to apply that wax to there as well, and then i'm going to take my hot comb and just press that heat into there just to get it to look as natural as possible and nice and flat. I know i don't do no bulky wigs, hey, and this is the final look for the install um. Like i said before, i will give this hair a 7 out of 10 only because it did shed a lot but other than that the hair was really smooth. I, like the lace on this hair. This was probably uh the best list i ever had for a wig. You know it's off amazon. You already know how to get down, but uh continue to like comment and subscribe. Ladies and i will see you in my next video

Comments
Anita Bates: You did an amazing job
Tehillah Praise: Is the hair human and is it silky please cause I’m about to purchase cause of you
bethany Tyuania: Where did u get your pressing comb
taz !:
hair-factory: so stunning! Are you willing to work with me?