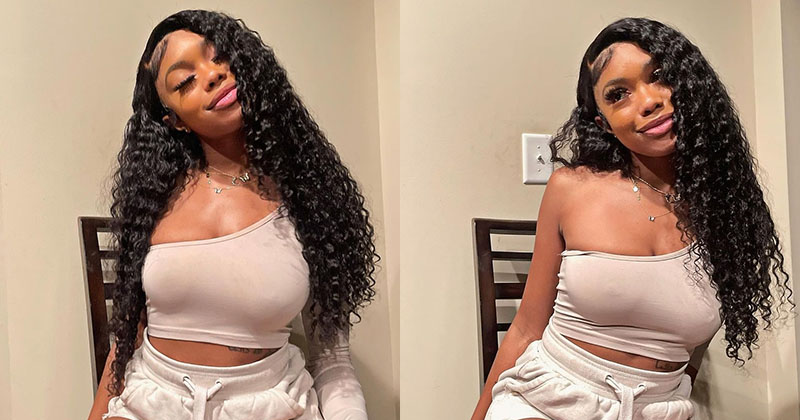
Tutorial: How To Make A Full Lace Closure Wig (Beginner Friendly) | Amazon Nadula Hair
- Posted on 27 August, 2018
- Closure Wig
- By Anonymous
Hair info: body wave 12 14 16+10" closure(natural color)
Hair Link: www.amazon.com/dp/B01EWVTV1Q
Store Link: https://amzn.to/2N4tkCo, coupon code: NADULA08
IG: janice_nadula
Email: [email protected]
Whatsapp/phone: +86 183 3903 9787
Subscribe to stay updated!
Follow Me!!
Instagram: https://www.instagram.com/missgeorgiab...
Email: [email protected]
This is the wig cap I will be using today. You can actually use any spandex dome cap of your choice. I measure the width and the length of the lace frontal, and then I mark it onto my cap, so measuring your lace, closure and marking it on your wig cap just helps with placement and just making sure that everything is properly aligned using T pins is a Really good trick, it holds the closure in place while you're sewing, but I only could find one currently. So I use the next best thing. A bobbing pin like you have to use what you have so we're going to work with that. So it is much easier to watch and understand than to for me to explain it, but in general the technique is to so from top to bottom, showing the needle through the top to the bottom. So if you look closely when I sew the needle I'm gon na pull the needle through the middle you, this is gon na, be a slo-mo for you to better understand the technique. You'Re gon na insert the needle through the top of the lace closure into the weight cap and you're gon na pull the needle through the middle. Just like that - and this is the technique. You'Re gon na continue all the way around and it's basically the technique that you're going to be using all throughout making this wig. Here you can see I'm doing the same thing. The only difference is that I wrap the thread around the needle twice. This is to create a secure hole. Usually I do this when I'm beginning a web to create a secure hole at the ends and you'll see. I also do this when I get to flip over method you. What I learned as best practice, is to slow down one side of the lace, closure and then sew down the next side and leaving the back for last, because it makes sure that you don't have any lumps or gatherings in your lace closure when sewing it down. You use your t, pin to secure the track onto your Styrofoam head um. This is best practice because in the track won't be falling and weighing down and it makes it easier to sew. So I double my tracks in the back, because it makes for a faster sewing process towards the top. That'S when I will be sewing single tracks to make sure that the wig is as flat as possible, and it makes it look like sewing so now we're continuing with our sewing technique, you're going to be sewing through the top and pulling the needle through the middle. So, that's all you need to remember to complete this week. You you so now. This is where we're gon na do the flip over method, where you're gon na flip the track over. So we can begin to sew on to our next girl, and this is also where you will wrap the needle around the thread to create a secure hole at the flip over part. I should come up with a catchy catchphrase for you to remember how to sew, but anyway, insert the needle through the top and pull it through the middle through the top and pull it through the middle. And that is literally so easy and look at how nicely the stitch is coming out you, after watching this video, you should have a perfectly made wig like the stitching is perfect, like no one can tell you this wig is a weak. Your wig will look like a sewing honey, so when you get to the ends - and the thread is too small to continue sewing - you cut it and then I also decide to tie it before I completely cut it off, and then I cut the weft, because now I am about to start single tracking on the way up, so that the wig will be flat at top, be very careful with sewing the needle, because you are sewing towards your fingers. So that's why I place the bandaid on, because I kept sticking myself with the needle you. Yes, you have finally made it and you are on your last track. So what we want to do is so very close to the lace closure. You can even insert the needle through the lace closure and through the track, to make sure that everything is very secure and close together in my next video I will be uploaded. I will be doing a video on how I made my closure lay like a front. Oh and really look like a frontal, so I think you guys would really really enjoy that and I will put down below what length I have in my hair here. I haven't had this here in long, but it's beautiful and one of the things that I really judge on how do if I like, hair or not, is the way it strains, because I feel like some hair. I'Ve had before it doesn't get bone straight, and that is something that I really really don't like. I love my hair bone straight and I'm gon na tell you this hair straightened really really well, and that is a really great indicator of this being some really quality. Here this here is so soft after bleaching it, the hair, has not altered in any type of way. It'S still soft. It has not started to tangle on me and it has not shedded any from the bleach because, usually after you add bleach, some hair will start to shed and start to matte. You do not want you here matting. I am truly truly satisfied with how beautiful it came out and how great the quality is and you're getting more than you pay for. Definitely you definitely are so and you go check out the doula care company and please like comment and subscribe.


Comments
OhSoAutumnx: Hi! Love how this came out. Literally the video I will be using to make my wig as it looks so natural! I’m a beginner so I have a question lol 1. I’ve heard with the dome cap you’re only supposed to go through the first layer of the cap when sewing. Is this true? 2. Do you see the hair all the way around cap? Like, how can you tell where to stop for your ears? Lol Thank you so much!
Sandra: u did a great job with making this wig. love how flat it is. question: did you sew in a U pattern after u finished sewing in the back? also did u use all 3 bundles?
A C: Sis you really be slaying!! Can’t wait until the next video
Jha Jordan: You're going to go far. This is so beautiful and it looks so natural.
Kersha Beaver: Very nice job . New sub