How To Make A Lace Closure Wig Tutorial | Tinashe Hair
- Posted on 13 April, 2019
- Closure Wig
- By Anonymous
Hey Y'all! Here is a video on how to make a lace closure wig tutorial ft. Tinashe Hair (all their info down below) Hope you enjoy the video!
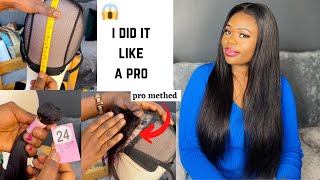
Hair Details: Brazilian curly hair 20 22 24 with 18 closure
Tinashe website top quality hair: https://www.tinashehair.com
Same hair in the video:
https://www.tinashehair.com/product/br...
Same texture lace front wig:
https://www.tinashehair.com/product/13...
5x5 closure with bundles:
https://www.tinashehair.com/product-ta...
Refer your friends and get more coupons:
https://www.tinashehair.com/2019/01/09...
Contact Us: Whatsapp/Tel: +8618737406024 Email: [email protected]
Tinashe Aliexpress store top brand & rated seller: http://bit.ly/2sf2tvh
Curly hair lace front wig: http://bit.ly/2IgV88o
Curly hair with frontal: http://bit.ly/2P8Yqer
5x5 clcosure with bundles: http://bit.ly/2Z5ALA1
Top selling straight hair: http://bit.ly/2GldEdv
Contact Us: Whatsapp/Tel: +8615203746156 Email: [email protected]
Instagram: @tinashehair Facebook: @tinashehair
Business Inquiries: [email protected]
Music: Music: Seasons by Sappheiros
https://soundcloud.com/sappheirosmusic...
Video Link: https://youtu.be/6M6INFitwMQ
License: https://creativecommons.org/licenses/...
Hey everyone is Teena, Marie welcome back to my channel, so today I'm actually going to be making a wig. So before I started my whole natural journey and doing natural tutorials, I always used to do so winds and making wigs all the time so just want to show you guys how to make a wig. I was going to do so in, but I got other stuff to do, but I will definitely be doing a sewing later on this year. I don't know when, but I will definitely do it. I am NOT a professional by any means, but I have made quite a few wigs back in my time, so I just want to share with you all exactly how I make a wig if you want to make a wig and yeah so alright y'all. So the hair that I'm going to be using is from Tinashe. I believe, that's how you say it. This is everything that comes in the little cute little bag, and this is a mirror. It comes with the pamphlet and I got three bundles of hair 24, 22 and 20 and an 18 inch closure. So I love how the hair looks so far. The ends look fine to me. They don't look too scraggly or anything. This is what the back of the closure looks like and on each bundle. It shows how to care for the hair, how to wash it and everything. So that is definitely something good to keep. This is the wig cap that I'll be using. I thought I bought a black one, but it's absolutely fine, I'm just making sure that it fits my big ol head and just seeing exactly how I want to wear it, I'm taking the closure and putting it on top so that I'll be able to make marks For where the closure stops at so that you know, I won't go off track when I'm sewing it onto the cap, I'm just taking a. I think this is a lip liner, so you use whatever you. Can that's gon na make a mark and I'm just marking exactly where that closure is staying, and then I'm also going to mark it in the back as well. So I'm just lining up the front again and then I'm just marking it in the back to where it stops, and that is gon na help. So much with making sure that your closures say straight and everything's going to turn out perfectly all right. So I'm just putting my wig cap onto the styrofoam head, making sure that it fits properly and what I'm going to do is take my closure and match up the points to where they are, and I'm just gon na take some t, pins and pin that down. So that when I'm sewing it, it won't move and it won't go out of place, so I'm just putting the hair in the bun, because I don't want it to be in my way. While I'm doing this, you can also pin down the back ends of the hair as well, so that that will help you and it won't move that that didn't really help me that much because I ran out of T pins and I was using pushpins. So what I do is, I just take the needle and I put it through and then I just wrap the string around it and that creates a nut and I pull it through you're gon na be able to see exactly what I'm talking about a little bit Later, it's kind of hard to show you right now, but I used to take the needle through. I wrap the string around and pull it in. That creates a knot, and I just do that throughout the whole closure and I'm making sure that it's not too far apart, I'm making sure that the string is together. I don't want it to be loose or have any gaps in it or anything, I'm just making sure that it's very neat and secure that it won't go anywhere. So while I'm finishing this up, I just want to let y'all know if you don't have a wig stand. You can definitely just sew it with the styrofoam head in between your legs, but it just moved too much for me. I don't have a wig stand, so let me tell you I what I use I use my fan and I just took the fan part off and I just stuck the styrofoam head on top of that and bam DIY wig stand. So I am starting off with my bundles, starting with the longest one and I'm just measuring to see exactly where I wanted to go, and I'm just gon na take my needle stick it through the cap and then I'm gon na. Stick it through the very end of the bundle as well, and I'm just bringing that on through, so that it will create a knot, and you don't have to go through the left every time that you saw it because that can take forever. So what you can do is you can just go underneath the left wrap the string around it and pull it on through and just continue to do that method. I am also doubling up on my wife, so they're together, I'm not just doing one. I folded the whole track in half so that it's like two, so I'm doing doubles if that makes sense. So once I get to the end of the cap, you can definitely cut right here if you're not used to like folding it and doubling up. I am just gon na fold it over and what I do is I take a tee, pin and pin it right where I want it to stop that way, you'll be able to go in a straight line and it's much easier staying on track so, where you Know your soul will be seamless, so that's exactly what I did, and so it won't be a big bulge right there, I'm just putting the needle through the cap and through all of the lifts not making the nuts and then I just do it one more time. Just so that I could have that extra security and then I just go ahead and finish my sewing, so I slowed it down a little bit because I wanted y'all to see exactly what I was talking about. So I take my needle and I put it underneath both of the whiffs - I wrap the string around it and pull it through and that creates the loop. So this is a much easier process and you still get the same results for your wig also with this. So in it is more of a u-shaped, as you can see, but once I get closer and closer towards the top is going to be in more of a square shape, alright y'all. So I do want to go more in depth about this, but I'm a little sick and my throat it's kind of sore. So it's kind of hard for me to explain, but I didn't just want to give you this video, with no words at all, so just bear with me, and I will try to do another video like this as well in the future. That will be very, very more in-depth all right. So this is the end of bundle number two, so I'm just gon na show you guys what I'm doing, I'm just taking that needle putting it through the wig cap and putting it through the end of the bundle hair and I'm just taking the needle and putting It through that loop of thread, that's shaped like a circle and pulling it through and that's going to create that nut and I'm just making another knot just so that is secured just so that it won't get loose or anything and I'm just cutting off that excess String so for this part, when I get to the top, I don't do double weft at all. I just go ahead and measure it so the size of the cap, and then I just go ahead and sew it on one at a time, alright y'all. So I am all done. As you can see, there is a little bit of space left up there at the front you're going to see when I move my hand, but that is what you want. You don't want it too bulky up top. It'S not gon na. Look right, trust me, you're, just gon na look like you got a big ol hat on your head or something or a beaver sitting on your head. I don't know so just make sure that it's flat enough and that the closure of the hair from the closure you're just gon na put that over that hair and it's going to cover it up. You'Re not going to be able to see anything. But this is my final product of what it looks like, so I'm just gon na go ahead and take it off of the mannequin and just turn it inside out, so that I can go ahead and cut this part where the lace is so you want to Be extra careful you don't want to cut too far back where you're sewing at, because that would just mess up the whole week and everything so just be careful. Just cut out a little bit of it where the lace is on the lace, closure and then you'll be absolutely fine. You can also add a strap if you wanted to or wig clips or whatever you want, but I didn't need it because the wig fit absolutely fine. This is just some makeup that I found in my closet and I'm just putting it on the back of that, because I didn't bleach the nuts or anything. I think this is like finishing powder like a bronze or a brown finishing powder and I'm just putting that all over the back of it. So this is what it looks like on my head. It looks a little crazy, but trust me we're gon na get it right, so I'm just spraying some water on top of the closure, because I want to make my part and I'm gon na go ahead and cut off that list and I'm just seeing where my Part is so I could go ahead and make that part in my closure so that it will match up and look how natural my part looks without bleaching or anything. That'S the only thing I did was put that finishing powder on it and it looks absolutely amazing. So let me just tell you about this hair. I absolutely love it. I did go ahead and wash it and the curls are absolutely gorgeous y'all. This hair is so soft is so manageable. I dig it a little bit of shedding, but that's normal with curly hair. I didn't have any tangles whatsoever. I am in love with this hair already and I will definitely give y'all an update on it, but this is what the hair looked like once I let it air dry and put it on the next day. No complaints whatsoever is so full, and the only thing that I did is just run my fingers through it so that it could get a little bit more volume, but you don't have to do anything to this. Really. All you got to do is put all your hair girl and go. I love this hair so much and I can't wait to give y'all an update on it. I will leave all the hair information down below in the description box. Make sure that you check them out. Thank you guys so much for watching make sure you like comment and subscribe and I'll see you all on the next video


Comments
Cierra F: I feel like I’ve been avoiding this wig thing for so long but it seems like the move for protective styling
Kafi Crichlow: Thank you so much for mentioning the fan to use as a stand...would of never thought of that
KabyKai: Girl thank you for the diy wig stand truth lol. I’m going to do exactly that.
Shan: Notification gang gang
Kaashh Baby: Did you have to Pluck