How To| Closure Wig Install (Very Detailed, Beginner Friendly)
- Posted on 21 July, 2019
- Closure Wig
- By Anonymous
Hello my PlayTime Beauties!! This is a HOW TO| Closure Wig Install (VERY DETAILED, BEGINNER FRIENDLY). This videos shows you step by step instructions on how to successfully install a closure wig on yourself. I hope that you all enjoy this video! Please make sure you Like, Comment & Subscribe to my Youtube Channel to stay connected and never miss an upload!! P.s- uploads are every week and sometimes twice a week!!
Down below are all of the products and tools I used in this video.
Got2b
http://www.schwarzkopf.com/en/brands/h...
Blow dryer
https://www.amazon.com/Kiss-Ceramic-To...
LottaBody setting lotion
GhostBond Glue
https://www.amazon.com/Ghost-Bond-Hair...
LA girl foundation
https://www.lagirlusa.com/products/pro...
RubyKisses mineral powder
https://www.amazon.com/KISSES-MINERAL-...
Nicka K products
https://shop.nicka.com/nk-liquid-liner...
Hair used for wig
https://www.clorebeauty.com/janeiro-10...
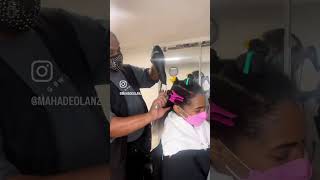
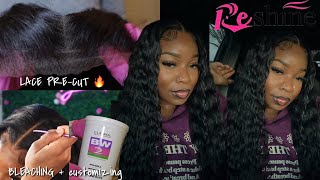
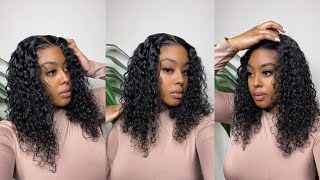
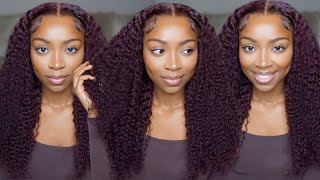
What you're going to achieve this look is low driver, a lot of bodies on setting lotion got to meet, go spine, blue, and I know it looks crazy, but hey we do here over here. Everything is not gon na, be perfect. It'S brush and we're gon na be using the LA girl foundation, a concealer, / eyebrows, fit or brush and eyeshadow punished and be okay, eyeliner and I saw the McCain mascara, but I don't know where they is right now, because everything just everywhere, but this all but She'S gon na need today, so I know these braids looking crazy. I thought it was like sitting off, but this week it's gon na get you back in the game. This is a closer wig that I've made and I don't want to be wet kind of hair. I use as far as the brand, but I'm gon na make sure that I find out and take it down below, so I'm gon na show you all two ways you can put on your wigs. The first way is the way that I do it. I just position my clothes or my funnel, where I want it to be and then pull down and I'll make sure that your crazy I took up under and I don't use. I don't use stocking caps because, but I'm not I'm not saying, don't use them because they are good. It'S just not good for me because I get hot and I'm gon na take mine off at the end of the night. So this is first way you can put it on or you can do a traditional way, which is start from right here and then just put your head into, so you want to start well. First of all, you want to make sure that all the hair is going to loose a bit as you're teasing and you're going to start at the end. It doesn't matter which side you start with it, but just make sure that it's going to start cutting and you want to cut in a rigid motion. So after you get them cutting the lace. You want to take a pen or a marker to mark off where you're gon na start putting the ghost bond glue or whatever you do that you're gon na be using, and I always do that. Just because it'll give me a more better outlook on where I'm gon na be putting the glue and where I want my closure or frontal to lay. So whenever I used to go spunky, I always use the tip of a comb or you can even use a q-tip, but I always use the tip of a comb only because it lets the ghost find a little lace, smoothing your head and the smoother. It is on your head, the faster it's gon na dry. If you let it just sit there without smoothing it, it's gon na take longer for it to dry. So you always want to keep that in mind. So it's not rocket science on how you can let this ghost mind loser. I always use a blow-dryer only because it makes it go faster, but you can let it air dry as well and in the next clip of this video is just gon na. Be me putting the second coat on so by most of you all being beginners. I'M gon na always recommend for you all to start at the end of the closure or frontal and start putting it on the glue and then you're gon na. Take your comb and just mash it down on the glue just making sure that it's secured, and then it's not rocket science. You just go from the end to the middle. To the other end, it's very easy. It'S going to be very self-explanatory once you do it, and I also recommend that if you're going to do a closure install on yourself watch this tutorial as you're doing it on yourself, this will be a very good help. So next comes the baby hairs and I always recommend for people to pull out the same amount that they would on their natural hair on their projects or frontals. Just so it'll give it a more natural look. So after you pull out that amount, you're gon na use the lot of body or you can use any type of setting lotion and just put the setting lotion on the rest of your closure or frontal and some of your edges, and this just makes it easier For you to have it flat, you wouldn't need to have a flat iron or a straightening comb. This will get it very flat and very natural-looking. So when it comes to cutting your baby hair, so I always tell people just cut them as short or as long as your natural baby hairs are because you don't want them to look unrealistic. So when you're doing your edges with the frontal or closer, you always going to make sure that you use the edge brush only because it's more easier and it gives it a more of a natural look and as you all can see, all I'm doing is just Brushing the hair up into the closure and smoothing it down with my finger. So next I'm going to be using the Allegro Foundation and a dry brush, I'm going to be using the foundation so go into the scalp where the part is and where the edges are and just filling it in with foundation and using the foundation can make. It look like you bleached, the nuts. I know some of you are gon na, be beginners, so you're not fully aware of how to bleach the nuts, but I'm gon na do another video on that, but this is further that way so make it. Look like the nuts are bleached, so you see that I'm getting done using the foundation on the closure. So next I'm going to be using the other end of the eyebrow brush and just going in with some mascara to clean up the park. Just make it a little bit more straight and you might see where I have some hair that has foundation on there. So I'm gon na just be cleaning up that with the mascara as well. So next I'm going to be using the Nikkei eyeliner and I always go back and what eyeliner just to really make sure that the part is crispy and no hair on the closure has foundation on it. So in the next clip of this video, I'm gon na be showing you all how I use the Ruby kisses powder foundation and I'm gon na be putting it in the scalp of the closure. I'M not gon na put it in the part, I'm just gon na put it where the edges are, and this is just gon na make it look like it's more natural and it's gon na make it look like it. You really did bleach the nights to perfection. So since you all our beginners, I'm going to be showing you all a quick and easy way, you can melt the lace really fast, I'm going to be using the got to be glam force, holding spray and you're gon na spray it on the front edge of The closure and where the edges are, and once you do, that you're gon na tie your hair down with either a satin scarf or Senate strips. So once your hair is dry from being upon of the scarf you're going to take your blow dryer and the tip of your comb to just mash down the closure and dry it at the same time, this is just going to make sure that the closure is Dry from all the sets that you took to melt the lace and as you all can see, the lace is not melted, so we're all good. Now so y'all. I tried my best for my mom to get on camera, to show you how she curled my hair, but this was just turning to a next video for curling, but thank you all so much for watching. I appreciate you all so much. I hope you all enjoyed this video. I hope you I actually tries to do the closer install and if you do please send me pictures or videos. Thank you all so much for watching again and remember it's playtime. You
Comments
trey dig: great content