How To Make A Kinky Curly Wig| Step By Step [Part 2]
- Posted on 01 September, 2017
- Closure Wig
- By Anonymous
..::OPEN for more info::..
NEW VIDEOS EVERY THURSDAY
Watch in HD!!!
- VOGUE HAIR 100% VIRGIN HUMAN HAIR BRAZILIAN BUNDLE HAIR WEAVE 6A BOHEMIAN JERRY
- BEAUTIFUL HAIR UNPROCESSED BRAZILIAN REMY HUMAN HAIR WEAVE HAND-TIED 4X4 LACE PARTING CLOSURE KINKY CURLY
LINK TO HAIR
- http://www.samsbeauty.com/service/prod...
- http://www.samsbeauty.com/service/prod...
COMPANY STORE LINK
- http://samsbeauty.com/index.beauty
SAMSBEAUTY IG&FB
follow samsbeauty on instagram
https://instagram.com/love_samsbeauty/...
like samsbeauty facebook page
https://www.facebook.com/love.samsbeau...
HOW I MAKE A LACE FRONT WIG + DYEING & STYLING| ZURY SISTAR HAIR REVIEW:
https://www.youtube.com/watch?v=bEkF_g...
Big, Curly Blonde Wig| How to Customize a Glueless Lace Front Wig:
https://www.youtube.com/watch?v=JEbUmG...
Previous Video:
https://www.youtube.com/watch?v=EVmQiX...
LaVidaRosa Playlists to Binge Watch:
My Natural Hair Vids:
https://www.youtube.com/playlist?list=...
My Wig Reviews:
https://www.youtube.com/playlist?list=...
My Beginner's MakeUp Vids:
https://www.youtube.com/playlist?list=...
Skincare Playlist:
https://www.youtube.com/playlist?list=...
Camera:
Canon Powershot G7x
Subbie Count: 12,145
Don't Forget to Like, Comment and Subscribe!
~~~~~~~~~~~~~~~~~~~~~~~~~~~~~~~~~~~~~~~~~~~~
..::Contact Info::..
Email: [email protected]
Intagram: https://www.instagram.com/_lavidarosa_...
Twitter: https://twitter.com/LaVida_Rosa
Facebook: https://www.facebook.com/LaVidaRosa91
Snapchat: inkiepay
Nappy- A beautifully coiled, chemical free, real, unaltered, and versatile
Synonyms: Kinky, natural
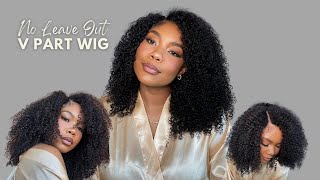
I'M Filipino Elsa, I'm your host pinky and today I will be showing you how I sell these bundles up and Disclosure into a nice, beautiful, curly, big beautiful way. So if you would like to see how I achieved this look, then just stay tuned, and I also want to let you know that this is only part 2 and the first part of this video. I show you how I got this beautiful color. So, if you'd like to see how I got that it will be linked down below and also be at the end of this video, if you'd like to check that out, but before we get into this video, I would like for everyone to leave a big thumbs Up down below also add me on my snapchat Instagram and my facebook and don't forget to subscribe so that further ado, let's get into this video, I start with foam head. Definitely gon na need a curved needle and thread a dome cap. T pins scissors, a lace, front closure, a 10-inch, a bundle and two 12-inch bundles. First you're gon na take the dome cap out of the pack and place it on the mannequin head, and you want to have these two lines placed right in the middle of the forehead. I would pin all the excess cap down just so. I won't get in the way, while you're trying to fix the front tool now you're, going to take your frontal and place it right in the center of those two lines and then pin it in place and take another pin and pin the back of the frontal And I like to pin the sides of the frontal as well and the front in the back, just to make sure it's secure when you are sewing it down. Okay, I'm gon na take a pre threaded needle and I'm just gon na sew along the edges of the closure. I'M gon na double up closer to the front because I just want to make sure the closure is stable. You want this to be the most stable part of your wig, because that closure is what makes the week, in my opinion, like you, don't want that to be loose or come apart, while you're wearing it, because you gon na get caught out your girl. Once you sewn all the way around the closure, you're going to just take your thread and tie a knot in the end, I like to double my mind, because you just can never be too careful. If you stay ready, you might got ta get ready, we're moving on to the bundles you're gon na pin the back of the cap down to hold it in place. This is very important. This line right here is your boundary. Do not sell any of these bundles on the elastic part of this dome cap or your wig cap will not stretch, and that is not a good way. Trust me now, I'm gon na be doubling up my tracks because I feel like on a curly wig. It makes the wig a lot fuller and just look just better in general, and I'm gon na take the doubled in and pin it to one side and that's where I'm gon na start sewing once you get to the end you're going to pick the tracks up. Flip it over and take the pin, pin it in place and just start sewing the opposite direction and you're going to keep sewing until you get to the end of that track, and once you do you're, just gon na take another bundle and you're gon na. Do the exact same thing, but just place the end of it where you left off and just start song again go to work, and this is what it should look like when it's all said and done. This is another important part. This is what's gon na make your wig lay flat on your head and ultimately make it look the most natural you're gon na cut the excess dome cap on the inside of where you sewed on the lace closure, make sure not to cut any of the closure Or the thread or you're, just gon na ruin the entire thing all right. The final step is cutting the lace off and you want to leave a little tiny bit of lace on, but not too much so this is the finished result. So when I first finished this wig, it wasn't exactly what I wanted yeah I was really upset like I was really I was like. I can't believe I spent all this time on this wig and it looks like that. You know how Gina Tosh and they need to go to work on. My repeat: what are you doing? You don't sound like that? Oh, oh, please, okay, you got to go to work on my receipt. I have to go to work on this week in the exact same way, because I had to pick and pick and pick and and finger comb and and and just twist and turn it like flip it upside down and shake it like. I literally took it off my head and just whipped it around my head. A few times like this wig had to be blown out. Not only that, I made the mistake of putting the longer pieces on the bottom and the shorter pieces on the top, so it ended up looking like a mullet, so I had to even it out around the bottom as you can see, because I don't know if You walk around here with no natural hair mullet. Who does that so I had to fix it and it looks so much better. I'M actually super happy with the results. The hair itself is just so soft and it's so easy to work with honestly. The thing I'm most proud of is the closure. It just looks super natural. If you don't know me, then you probably would think this is my real hair. It just looks so real to me. This is just like a really fun hairstyle. I kind of just wanted a wig. I could wear in my spare time that looked team natural without me having to actually wear my hair out. The bundles were by vogue hair, but the closure is my beautiful hair. So if you're like me, you want a closure to go along with these bundles. I feel like this would be a decent closure to go with them, even though they're not from the same company, it matches pretty. Well, you pretty much can't tell the difference at all. All the hair that I use this unprocessed and it claims that it can be bleached dyed and all that - and it's very true because I've done it all to this hair and it's still soft shiny and beautiful shadow Sam's beauty for sending me these pieces. They are gorge if you like to purchase the hair that I've used in both of these videos, then the link will also be down below for you to check that out so yeah guys. Let me know what you guys think about this unit down below um. Obviously I love it. I can't stop touching my hair. Is this faux kill check out part 2 by clicking the link down below or waiting till the end of this video? I hope you enjoyed this video and I'll, see you in my next one peace. You
Comments
Candyapplemomo: So beautiful!!! I enjoyed this video so much actually one of the best videos so far from editing to demonstration. I always rate your honesty. Keep up the good work.
NaturalBeauty214: Makeup on point. Hair and tutorial on point. Insert of Martin clip, hilarious AND on point lol. Subscribed.
Mercedes: Nice video. Did you actually start with the 10 inch bundles at the bottom or the 12 inch ?
Bridget Pius: Wow awesome
Zhane’ Monique: What do you think of the quality of the hair?