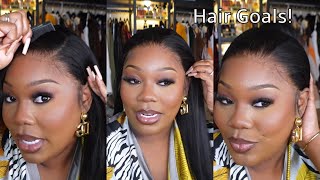
How To Make & Customize A 4X4 Closure Wig! Ft. Rosabeauty Hair
- Posted on 22 November, 2020
- Closure Wig
- By Anonymous
**BE SURE TO WATCH IN 1080p! :)
Hair used in video: https://www.aliexpress.com/item/400127...
If you guys want more details on the hair or a review let me know!
Follow me on instagram - https://www.instagram.com/dimeeexo/
Okay, so first things first, i'm just starting with my canvas head. I got this from amazon and i have like 11 needles already threaded. I feel like if i pre-thread my needles. It makes the process so much faster and the head that i'm using is the 24 inch one. I have a really big head, so mine is like the biggest size. The cap that i always use to make my wigs are these spandex dome caps they're for men um, i just like them a lot. They work really good. So before i put on the mannequin, i put it on my own head and that's what those white lines are. I just marked out where my ears are on both sides and that's going to help me out later when i'm sewing on my elastic band. So i'm just putting the cap onto the mannequin, the hair i'll be using is from rosa beauty on aliexpress. This is the closure. I went ahead and bleached the knots already, and this is what it looks like now. It'S just a regular little 4x4 closure. So i'm going to put it up against the cap and kind of just get a feel for where i want it to sit. You obviously want i can never talk. You obviously want it to sit in the middle of your cap. I'M just going to take t pins and kind of like just stick it in place, so it's not moving all around while i'm trying to sew it down, and i also pulled it down about a half inch past where the cap is. I never set my closure exactly on the edge of the cap. I always pull it down a little bit so now that it's pinned in i'm just going to braid it up and clip it out of the way. So i'm not moving hair out of the way. The whole time and i'm going to go ahead and start sewing it on i'm gon na take one of my pre-threaded needles and it is knotted at the end. So i just always like to start on one side. So i sew down one side. Then i sew down the other side, then the back i feel like that, makes it as flat as possible for me. So when i'm starting i, this is gon na, be so hard to explain. I loop it around twice and just to get the thread going and then i stick it into the band of the closure. Like closures always come with that thick ass, like band around it, so i stick the needle into that and it creates a hole right. So then i pull the needle through the hole and then just yank it through, like it's really really easy, it's so hard to explain, but when you're doing it, it's really easy. So you see i'm sticking it in pull it through the hole boom. That'S it! It'S really really easy and i just keep doing that until i get all the way down to the edge. So i'm sticking it through the band through the cap. It creates a circle i pull the needle through that tighten it boom. So i just keep doing the same thing over and over again and then, when it gets to the last one. I really want that last knot to be nice and tight so that nothing comes loose. So i'm gon na go over it in the same exact spot. More than once, i think i do it like three times that was one. This is two yeah. I did it three times, so i go over the same spot three times when i know i'm at the end, pull it nice and tight. Then i'm gon na take my scissors cut the string, but i'm leaving some excess and with that excess i'm going to tie it like i'm tying my shoes and i do that three times pull it in nice and tight, then there's my sister annoying. So now i'm gon na take my scissor and then cut that off and then you're done with the first side. That was so easy. Now i'm moving on to the next side because, like i said i like to do side side and in the back, so i'm just doing the same thing sewing through the band, creating that little circle and then pulling the needle through that and then when it gets To the end, i'm gon na do the same thing. I'M gon na loop it around about three times and then tie it nice and tight as if i'm tying my shoes and then i went ahead and did the back part off camera because i just felt like it would have been really repetitive to show it. But that's what it looks like and now the closure is done. That'S kind of the hard part like that's done already so now, i'm just showing y'all the hair i'm using this is all four bundles. It was kind of thin for my taste. I could have went for five, but neither here nor there i have three bundles of 26 inches and one bundle of 24 inches. So i just cut out a piece. Well, i put it up against my head and measured out the nape part cut it out and now i'm just putting it up against the canvas head and i'm pinning it down so that it's not moving while i'm sewing. I only kind of do this when i'm starting out and then once i get to like the middle of the head, i have a groove going and i don't need to do that anymore, but now i'm just sewing it the same way. I sewed the closure so like for the first piece that very very first stitch. I'M stitching it down twice making sure that it's nice and tight and then, as i'm going over, i'm just sewing through the cap. I don't sew through the the tracks, like the wefts. I don't sew through that. I sew around it, so i'm taking the needle going around the weft through the cap, creating that circle and then pulling the needle through. So i don't know why i sewed it on the band. I usually do it above the band, but i wasn't even thinking if you sew on the band it kind of takes away from the stretch in your cap. I mean it still fits because i have a huge head and it still went completely over my head, but i usually don't sew on that. First band i usually sell above it, but sometimes i don't even be thinking like sometimes i'll just be doing and forget and i'm even existing. So i don't know why i so do that band, but it still works. So i'm just going to keep doing the same thing and as i'm going up, i'm going to just make the tracks wider. If that makes sense, so it's going to start going ear to ear and then, of course, as it gets up closer to the closure, it's gon na start getting smaller, because you're gon na start creating a. U shape. It'Ll make sense once you see it, but i'm just sewing my wefts on now the first one i'm sewing it down like twice and then i just go across and then at the end i loop it around three times and then tie it like i'm tying. My shoe, the same thing i did to the closure is what i do to the wefts and how far you're spacing them apart just depends on how much hair you have i kind of gave myself space in between them, because i knew i didn't have that much Hair to work with, even though it was four bundles, it was typed in so i spaced mine out nicely, and you can see here, i'm running out of thread before the weft is done. So what i do i just cut. It tie it in a knot right. There and then start over with a fresh needle, so i just kept sewing going around across around across blah blah blah all the way until you get up around the closure and then you just start going in the u-shape. It'S very easy and you'll be done before you know it now. This is what it looks like. After all, the wefts are sewn on up all the way around the closure. I'M just going to go ahead and take the braid out so that i can start customizing. Now i'm gon na take the wig off of the head and i'm going to flip it inside out so that i can cut off the excess cap because you know you don't want cap under your closure. So i'm taking my scissors and i'm doing this really slowly. It'S sped up, but i'm being really careful, i just cut out the cap from underneath the closure i like to do one cut down the middle and then cut out the sides. I think that makes it easier for me now, i'm going to take my got to be freeze spray and i'm going to spray that all over the closure, because i am going to watercolor it jet black. So what this does is stops the knots on the closure from turning black well, it works for me, so i spray like a hefty spraying and then i do the water. Coloring later now, i'm going to take elastic band. I measured out my length from ear to ear and that's the piece i ended up with so now. I'M sewing down the elastic band on those little spots where i put the white dots to mark off, where my ears are that's what they're using that's who's there. That'S what we are using it for now, i'm gon na sew the bands on basically the same way. I'Ve been sewing, the hair on like creating a little hole, pull a needle through it and then once it's done, tie it off, like i'm tying my shoes, so yeah, that's what i'm doing now and i have to sit because every time i do this, i kind Of need the wig to like rest in my lap. I don't know why i just can't do it standing up, so i'm sitting down doing that now and then in the next clip i'm going to show y'all the color that i used. I used a door like always the jet black one. I water colored it. I didn't, show it on camera, because i already have a video of how i do my watercolors on my channel. So now i'm just showing you the closure, it's really white, so i'm gon na go ahead and tint it with my foundation. I just take any liquid foundation on like a stippling type of brush and push it into the closure so that it's not white anymore is now brown. Look how nice great perfect doesn't look like anymore. So now i'm going to take my got2b spray again and spray. It on the closure just to lock in that foundation. Now i'm going to start customizing my closure, you absolutely don't have to do this um, it's not a frontal. You don't have to pluck closures. I just like to it's my preference. So what i do is i take a little section of the closure wet it. I just work like in halves, so i'm starting on one side right now. I wet it with a spray bottle and now i'm just plucking hairs out, there's no special technique. I literally just pluck hairs out, skip a section and then pluck again i don't know how else to explain it. So i pluck pluck plug plug plug, skip a spot plug plug, because i don't want it to look like a bald spot. So i pluck a few times in one spot, skip over a few centimeters and then start plucking again. That'S just how i do it and then, of course, i'm taking a comb and combing out all the hairs that i just plucked out. So i just keep doing it until the closure starts. Looking how i like it to look so you can see, i just go back. I start back like an inch and then keep working my way down. So i sectioned off the hair, i'm plucking plucking plucking combing. It out, and then i just keep moving down, and the point of this is obviously to make it look more like a hairline and not a helmet. So this is all about preference. You know, like you, don't have to do it exactly how i'm doing it. This is just how i like to do it so now i'm moving on to the other side and i'm just doing the same thing. I wet it with a spray bottle. I parted back like an inch and now i'm plucking and i'm gon na keep moving down and plucking some more remembering not to pluck too much in one spot, because i don't want any bald spots and then i'm also going to go ahead and pluck the part. Not to make it necessarily wider, but just to make it less neat, i don't like perfect, perfect parts like it's kind of weird to me, so i'm just taking my tweezers and going down the part and kind of messing it up like i just don't want it To be perfect, so i'm doing that and then combing out the hair. Now i'm just gon na flat iron it my flat iron is on 410 and i did spray heat protectant before i started flat ironing it. So i just flat ironed the entire head. Then i'm going to go in with my carrot: hair wax stick and i'm just rubbing it across the top of the closure, so that it'll be nice and flat. Then i'm going to take my hot comb and comb it through and it's supposed to be on 500 degrees. I don't see no smoke, so i don't like this hot comb because i don't feel like it gets as hot as it's supposed to, but it gets the job done and i'm just combing through everywhere, where i put that wax stick and it's getting nice and flat. So then, this is what it looks like once. I'M done with everything. The only thing left to do is cut the lace so to cut the lace. I just take my scissors and i go up the middle and then i cut across the hairline, and i don't like to do it in a straight line. I kind of like to make it a little jagged. So it looks a little more natural and then that's literally it you're done so easy. This is what it looks like on. This hair is really pretty um, i'm feeling it uh. You guys could make sure you like comment and subscribe. Any questions comments all that good stuff and i'll be sure to answer thanks for watching
Comments
JustNikkiB: You did such a wonderful job! Love it!
BrittanySMason: This look is bomb
Camille: Loved the video! Can we get a video of how you apply your wigs?
Urbigbeauty 8: Love the video!!Do you leave some of your hair out on the side?
Purple Unicorn: What's the link to the closure?
Aicha Dixon: do you have a link to the hair company?