4X4 Closure Wig Install || Amazon Affordable Wig ||
- Posted on 03 December, 2021
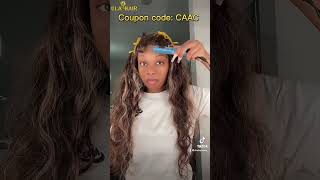
- Closure Wig
- By Anonymous
Link to wig
https://www.amazon.com/dp/B09B9285RF?p...
go check out my latest video
https://www.youtube.com/watch?v=hvDIpd...
Hey y'all and welcome back to my channel and for today's video i will be showing you how i apply my wig, the wig down with my birthday so um the link. The link to this wig will be down in the description and i did purchase it from amazon. It was a 4x4 closure, 20 inch body weight wig. So to make the wig a little bit longer. I did add a body weight bundle of 28 inch to the wig. I just went through a section and glued the drag, so it could be a little longer because 20 inches is a little short on me. So so, in the beginning of this video i could use my faculty blue gel the black con to push back my edges, so they can be. You know out of the way from the lace, cool or whatever, and then i put on this new cap and now you see me applying makeup to the part to the part where my closure would be so it can blend better and now i'm just taking alcohol And a washcloth and cleaning the area where my lace glue will be applied to and now i'm just applying makeup to the closure itself, so it can blend better, hey y'all. If you see me talking in this video, i was gon na. Do a talk through, but the audio was just so bad. It was so bad. So now i'm just doing a voiceover. So then i applied my cap was moving, so i took the wig off and applied some got. The bleach got to be glued gel and the freeze spray, so it can stay in place for a little bit and i did blow dry. I did blow dry it off camera and now i'm going in with my erica j, the watermelon kind. It smells so good. Y'All - and this looks good - it works like magic, it's just the bomb go, buy, it go, get it, and now i'm just applying. I did do three layers and now i'm just waiting for the first layer to turn clear, and then you see me applying my second layer, and i do this until i get to the third layer and it's ready for the lace to be glued down. So i did put the lace down and now i'll be going in with an elastic band to make sure it stays in place. Do so now it's time to cut the lace, and you see me removing the elastic and now i'm about to put the lace in two, so it'd be easier to um to cut off and then i'll be using my razor blade to actually do it like in A zigzag motion it'll be easier and now i'll just do it both sides and then, after that i'll be taking my got to be glue, free spray and putting my elastic band back on and that's basically it for this install um the next day. I actually did my makeup and put curls in it. I did not record the curls part. Sorry, but if you like to see um a curling video, let me know down in the comments actually curls with my flat iron. So if you like to see that, let me know down in the comments - and if you like this video like this video and if you have any suggestions or you know, review the comments. Whatever leave it down in the comment section and i'll see you guys in the next video. Thank you for watching you


Comments
Nancy Lavenia Greer: Hey Maya