Elastic Band Wig Install On A 5X5 Closure | Neon Red Roots, Body Wave Wig | Amanda Hairs
- Posted on 19 April, 2022
- Closure Wig
- By Anonymous
#neonredrootswig #elasticbandmethodwiginstall #amandahairs
Happy Easter Sale
Up to 20% off
Save Extra 15% OFF SITE-WIDE, Code: E15
Save $30 over $149, Code: T25
Save $50 over $249, Code: T50
Save $70 over $349, Code: T80
●▬▬▬▬▬▬▬▬▬※ #AmandaHair ※▬▬▬▬▬▬▬▬●
Amanda Hair Official ➤https://bit.ly/3tky9Qw
I’m Wearing 18’’ Neon Red Body Wave 5*5 Lace Closure Wig ➤https://bit.ly/3Ol2Z3k
Exclusive benefits for Sejayda fans (the elastic band used in the wig in the video, if necessary, please inform the customer service for a free gift)
Best Selling Wigs ➤https://bit.ly/33c3fiz
Invisible 5*5/13*6 Lace Wigs ➤https://bit.ly/33w3qFm
Affordable Lace Closure Wigs ➤https://bit.ly/3fm5LoF
Hand-Tied Pre Plucked lace part wigs ➤https://bit.ly/3vzmAoa
Trendy #coloredwig On Sale➤https://bit.ly/3GmjEPQ
Hot Wigs Flash Sale➤https://bit.ly/3jSRAKm
#amandahair #hairreview #lacefrontal #laceclosure #waterwave #hairrestyle #wig #wigs #lacewig #wiginstall #hairvideo #naturalhair #hairdo #wiginstall #wigunit #wigarelife #HDlacewig #transparentlacewig #hairstyle #wiglife #hairstylist #naturalhairstyle #hairstyleforeveryday #musthavewig #affordablelacewig #autumnwig #gluelesswig
Be sure to follow our social media:
IG: https://www.instagram.com/amandahairs_...
FB: https://www.facebook.com/Amandahairbes...
Youtube: https://www.youtube.com/c/AmandaHair
Tiktok: https://vm.tiktok.com/ZM8XjJQvr/
❥ Contact for hair promotion:
Email: [email protected], Instagram: @amandahairs_com
❥ Contact for wholesale:
Email: [email protected], Whatsapp: +8617630339198
PRODUCTS USED:
Bleach Powder for Wigs
Bleach Developer
Ebin Adhesive Spray for Wigs
Ruby Kisses Cream Foundation "Level 12"
Remington Pro 2" Flat Iron
Affordable Hot Comb
Hair Wax Stick for Wigs
Conair Curling Iron
STAY CONNECTED SIS!
*New Instagram: Sejayda_
Twitter: Iamjaydafierce
Snapchat: iamjaydafierce
***CONTACT ME***
Business Inquiries Only!
SEJAYDA FENNELL
PO BOX 666
GOSHEN, NY 10924
Common Questions:
Age: 28
Where I'm from: New York ( Hudson Valley area )
Ethnicity: Jamaican
Race: Black
Nationality: American
What do I use to edit my Youtube videos? iMovie on iMac
Camera ? iPhone 12 or Sony A5000
What does this channel include? Makeup tutorials for WOC, Reaction Videos, BGC reaction videos, and Vlogs
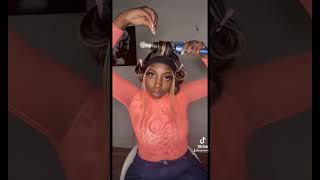
Hey mom welcome back to my channel, so, as you guys can see, we are back with another hair tutorial, so this video is sponsored by amanda hair, as you guys can see. It is this beautiful 18 inch body wave wig with neon red roots. Okay, this wig is so me, y'all know i go through my little punk rock phase every now and then so, if you want to see exactly how i got this glueless install then continue to watch, so the hair is going to arrive in this bag here, of Course, you're gon na have a card with all of their socials on it, as well as some tips as to how to get some cash back on your next purchase. Now, you're gon na have some wig caps and then the wig comes in this secure bag. Here now, look at the roots you guys now. First of all, actually look at the lace. The lace is super transparent, super hd and you know it. That makes it easier for you to go ahead and install, and this is a 5x5 closure. You guys know. I love my closures, therefore we're doing a glueless install as we always do, but this is going to be no glue, no spray whatsoever all right, so i did go ahead and bleach the knots off camera and i did tint the lace off camera as well. All the products that i use for that will be listed in the description box down below. So the first thing that i do is i put the wig cap on uh. While i put the wig on just to see exactly how it fits, then i take my elastic band. You can actually get this off at amazon and i measure it to exactly where the closure ended as well on my head. So for me it went from like eyebrow to eyebrow and all you do is you just sew the elastic band on one end to the other? That'S literally all you do so. I showed you guys a side that was completed at first and now, i'm just showing you exactly how i sew it onto the other side. It'S really really really easy and it literally takes like two seconds all right, so once i get towards the end, i do not cut the thread. Super short, i leave it long enough, so i can tie like four knots in it just to make sure it's super secure. Then i go ahead and i cut off the excess thread after i do that, that's pretty much it you guys will see it's sewn on from one end to the other, and that is it one. Two three super easy. So now, i'm just gon na put the wig on just to make sure that it's super secure and she's definitely secure she's tight but she's, not too tight. Okay and that's the importance of measuring the elastic band on your head um. Normally, i cut it a little like lesser than what i measure just to make sure it is definitely secured, because once you cut off the additional lace, you want to make sure that you do not see the lace. You know what i'm saying you want to give it that effect as if you did glue it or you spray or whatever so right. Now, i'm just showing you guys exactly how i pluck the front um. I didn't really have to do too much on this wig for one: it's a closure, so there wasn't too much to pluck anyways and then also the wig had already came pre-plugged. So there really wasn't too much that i needed to do. I just plucked to my liking. You know just um, basically just got to the point where i feel like it looked natural enough for me. So that's why i like plucking the wig when it's already on my head, because i have a better idea as to how it'll look versus you know: plucking on the wig stand or whatever or using the white towel method. You can do that too. It'S whatever you prefer, but i normally just like to install my wigs and do everything in one shot. So i pluck it while it's on my head, so once i get it to exactly how i want it, you know it's looking pretty natural or whatever it's giving a natural hair line. That'S when i go in with my wax stick and my hot comb just to lay it down all right, so i decided that i wanted a side part a little soup to do so. That'S pretty much what i did, because i really wanted to show off those neon red roots. I felt, like a middle part, wouldn't really show it off that much like i wanted that to be the main focus, because i really really think it's cute. So once i got my part down, then i used my wax stick to kind of secure it in place and then, of course, i went in with my hot comb now. What you guys are going to see me do next is to get it to lay extremely flat. What i did was um on the side where, like i, you know, parted for the soup or whatever i use my wax stick and then i'll use a hot comb. Then i'll part some more use. The wax stick then use my hot comb, and i just kept doing that until i got up to the top and that helped to really lay the wig down nice and flat, because since this is a body wave wig once it dried after i washed a wig Like it was kind of wavy towards the roots, so i just really wanted to make sure that it was flat um and that's pretty much what i did so yeah all right, so she's, looking good she's, looking flat, of course. So now what i'm going to do is cut off the additional lace. I take the scissors first cut it right in the center make sure everything is secure, and then i use the razor to cut off the additional lace. Now, after i use the razor, i do go back in with my scissors, i gently tug on the wig just to see if there's any pieces of lace that stick up, and i just cut those off. It'S normally like like little little pieces. Same thing happens when you're gluing your wig down or spraying your wig down, there's always like those little pieces of lace that don't get it that they don't stay down. So that's pretty much what i cut off with the scissors after i do that um. I added some makeup on the part just to kind of make the lace look a little bit more natural, a little bit closer to my skin color, and then i actually went ahead and put some curls in my head. So i'm going to let you guys watch and then i'll come back towards the end. Every time i see you, i oh want to be. I'M me my did. Did i'm ready you guys, so that is it for the tutorial? I hope that it was easy for you guys to follow a hundred percent glue list, no glue, no spray, no nothing. When it comes to closures. The elastic band method is the perfect way to go. I will have all of the information regarding the hair in the description box down below, and i want to thank amanda here for sponsoring another video of mine love. This wig so mean. I hope you guys love it too, and i will see you guys next time. Bye
Comments
Lovelyy Angg: you look great as always
Rpercell Rpercell: Very cute.. imma try it!!
Ciara NYC: First of all! You! Look! Amazing!
Yaya Anoraa: You’re gorgeous
MESS: I know nothing about wigs and lace fronts but this video was still enjoyable to watch
JayDaMenace: Sejayda stay looking good no matter what
D T: You always post good videos! My fav person to watch on YouTube
BADBITCHESONLY: omgg i love ittt !!!
Bri Harris: Omg can you do a skincare routine?! I don't know if you have already
Blitz: GAH DAMN, this hair REALLY screams you
Life Of A Dancer: Cute !!
drisiaga: chile she really slayed that
Jassybabyj: Yess queen I can also see u in a blue wig
@Not really Here: U r so beautiful ❤️
Tamira Bracey: Can you do reviews on p.valley it comes back on June 1st
Markail Jones: Ayyyyyeeee I like that wig color and hair on you ❤️❤️
ClarkMunroe TV: I stay bumpin to the track over here like “get a bad vibe”
owen treseler: please react to ramona singer of the real housewives of nyc’s craziest/wackiest moments
Atlanta Lewis: Interacting❤️
GizzMo: Yess Mammmm
Sammy Da Goat: First Comment Lovely Hair Color Bomb Unit
Material Gworl: This ateeeee
Kanyia Harris: Hey sejayda