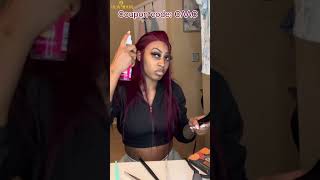
Curly Closure Wig Install! | How To Make A 5X5 Closure Look Like A Frontal
- Posted on 06 February, 2021
- Closure Wig
- By Anonymous
The hair used in this video is a 24-inch jerry curl with a 5x5 closure unit from UNice hair on Amazon.
The hot comb I used is a Hot and Hotter Electrical Straightening Comb Double-Sided Medium Teeth that I got from Amazon.
If you are a company that would like for me to review your hair, please email me [email protected] (Serious Inquiries Only)
Thanks to all my subscribers, New and Old! I appreciate all of you
Don’t forget to like, share, comment, subscribe, and turn on your notification bell. New videos every week ‼️
Instagram @garlynleigh @alexandragarlyn
Snapchat @alex_love203
Music: Erykah Badu - On & On (Instrumental)
What'S up, it's me alexander garland, and we're doing this wig install okay, get into it, get into it. So right here you see me putting back our edges with the invisible gel, it's the black. It'S glad to be, i mean with me. No, no, not you put me see, you see me putting this wig cap on and you know i would have a couple arguments with people about this glue. You know and it's the myth that the glue will snatch your edges off. No, you snatch your edges off. You got ta snatch your edges off with the glue okay, you can't treat glue any old type of way. You can't treat wigs in your type of way, so you know be wary of that, and now i'm sewing down the wig cap. I don't want to slow down the whole head because that's hot - and you know that's just really - that's just a disaster wouldn't happen to me because i feel like you can get really hot up under there. So i'm just gon na put it where to lace it. I'M gon na sew it where the lace is so now. I'M gon na wait till that gets hard, and then i'm gon na proceed with my palette and i'm going to try to shape match with that part that i glue down not necessarily this skin so self-explanatory. But i'm cutting make sure you don't cut the client's hair. Please don't cut her hair. You know she took a while to grow that don't cut it now, i'm proceeding on to cut that little bitty itty piece of lace in the front and i'm putting more of that black gel to just blend it in with her skin. This will just make sure everything is seamless when it's up under that lace, so i'm just getting that. I'M not gon na call it ashley, but i'm getting that part where the line of demarcation is a little bit more obvious. You can see in that corner that my hand is worn. It'S just gon na be obvious, so i take a small detail brush and i'm just making sure everything is the same color and then i cleaned it with sea breeze. I don't like to use alcohol because people are allergic to alcohol and don't know it and i'm trying to line it up. I'M consulting with my client to see how far or how behind she wants her lace to be, and i'm marking it with some white foundation on a little. You can use a pencil or whatever and then i'm taking those two tabs off of the wig that they sew the other tracks on and then i'm adding thin laser glue. She went on for a while, so we put five layers, i'm not even going to put all five layers into because it's very um repetitive and make sure the layers are thin and also just. It was a lot of backlash for the amount of glue. But you know people's always be falling off, but i'm not even gon na get into that. So now i'm sliding that wig back up and i'm going to line that with the little dots that i made in between the skin and the lace. So that is just like a little demarcation, so then i parted out the edges. I like parting, the edges back instead of a thin layer in the front because i feel like it makes it look way more natural and then put that elastic band down. That is. That'S the key point straighten that part up, and you won't see me spray it, but i'm using the, i think, kiss spray for like balding hair and i just use it to line up my part, i'm gon na do that after the hot comb. But this is such an essential part. You need a hot comb please so now my favorite is the wax stick and then um wax. I mean melt that wax in with that hot cone. So now you see me taking up the elastic band and i'm going to blend the part where those edges meet that hairline to make it realistic and i'm clipping back those edges so that i can cut this lace off and then i'm going to clean those little Dots of demarcation for the lineup and get those little straggly bits and then you're going to spray with gossipy. Basically, what this does is. It makes sure that that little part in the front is the same color as the skin. It'S going to blend it even more, and the very last thing you see me doing is making sure that part is straight with the detail brush and also sealing in that black spray. So my client didn't want dramatic edges at all, so i was like cool and i'm just putting them on. Unlike the temple, i guess or right above the eyebrow so for the actual styling of the hair, i'm putting it in three sections and then i split those sections and then, before i'm spraying and putting these oils and stuff, i'm making sure i'm protecting this lace. So the process i'm using is a mousse, a water and a curly hair product. So i forgot my curly hair brush at home. So you see me just using a comb to detangle and then i'm using that ceiling spray just to make sure everything's shiny and then what i don't see a lot of people doing on youtube or these wig install videos are drying the hair they just let their Clients leave with wet hair, and i don't like that because if i left wet hair i'll be very mad, i'll be an angry, wet dog. So now it's basically done. I'M blending it in with the closure, and you know i think i did my thing. I think i did let's get into it. No, it looks so good.


Comments
Makayla Caldwell: YES FRANNNN