Glueless Closure Quickweave Tutorial | Beauty Forever
- Posted on 03 July, 2019
- Closure Wig
- By Anonymous
Enjoy Your Happay Independence Day 42% OFF(1st July-4th July)
Hair Details: Malaysian Curly Hair 20' 22' 24' 26' bundles with 20' closure
Add Cart/Follow Store to Get Free Coupon: http://bit.ly/2MXecf2
Malaysian Curly Hair bundles with Closure in the video: http://bit.ly/2KpWTAW
Malaysian Curly Hair bundles with Frontal: http://bit.ly/2IRntjx
Malaysian Curly Hair Products: http://bit.ly/2IRwBoe
Top Selling in our store: http://bit.ly/31LczEH
New Wigs Coming: http://bit.ly/2KsIggf
Aliexpress Beauty Forever Hair Store: http://bit.ly/2WTcb2V
Beauty Forever Hair Official Website: http://bit.ly/2XmbNyd
Amazon Beauty Forever Hair Store: https://amzn.to/2KSGkyB
Social Media:
Youtube: http://bit.ly/YouTubeBeautyForeverHair...
Instagram: https://goo.gl/dR2g8z http://bit.ly/IGBeautyForever
Facebook: http://bit.ly/2jqoBNP
what's app: +86 15090267865
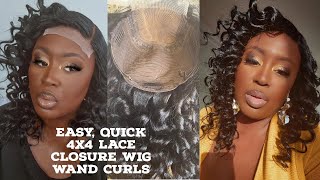
Hey y'all occasion, and today I'm gon na show you how I install this curly hair that was sent to me by beauty forever, so they sent me four bundles in a closure, so they sent me a two inch closure. 20. 22. 24. 26 inch bundles. Of course, I'm gon na leave everything about this hair in the description bar below and the direct link to this here. So I'm starting to show y'all the closure. I did attach an elastic band, but I'm just showing y'all the hairline and the lace on this closure. I did bleach the guys, but I have plenty of videos on bleaching lots and how I add my elastic band, but this is the lace tip that I used and I mix those two colors together. I definitely suggest that so this is how I braided my hair and yeah. I'M sorry. I did all that off-camera. So this is the key concept to how to get that. Glueless install so basically you're gon na use, Sendak strips, which I prefer the ones that are for your hair, because they're really lovely. I only could find these was at my local beauty, supply store and I ran out of the other ones, but basically I'm gon na be tying them. Where I cover pretty much my whole head, leaving the part where my closure is gon na, go I'm leaving their part without the strip's on it, but I'm gon na cover the entire part that my actual tracks are gon na go on, because when I glue them, I want this to be a barrier so that the glue doesn't adhere to my actual hair. So after I get the strips in place, I'm going to place two weird caps or they're called wave caps, whichever one you get, it really doesn't matter. They'Re literally the same thing, and I'm just basically sure where I'm gon na be so and which is around the perimeter of my head and around where the closure is going to go. So I should so you're gon na wan na cut off the extra cap and send extra that you have leftover, try to get as close to cutting everything off as possible. But you don't want to cut it to where you end up. Exposing your braids so be very careful not to cut any of the thread or anything like that. Also keep in mind that this is called glueless, although I am using glue, it's called glue this because the glue won't actually be on my hair. So basically, I'm sewing this cap in these strips on, so that it is a barrier from the glue actually getting on my real hair. So when it's time for me to remove my weave I'll, be taking the thread down and it will come off basically like a wig, so once I'm done doing that, I just go ahead and spray everything. We'Ve got to be glue spray and then I'm gon na start with my closure. So basically I'm just gon na be cutting off the latest. Usually I do a really jagged cut. It'S not this cut isn't perfect, but it is it super uh jagged either. I just pretty much cut off the lace, so I'm putting it on using my elastic man. I would definitely suggest a black elastic band, which it obviously doesn't matter, but I just used that because I just had it laying around already so I'm just gon na align. My closure, with my actual part, that's in my rail here and I'm gon na make sure that I have the closure sitting where I want it to sit and I'm gon na go ahead and match up the back and begin to sew down the closure. I'M gon na start in the middle and so all down to one side and then go back to the middle of Seoul down to the other side. I'M not sewing from one side all the way around, because I don't want my closure to shift on me now. It'S possible that you can't do it like that, if you're doing it on a client, but if I'm doing it on myself, I'm definitely gon na start from the middle. I do start from the middle of my clients as a personal preference, but I definitely suggest starting from the middle and not from either side. So at this point you may know that there is a ripple or like bend or space kinda in my closure. Don'T worry about that! What I'm gon na do is just so back and forth between that spot and my elastic band to just flatten out that part. It'S not gon na show up, or it's not gon na, look weird, it's just honestly some times it does. That, and sometimes it doesn't, I don't know really why. I noticed that when I do closures on myself, this always happens and it happens on some clients but doesn't happen on all. So I assume that it was due to like the way like your head is shaped, but I don't really know if you know why this happens. Let me know in the comment section below, but it may have something to do with the elastic band and the placement of it, but I have to use elastic bands when I do my own closure, because I can't it's a full. I can't, but it's really hard for me to hold the closure down in place. So anyway, you're gon na see kind of like a band but you're just gon na make sure that you do plenty of stitches in between where that is so that it can flatten out. So now, I'm gon na start gluing in my tracks. I'M using 32nd glue. This is the only hair glue that I use well as far as dark glue to choose on your tracks, so I'm just going to be gluing in my tracks, in a kind of like move crescent shape or smile shape, um other than that. This is pretty much gon na, be it for this part of the video I'm kind of just gon na. Let it go ahead and play um, I'm sorry! I wish I got a better angle for this, but it's really really simple. I'M just going back and forth with the tracks. Nothing special! I don't do anything special on this part watch out. Okay, so I have glued in all of the tracks, and this is what it looks like. So I'm going to be using this phone wrapping lotion and this elastic you pee or someplace this elastic air um, I'm just gon na, be putting this foam all over my closure just to kind of flatten it down and get my parts together: okay and I'm just Gon na begin to get those curls together and get those edges together. Now I would recommend you to sew this front part of your closure down. I didn't, I don't know why I didn't, but I was just gon na use a little bit of spray to lay my closure down in the front, which I really don't need, because the way that I'm wearing it, you can't tell but just go ahead and lay It down or if not sew it down. I didn't sew it down because I'm lazy, okay, so yeah, I'm just gon na be spraying and blow-drying to lay that lays down, and then I'm gon na go ahead and do my baby here and after I do my baby here, I'm gon na spray, my hair Down and get those curls popping and I'll just come back to you at that part. Okay, so, basically I'm just going to be cutting my baby hair. I just basically pulled the front part of my edges down and began to cut, probably about an inch and an inch and a half of hair well leaving an inch of inch and a half of here. It was too much hair on my face. You know I had to pull that back. I was getting overwhelmed okay, so I'm going to be using a little bit of foam to get my edges together. Now I was just kind of like trying to go with the flow and see how my edges would lay, but once I got to doing it I wasn't liking it. So I ended up swooping my edges in the opposite direction. So you'll see me doing that here and then I ended up you edges. You know you just have to really work with them and get them to do what you want them to do so just bear with me. Okay, so I finally got my edges to where I got I'm taking down my hair and I'm spraying it. You will notice that this is a spray bottle for some sort of Tresemme product. There is no product in there that it's literally just water in a spray bottle that I reused, so I'm just spraying my hair down with water to get it wet and get those curls defined. And then once I do that, I'm going to use. But alas, the QP and a little bit of mousse to make my curls stay like this, and I cannot lie to you that elastic QP is like the bomb calm. I'Ve never used a product like it. It is so good. It keeps your hair looking it's so good and so defined, and so moisturizer, if you like, that big poofy look stay away from it, but me personally, I wanted that kind of wet and wavy. Looking after a long hot day, I wanted it to still look moisturized and not dry, that elastic yupi. Oh my goodness, it's it! It'S like a gel, but it has an oil consistency, so it holds the curl, but it keeps the moisturize. This is not sponsored by the way I just really like the product, but anyway bear with me, while I'm styling this hair okay. So this is my final thing that I did, which was put a little bit of concealer in my part, and I just wanted to widen my part a little bit. But I didn't want to pluck it because I didn't want it to go start going bad or anything or my part get too wide so yeah. I just used some la girl concealer in the color fawn, and that did the job and this came out so perfect and I have been getting so many compliments since I've been wearing this hair thanks for watching if they told for new videos coming soon


Comments
McKayla Padgett: I’m going to try doing this on myself because you did that frfr
Becky Walker: Very cool!
Dree Dree: my closure rippled too! i thought it was cause the closure shifted as i was sewing
Latrice Finch: I really want you to do my hair for my wedding
iamtrinaful: I love the hair girl
Wynekia Holston: Hello I been looking for some lace tint can you let me know where you purchase your lace tint?
Krystal Johnson: Do you highly recommend this hair?
Ariel Williams: I miss you Kasia
Mindset Will: You fine
Jhayce Branch: Hey