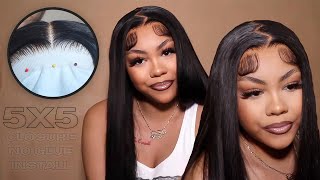
How To Customize And Install 5X5 Closure Wig |Bleaching + Plucking *Very Detailed* Donmily Hair
- Posted on 13 December, 2021
- Closure Wig
- By Anonymous
Hey y’all ❤️ thank you for watching this video don’t forget to like comment subscribe and share THANK YOU FOR 100k❤️ On the Road to 200k
❤️TIME STAMPS ❤️
INTRO: 0:00
BLEACHING: 0:21
PLUCKING/ customizing : 4:55
INSTALL: 16:02
FINAL THOUGHTS : 20:40
❤------------------- ❤#DonmilyHair ❤------------------❤
I'm wearing this in the video: https://bit.ly/3rDRUBu
Use My Special Code For Discount Off: donmily8
https://www.donmily.com/ ➤Top Selling Wigs: https://bit.ly/3IkoL4l
Click To Enjoy Biggest Discount of HD Lace Hair: https://bit.ly/31ACVxu
Hair Info: Donmily HD Lace Jerry Curly Wig 28”
Donmily HD Wig’s Sale is Rocking On the Way!!!
Save $5 Over $99 Code:MI5
Save $15 Over $159 Code:MI15
Save $20 Over $259 Code:MI20
——————————————————————
➤ Great Discount New V Part Body Wave Hair https://bit.ly/3ptVqMd
➤ Great Discount Highlight Jerry Curly Wig https://bit.ly/333TyST
➤ Great Discount Sunshine Highlight Body Wave https://bit.ly/302sEd2
➤ Great Discount Lace Frontal Body Wave https://bit.ly/32QfwIP
➤ Great Discount Lace Frontal Straight Wig https://bit.ly/3lCcKO0
➤ Great Discount Affordable Headband Wig https://bit.ly/31w5Suk
Choose Your Favorite Lace Part Wig☛ https://bit.ly/3xXfbQa
Big Discount Bundles with Closure/Frontal☛ https://bit.ly/3oq6Jpg
————————————————————————————
Subscribe Donmily Hair on:
Instagram: @donmily_hair https://bit.ly/31E9P0g
YouTube: @Donmily Hair https://bit.ly/31gF0hC
Facebook: @donmilyhairbeauty https://bit.ly/302v9fq
SOCIAL MEDIA
Instagram: @Ty.marrah
Twitter: @tymarrah__
Business email: [email protected]
#WATCHIN1080P
What'S up gi babies, so today we are jumping straight into this: install with don milly hair, we're, starting with the things that came in the inside of the package. All the details for this hair will be down below. This is a 5x5 jerry, curl texture type wig. The links and everything will be in the description box so make sure you guys check that out. So we are getting very detailed. Today we are starting with the bleaching process, we're using bw2 and um. There'S no specific reason why i used a 40 volume and a 50 volume. That'S just the developer that i had to me developer really doesn't matter it's really. The volumes is just how fast that it takes to lift the hair. So i really like using 40 for beginners 50 when i'm just trying to you know just get it done when i mix both together. I don't know what that does it acts pretty normal to me, so there's nothing really to it as to why i mix them together, but when you're mixing it together, you want to have a consistency that is not too runny so that it won't bleach through the Hair all the way, but still i kind of think that i could have made my mixture a little thicker, but it still worked out in this process and it didn't over bleach the hair too much so as you guys can see, i'm just going ahead and putting The bleach on my knots with my brush um, you can use a popsicle stick. You can use a butter knife. You can use anything you want to use, but i think that the brush kind of like glides it on and you don't want to be too heavy-handed because you don't want it to get through the hair and pass the knots and bleach the hair. Even though i kind of over bleached it in this video, but we're going to get to that a little later, but just cover all of your knots just so the hair can bleach the purpose of you bleaching. Your knots is so that your knots can bleach. So it won't be like really a lot of dark dots, even though you might still have a little bit of dark knots bleaching. The hair just makes the process a little better so that the hair comes off a little bit more natural. So i did let this sit for about 30 to 40 minutes, because i was doing something normally when i bleach my hair, i put the bleach on and i go do stuff so that i won't be like just waiting and i won't take it off too soon. So, as you guys can see, the knots are bleached. I just rinsed it off with some warm water, and i did kind of over bleach the knots. So you guys are going to see me go in and fix that with my jet black die, you can use any jet black die. I use this one by adore. There'S, no specific reason why i got this one. It was just the one that i picked up. You can use any jet black die that you want to get you a tooth brush and gently gently. Go over those knots. You don't want to make the knots black again, but just kind of gently get the parts that you over bleached. So now i'm taking my shimmer lights, and this is just to kind of tone that um brassiness, that you use from the bleach and i didn't wash out the dye. Yet the dye that i used, the jet black is still sitting on there. I'Ve never done that before, but i was like hey: let's just kill two birds with one stone the high shimmer lights couldn't affect. I don't think it's gon na affect the color, so i just put them both on there and i let those sit for about 15 minutes and then i went ahead and washed everything out. As you see me doing, right now for the conditioner, i use my tresemme conditioner that i use on my hair. It was no specific reason why i used that type of conditioner. It was just the conditioner that i had and i just went ahead and used it, but i really love the conditioner for my hair and it makes your hair and it makes your hair and everything that you use it on smells so good. So so now we are getting to this plug-in, get your t-pins these t-pins! You can find them at target for about. I think a dollar really cheap, easy if you can't, if the beauty supply store, closed, y'all know, target close at 10. If y'all running out of t-pins y'all need some more run to target, get y'all some t-pins they at target y'all. So i'm just pinning down my frontal, i said frontal closure because we're working with a five by five. Let me get it together, so i'm just parting, my closure in the middle, because we are to be wearing it as a middle part and we're going to start this plucking process now. Plucking is so easy to me. It'S just sometimes i just get lazy and i'll be like. I don't want to even feel like plucking this much, but trust me you guys. Plucking will make your style look 10 times better like if i was to install it how to look right now. It would not look as good as it did when i installed it so when i'm plugging my hair first, what i like to do is just take off a small section now. The first small section that i take off will ideally be the hair that i'm using for my baby hairs. So then i get to plucking. So when you pluck you're going to go from side to side in a fast motion and when i'm plucking, as you guys can kind of see, i'm not plucking all the way from the front i kind of pluck a little bit behind. I don't go really really on the front just because i just feel like that gives me a better look. So you just plug from side to side side to side, and if you want to like take out more sections and then do it like that, you can. But really the plucking process is really self-explanatory. It'S really very repetitive, and if you just keep those same continuous motions, you will get the look that you need and also one big tip that i would say about. Plucking is so, as you guys see how i'm gripping the hair when i'm plucking it. So i'm taking out another section, like i said before, if you want to just take out, keep taking out sections these sections wouldn't be like. Ideally, what you're going to do for your baby hairs, but, like you, can just keep taking out sections so that you can get that more scalp look and i would suggest doing that, especially with closures. But one thing, though i say, is, as you guys can see like how i'm holding it with my hand like the hand, that's holding the hair, you want to get a good grip and i feel like getting the good grip will help you with the plucking, like It'Ll help you get the plucking good, like. I hope you guys can understand what i'm trying to say like the grip, how i'm gripping my hair holding it back and plucking. I feel like that. It gives me more of a sturdier base, so i can plug do so. So these hairs are the hairs i'm going to be doing for my baby hair. So i'm just taking my hot comb and just you know getting those as straight as i can in the front and that's how much hair that we plucked out of this unit in total and i'm just going ahead with my little kitchen scissors. And i really like these kitchen scissors, so don't come for me for using them, because i'm gon na keep using them because i like them, but i'm just plucking out the hair that i'm using for my baby hairs. You just do that, so it won't look as thick when you're doing your baby hairs and i'm taking my small straightener and curling it. I know every time you guys see me use a small straightener. You guys keep asking me where you find it where you find it. It'S literally at the beauty, supply store, go to your beauty, supply, store and look, and i guarantee you it's going to be there like. You, don't even have to order it. I guarantee you it's at the beauty. Supply store, like just look, just, go in and look and it's there so y'all for this part i'll, be seeing all these people like customizing, wigs on the wig head with the baby hairs, and i was just trying to be that girl today. But i it wasn't working out for me um, and i really wanted to show you guys this, because i don't want you guys to get discouraged. If you ever try to do this and it's not working out for you, like. I really wasn't discouraged when it was happening, because i was like i'm just about to put it on my head and do the baby hairs that way, but i kind of wanted to do it on the wig head, but it just wasn't working out for me like What y'all see right here is as good as it got, but we fixed it later on when i put it on my head. So now i am just cutting off the lace. I was gon na wait and cut it off on my head, but i was like no. The lace is already like a good, transparent type of vibe, so i wanted to just cut it while it was on the head. So then it's a five by five. So it'll be easier for me to install that way and um. I'M just doing like a little zigzag motion a little bit. I don't know if you guys can really tell, but when you're cutting off the lace make sure you guys do the zigzag, don't just cut it straight across. So now we are starting this install. I just went ahead and just popped the wig on my head, and this is so easy you guys like after i did all the stuff it just made. The install process so much easier, and this is - is actually a glueless install that we're doing. If i really didn't want to spray anything on her, i really didn't have to, i could have just did the baby hairs and just you know, walked right out the door, but later on, you are going to see me spraying just a little bit of my uh Glueless adhesive on there just so i could, you know, have a little hole because i personally don't like wearing my wigs without an adhesive on it. So i just feel, like you know, i don't want to go out in my wig, not be secure like that's just how i feel so. That'S why i always like to you know, have a little grip or whatever, but you guys are going to see me doing my baby hairs twice, because when i was doing it right here, i really didn't kind of like the way it was coming out. So i redid them, but i just wanted to show you guys the process and show you guys the stuff that happens when i'm doing my hair, i mean nothing was kind of wrong with this, but to me personally, i just didn't like it, so i went ahead And did it again and i wanted to show you guys everything that i was doing in the video so we're going in with our mousse. It is the same mousse that i used previously to try to do my baby hairs earlier, but i just put that all over the hair and brushed it, and i really really love the way these curls were coming out. I love the way these curls is coming out so much. You know i had to take the phone out to see what it was looking like, but i just sprayed some my even new york spray. You guys see, i didn't even spray a lot. This is just for like a little extra hold and this spray is such a great glue. This adhesive, i love it so much and i just blow dried it for about five minutes and then started my baby hairs for the second time, and i like the way they came out this time, okay guys. So all in all, i really really like this hair. This hair was so bomb and this hair is dry. It isn't wet anymore. I wanted to wait to come on, so i can show you guys what the hair looks like dry. You guys seen what it looks like when the mousse is right on it, but the one thing that i would really say that i like about this hair is it's not too big. You guys know how some curly hair gets like it gets huge when it gets dry and i just love the way like the density of it. I really love how it's not too big, but it's just the right amount of like bigness, like i'm, trying i'm trying to get i'm trying to really figure out what i'm trying to say, but if it has a good amount of thickness to it. At the same time, it's like it's not too much hair. So if you're like a person who's like, i don't want too much hair on my head, like i don't want this wig to make feel like i got a hat on like this is not going to feel like day, and it's going to give you that curly Curls that you want, like, i really love this and being that it's a by five. I would suggest that this is a very good beginner friendly wig, because you got the five by five one. So all you really have to do is worry about this and, as you guys can see, we went through the whole process from bleaching to plucking and i would say that whole process, if i was doing it in a beginner's standpoint like if i was a beginner And i was to you know, follow a video like this and do it with this particular unit. I feel like. I would be able to achieve the same, look and achieve it very well, because it was very easy. This hair bleached so well, which made the plucking process so much easier. If i were to rate this hair, i would rate this hair a, i would say, 9 out of 10 and all the reason why it doesn't get the 10 is because being that this is a lot of hair when you're brushing it and stuff. You are going to get some strands to come out, like i said before and like i say in all my videos, like hair sheds, there's no wig on this earth that does not shed but being that this hair is like really thick you're going to get like A little bit more, you know strands than what you would normally get and that's normal, but at the same time you know still that's why i just said a little 9.5. You know i said now, but we gon na do a 9.5, because this wig is really wigging like it's really cute. If you guys want all the information on this hair, don't forget to check that description box out down below and if you guys like this video, don't forget to like comment and subscribe to your girls. Youtube channel and we'll be back more videos soon stay blessed.

Comments
mythoughts 176: TOO PRETTY!!!!
African Doll Tv: 40 is a developer that quickens lightening 50 you have to be care it lifts super fast 30 and less takes longer
Kelsey Scott: Big fan of your videos and YouTube channel, and always look forward to new content. Keep up that grind friend
Brianna: Overall great video, i just wished you didn’t speed up the plucking process. A more preview/slow paced would have been great to see what your actually doing.
BeautyofNya: How long do you wait if you use a 30 developer?
Lanesha Turner: Pretty ..always here for it
vay laine: thanks sis cause i needed a new wig
Cennedy Jo’Nae: When you mix the 40 volume and the 50 volume it turns into 45 volume
Latoya Bennett: What’s the name of the comb you using to apply the cream
tori davis: your soo preettttyyyy love your vids
Donecia Williams:
chyna Anene: wow it is really givinggggggg
Shanique Estero: Hey my name is Risha im 13 years old I have been a fan from since last year I really love your hair videos and vlogs please reply if you see this may GOD BLESS YOU if you do reply please look out for another comment from me
I say what I want: Instead of using black liner and a nude lip with gloss, try a deep brown with a light nude and gloss cause the outline of your lips just looks very harsh and not blended.
Mini DIOR:
BeauTiFul Queen:
Tina Ni: So nice, please let me know if you need hair supplier