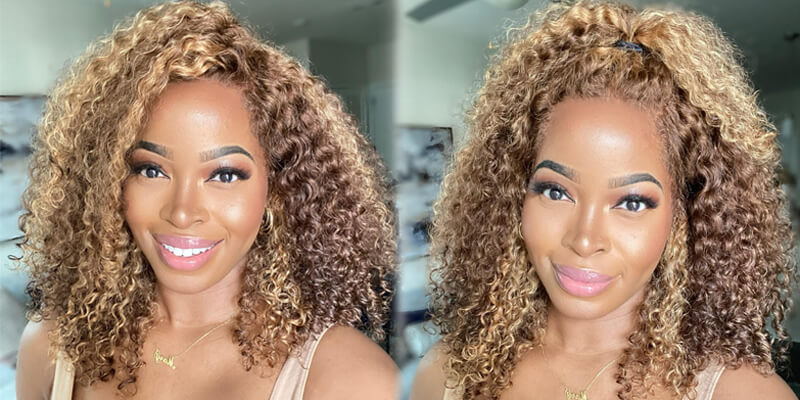
Walk Through Glueless Closure Install *Bleaching,Plucking,Styling* | Junoda Wig | Rxmi
- Posted on 12 May, 2022
- Closure Wig
- By Anonymous
*OPEN ME*
Watch in HD 1080p
Connect With Me
Instagram: @Rxmi__
Twitter: @Rxmi__
Snapchat: R.xmi
●▬▬▬▬▬▬▬▬▬♛ #JunodaWig ♛ ▬▬▬▬▬▬▬▬▬ ●
I am wearing this body wave HD wig in the video: https://bit.ly/3wlw72s
hair information: 5*5 lace closure wig 22 inch 180 density
Using Special Code To Get 15% OFF: JA15 For New Costumer Get Extra $$$ OFF
AfterPay & Klarna & Quadpay & Sezzle PAY 4 Equal payment Within 6 weeks!
Can Not Miss!!!
V part Wigs available : https://bit.ly/3w1wmkh
New Trending Affordable wig: https://bit.ly/397bIpN
YouTube @JunodaWig: https://bit.ly/3xborzP
Instagram @junoda_wig: https://www.instagram.com/junoda_wig/
Facebook @JunodaWig: https://business.facebook.com/JunodaWi...
Order Problem Contact: [email protected]
#junodawig#junodahairstyles#junodahair#bodywavewig#HDwig
_________________________________________
For business opportunities please contact - [email protected]
_________________________________________
I DO NOT OWN THE RIGHTS TO THIS MUSIC
Hey guys welcome back to my channel if you're new, here, hey girl, if you're a tennis, subscriber, hey girl, so in today's video, i'm literally going to show you guys how to pluck bleach and install your closure to the point where it can be glueless. I just added um bed head spray to the sides, but for the most part, very much clueless, so obviously it's getting warmer outside. We want something that we can easily transfer on and off something that we don't have to worry about lifting. So if you want to know how to make a closure, it's completely glueless, then oh and add some cute curls. So if you want to know how to do that, then stay tuned. So to start off, i'm just going to show you guys the wig unpackaged. This is from ginoda hair. They sent me a 5x5 body wave closure unit and i was so impressed with this um, i'm just showing you guys the lace and the construction of the cap. So it came with like an adjustable elastic band with clips at the back and clips at both sides, and the clips at both sides really help to make this wig so secure in a glueless way. Um, and i was just running my hands through the hair. There was literally no shedding so i was happy about that, so i'm gon na be using um some cheap bleach. I got from my local hair shop and some 20 volume developer. I'D recommend you get like maybe 30 volume developer, just because 30, volt or 45 is going to bleach the nuts a bit quicker. If you're, not a beginner, then definitely go for 30. If you are a beginner, you could probably start with the 20 volume just so you can watch what you're doing a little bit better um. I have an old tub, so i'm using the old tub to mix my developer in so i'm going to go in and do about. I think i did three scoops here. I was doing quite a lot of. I was doing a big mixture just because i had other wigs to bleach at that time, so just eyeball it normally for one wig, i might do about two scoops. I did about three scoops on this occasion and then literally just eyeball it. I don't add too much developer at first, so i add a little bit and then i'll mix it as much as i can right now. You'D, look at it and think that yeah, you need to add more developer but keep mixing if you're using this powder, because you can end up using too much developer and it's too runny so keep mixing because it kind of dissolves and breaks down into the type Of consistency that we're going for and the consistency that you want is literally like want it to be super super thick. I'D say, like i say, toothpaste, but that's still a bit runny i'd say maybe like icing and my big old hands was in the way. I'M so sorry about this, but literally just smooth it on just move it on use a very light hand at first like use a light hand, because if your lace is very hd, it will just seep all the way through because it lays so thin. So just use a very light hand and using a knife. I find that easier because i can just make sure it's spread it evenly across, and here i am just showing you guys how i leave it. So i'm going to leave that there for maybe like half an hour and then once it's fully processed. These are my nuts. I was very upset because my blue shampoo ran out. So i was not happy about that um so yeah. These are my nuts they're. Not perfectly toned, but i wasn't too upset because i know i can just tint them and they'll be a better color so onto my plucking method. So my plucking - i literally just pluck on my knee, so i get a cloth and i place it on my knee that way. I can just see exactly like what i'm doing and what i'll do is i'll go in like a one, two three motion, so i've got one. Two three move: one two, three move, one, two three move, and i just i just try and make demarcations in the line like i don't wan na, have that harsh line and, as you can see like my demarcations, are really thin in the hairline. So i don't go like i don't make too big of gaps. I just keep them like very small, very neat, and i try and avoid the middle as much i'd still plug the middle out slightly. But i don't pluck it as much and this hairline was kind of thick. So it was like it had a good gradient, but at the same time it was still thick like this wig was very very thick, so i went to work on it. I literally went back probably three times i'd say once i'm like plucked back into my closure about three times i'll, then push the hair back to its normal positioning and then check and see if, like i've done everything perfectly or where needs plucking slightly more so now I can see the kind of gradient that i've made i'll go back in but i'll take. I will make thinner parting spaces, so i will take out a little bit of hair and then i'll just do sporadic looking just so. I can see. Okay, there's not harsh anymore, so, as you can see, the sections i'm plucking out are way way way thinner. So that is my closure plucks and i just wanted to pluck out like a little widow's peak just so it could match my hairline a little bit more. I don't have a widow's peak, but the middle of my forehead does extend back, so it fits my hairline a lot better. When i do that and there we have the plucking. I just put it in a middle part, so you guys can see the vibe. I was very happy with this very, very happy so onto the install. What you want to do is, first of all, cut those little side tabs off, so you can see how it's going to sit and always always cut in a zigzag motion like zigzag motion uncluckable, like your lace, is going to be uncloggable zigzag motion with some good Lace, it's a vibe and, as you can see, i haven't even glued this down or nothing and look how well that is melted into my head and the wig wasn't tight either. So that was a bonus so because i'm just i'm just always scared like something's gon na fly up. I don't know i'm not the best. When it comes to glueless. I always have to add a little something. So i just added a little bit of bed head spray to the sides and nothing to the center. Just because i want to give that glueless feel in the center. So you guys can see how it will still look um, but i did add it to the sides just to secure it down. So i don't think i'm gon na add any baby hair to this unit, but i'm definitely gon na kill it yeah. That'S what we're going for we're going to be generator hey? What is we doing here? I'M going to be jira. Don'T embarrass me because i want the top to be super super flat, i'm gon na add some mousse and blow it out the only like body. I want is to be here at the front. I'Ve never worked with this company, but so far so good. I really like the lace and i really like how thick the unit is and how it's constructed also good, because it's fitting my head to a tee. Normally when i get closure wigs, they never like fit me. So i prefer to make my own, but this wig is very, very comfortable me, my so i hope you guys enjoyed this video, don't forget to like comment and subscribe, and i will see you in my next video with our next look: bye,


Comments
Alex Alex: Love this on you!
Ashley: Omg did you update your makeup routine? We need the tutorial girl!!
Sammie: Beautiful ❤️. Sis we need a makeup routine please
junoda wig: Thankyou for review love super super pretty!!