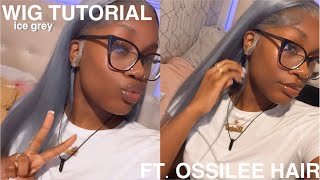
In-Depth Plucking Tutorial On Closure Wig | Ft. Miss Flower Hair Amazon
- Posted on 17 December, 2021
- Closure Wig
- By Anonymous
Welcome to my channel❤️ Don’t forget to like, comment, and subscribe.
Link to wig: https://www.amazon.com/gp/aw/d/B091942...
Products Used:
•Ebin 24 HR Sleek Extreme Firm Hold Wax Stick (mango scent)
•B&B Charcoal Foam Moisturizer Wrap Lotion
Check out my other socials:
INSTAGRAM: Kiannamoracia
Snapchat: Kiannamorae
Tiktok: Factualbrat
Email: [email protected] (Email for business inquiries)
Intro Song: Live your life by Uptown
https://soundcloud.app.goo.gl/WsawFGz8...
Music in Video by SouthStreet24- Media
FAQ:
Age? 17
Ethnicity: Jamaican
Fav Color: Dark green
Keywords
#amazonwig #closurewig #wiginstall #humanhairwig #humanhair #curlywig #closurewig #wigtutorial #closure Wig install, curly wig install, human hair wig, amazon wig, affordable wig, ali lumina, ali lumina hair, closure wig, wig tutorial, easy install, 4x4 closure, closure install
Hey everybody. Thank you for tuning in to my video. Today we are going to do a plucking tutorial um on this amazon wig from miss flower hair. As you can see right now, i'm just taking the hair out of the bag. You know getting it ready to start plucking. This plucking tutorial is going to be on a closure wig, because i feel, like that's a little bit easier to start out with um in one of my future videos. I will make a plucking tutorial on a frontal, so stay tuned for that i completely forgot to mention guys, i'm so sorry, thank you guys so much for 100 subscribers already um. I really do appreciate it. Thank you. So much don't forget to like comment subscribe on this one and yeah. Let'S go back to the video all right, so first, i like to start out with a little bit of mousse to kind of help me like. Pluck the wig better um, i don't really recommend dry plucking. The reason why is because sometimes i can't see how the hair would look if it was laid down when it is dry and then, when i put product on it later, it looks completely different. I plucked too much. That'S something. That'S happened to me in the past. So i like to take either a little bit of mousse or just a little bit of water and brush it out to start plucking the way, so i can see how it would look when i finally install it so first things. First, i like to put my part into the closure as soon as i'm about to start plugging like right away. So that way i know stay away from that area because you don't want it to look too bald. So i go on with a sharp comb and i just put my part into it. Then i take a thin section from one half of the closure. It'S easy to pluck on closure. Wigs and i brush that back from the hair and basically i just start plucking back and going in gradual lines, i'm not really staying in the same place, i'm just plucking about three or four times and then moving up and down the hairline. And i keep doing this step over and over one thing to be mindful of is to just stay within the section that you parted, like imagine, there's a line going back and you're just gon na stay in that area. Also, you saw that hair ball that i pulled out. I like to show y'all what i plucked, because it might not look like much on camera, but there is a good amount of hair coming out from my tweezers, so i'm just going to continue going up and down. I keep parting in tiny little sections going horizontally and then i go back vertically with my tweezers and i keep plucking in gradual lines, not staying in the same place, of course just thinning out the hairline a little bit. Oh one thing that i do like to do when i'm plucking is just combing out all the dead hair, because you might not see how much hair you pluck until you actually go back into it and comb all the dead hairs out. So you can see it so now, i'm just about to start this process over um, i'm combing it back just to see how much hair i plucked. You can't really see it when it's dry, but i promise you when i put the mousse back on it. You'Re gon na realize how much i plucked out of the hairline and right now, i'm just about to start my process over going in again with the comb and just making tiny little sections. Don'T make them too big, because you're going to be plugging for a while. I'M making a very thin section, same exact spot and just thinning out the hair. Some more now have y'all ever wondered how a lot of hairstylists and like big hair influencers, get their hairline to look like it's gradually going back. Let me show y'all what i do is i like to skip sections i like to go in about with like seven plucks in one single section. I know they tell you to stay away from it, but trust me when you comb it back. It'S gon na look. So good, so i go in and i go about seven times in one tiny little section skip over the next one go in about seven times that one tiny little section skip over the next one, and i keep doing this the more that i part the hair Back what this does is that gives you that kind of fading hairline look, that's not so thick at the front and has those gaps that a natural hairline does so right. Now, i'm just about to go back in with my mousse just to see how it would look if it was laid down and as i comb it back, you can see those skipped sections. You already know what i'm talking about. This is exactly what i mean so we're about to go in and just try to do the same thing to the other side as well. Now, here is something that i do like to do again. Um. I do the skip section technique at the front as well, because a lot of times the front will give you the exact same thickness as the back. So i go in about seven times. One same spot keep combing out the hair. You don't want it to look too full and i just keep skipping over, and that gives me the um effect that i want comb. It back still stay in the front, but one two, three, four, five, six seven, you know keep doing it right now. I'M kind of plucking very aggressively i do apologize, but i'm doing the same exact thing, just thinning out random sections and i keep going up and down up and down in the same spot, because i want it to look like a gradually going back. Hairline as if i could just put it up in a ponytail or something right now, i'm brushing the hair back, adding any little extra detail, as you can see, you're starting to see that, like skipped hairline that i'm talking about um, i'm parting, another thin section away Because it's just not how i want it um plucking is: you have to have patience to do it, so i'm going right back doing the same technique as you can see thinning out the front of the hairline, because you do not want the exact edge of the Hairline to be the same thickness as everything else, that's like defeating the whole purpose of plugging, so i just keep going and removing any excess hair that i want keep brushing through, because you want to make sure you know how it looks now, i'm putting my part In as i told y'all and we're about to get to the other side, i am satisfied with this side. I know it might not look like a lot when it's dry, you can still kind of see the skipped hairline, but when i put the mousse back on it, you'll know so starting out the same way on the other side, putting the mousse on and then we're About to section it off and get to plug-in the technique that i'm doing on this side, since i already showed y'all the other one is a not so beginner technique, i'm doing the skipped hairline technique right away, just because i kind of have an eye for it. Now and i'm pretty used to it, i wouldn't recommend doing this right away. I'D recommend like taking practice with it doing it in different sections. So that way you don't over plug. So right now i'm combing through the hair going right back, because this technique is a lot faster at removing the hair, but you have to be careful because you could create a bald spot right now. I'M on my fourth section. I believe this is usually where i stop um on frontals. I do go to the fifth, because the frontals you have to pluck a little bit more, but for closures. I don't think you do as much unless you want to give it like a real flirt. Frontal effect so right now, i'm just going in again doing the same technique. I showed y'all about and thinning out the hairline gradually. So after i'm done, i like to brush it out, you know: do a little bit of comparison of both sides make sure that they're even and that i didn't over plug too close to the middle, and now i'm just going in again random sections. Uh, like i said, i have an eye for this, so i'm gon na just keep going in, but as a beginner, i'd recommend sectioning them off again and seeing what you really need to take out of the hair. So i'm going to keep plucking until i feel like both of the sides are even now to finally set everything off i'm going to do my skip technique at the front, just to give it that same hairline. Look that the other one has i already thinned out. The back of this side, so we're all good there, but i'm gon na do the skip technique at the front again and just take out some more hair. So that's what the hair looks like when it's dry and i'm done plucking now it might not look like a lot, but now i'm about to go in with my eben wax. Stick. I love this stick, like i told y'all in my last video. It'S all. I use at the front of my hairline now i'm about to go, get a brush, i'm using my edge brush and i'm about to just brush the hair back now you can see the hairline that i wanted and that i was talking about. So this is what it's looking like, currently um and i'm just putting in a part with my rat tail comb, because i'm going to do a middle part on this wig. The install will be in my next video, so stay tuned for that and, as you can see, i gave it a nice hairline didn't over plug, and this is exactly what i wanted now. I'M doing what i like to call prepping the wig. I like doing this for all my wigs right before i install them. I just go over. My wax. Stick make my part um brush the hair back into place. So that way, as soon as i get ready to install it, it's a lot easier for me. So i'm just prepping the wig making sure my part is in place, making sure that it's straight and all that, so i don't have to go through that process. When i'm recording now i'm taking a little bit more time to brush the hairs back, so you guys can really see the effort that i put into this hairline and yeah. I'M about to show you how the finished product um! This is what it looks like now. You can see the skipped hairline i was talking about and yeah. I hope you guys enjoyed this video stay tuned for part two, where i actually do install this wig. I don't know why i felt it dropped like that. I'M sorry, but yeah have a good one. Love you guys don't forget to like comment and subscribe. Bye.


Comments
cui: Thanks for the sharing these details!❤️❤️❤️
Kemesha Johnson: ❤️❤️❤️
Latoya Mckoy:
Alyvia Skye:
Sydone Hall-Campbell: Greatttttt job
Latoya Mckoy: Go get it Mhz. KiKi. Loving this one.
Ailyjay Jones: Nice one cuz❤