Frontal Wig Install | Very Detailed - Bald Cap Method | Bleaching The Knots, Plucking + Customizing!
- Posted on 09 February, 2022
- Closure Wig
- By Anonymous
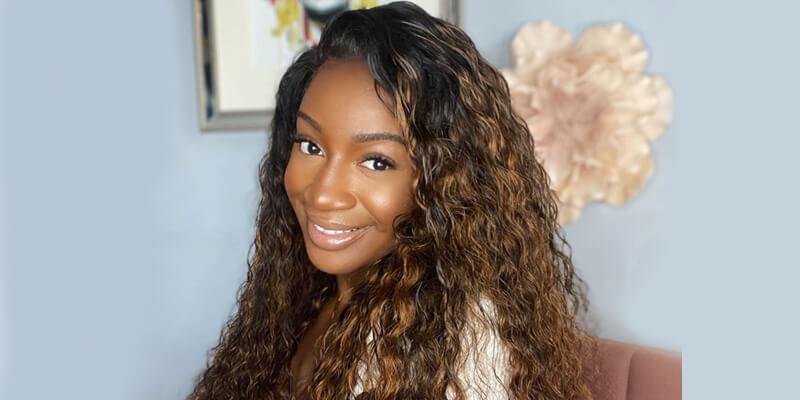
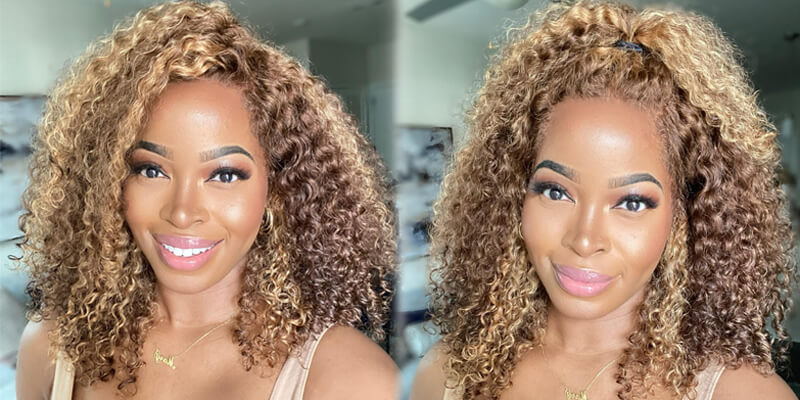
Hey y’all! Here’s a fun frontal wig install tutorial for ya! Using a 24 inch KINKY CURLY frontal unit from my wig company Mended Beauty Wigs. I enjoyed filming this and doing the install as always. I hope this helps any beginners looking to install their own wig, or if you’re an upcoming stylist who wants to master their craft! If you have specific questions about products used or anything else feel free to ask!
Don’t forget to like, comment, and subscribe! See you soon & lots of Smooches!
_________________________
LET’S CONNECT!
Instagram: @beyoutifulkayla
https://instagram.com/Beyoutifulkayla
TikTok: https://vm.tiktok.com/TTPdkvPyVu/
Twitter: @mendedbeautyceo
Snapchat: @ksmooth93
Support my Businesses:
Website: https://www.mendedbeautywigs.com/
Instagram: https://instagram.com/Mendedbeautywigs...
Email: [email protected]
@thehustlerlab
https://instagram.com/thehustlerlab
Book a hair/lash/brow/content creation/ business consultation appointment with me: https://beyoutibykayla.as.me/schedule....
______________________________
ABOUT ME:
Name: Kayla
Age: 28
City in live in: Atlanta, GA
City I was raised in: Cape Girardeau, MO
Profession: Administrative Assistant - Matson Logistics, Hair Stylist, Wig Maker, Serial Entrepreneur!
Email: [email protected]
#wiginstall #wigtutorial #kinkycurlywig #beauty #fashion #atlhair #baldcapmethod #bleaching #plucking
Okay, ladies, so as you can see we're back with another video, i am doing a 24 inch uh wig install this is my kinky curly hair from the beauty wigs. So right now, what we're going to do is we are going to bleach the knots and you know get it plucked all that good stuff ready for the install. I usually have the ladies drop, their um frontal units closure units, whatever off to me at least one to two days in advance, just to give me time to prep and prepare. So i just take the got2b and i spray a little bit along the hairline, and then i comb through with the regular comb and then with the hot comb. That way, we can get all the hairs out of the way, because we do not want any of the hair to be bleached only the knots only the knots okay. So then, of course, i mix my developer and my bleach. I use the quick blue and i usually use the 40 volume developer from clairol. I didn't want to show you all that other developer, because it's not what i normally use, but you want to make sure that you have a fixed substance, make sure it's not running or you will over process the lace and you will bleach the hair and there We have it so we're just gon na let this sit. I usually let it sit about 30 to 40 minutes honestly for frontals, just to make sure that it's good to go and then i rinse it out make sure you rinse it out thoroughly very thoroughly. Okay, all right so up. Next, we are going to shampoo the hair with shimmer lights, for you beginners for your pros. I'M sure that you already know exactly what this product is. So this is to take the brassiness out of the hair to really give you that natural scalp effect. So i usually always put the shampoo over the top of the frontal through the hair. I don't put apply it directly to the lace for the simple fact that sometimes it does stain the lace, i'm not sure for other people, but it does for me and y'all have to excuse me because it's raining - and this is real ghetto, but just bear with Me so there are the results, and i let that sit on there for a little while um, probably about ten five. Ten minutes not too long, don't leave it on there like it's the bleach and then i take the bella curls and i go in and i condition the hair very well. I let that sit on there. Sometimes, if i have the time i will put the hair into a plastic bag and i'll you know, do a deep conditioner overnight, and that really gives the hair a soft feel and it leaves it soft for a long time all right. So i have the hair sitting in leave-in conditioner hanging on the mannequin just drying, and i go ahead and do her braid down. I always just do a braid down to the back. You usually need about six to twelve braids and that'll, get the job done and, as you can see, oh look at her look at her. Yes, ma'am, it's the quality for me. So, as the great arrogant tay once said, you want to go ahead and lay the hairline down with your glue, i'm just using some ghost bond. I purchased some glue from a misleadio bay and i could not figure out what i did with it, because i was in the process of moving. But you want to go directly along the hairline, not on the hairline right in front of the hairline, because this is what's going to create your. I guess fake hairline um, for whenever you lay your frontal. So you want to go along and smooth that out. Make sure that you're not letting the glue dry all the way, because it's gon na be way too thick and chunky and tacky, and it's not gon na, be cute. Okay, so just make sure you take your time and go through there. I always kind of rub through with a uh with a pair of tweezers and get it all the way how it needs to be, and then you let that dry, as you can see in the back, it's drying on her head and then i sew the back Down just kind of, however, it don't really matter long as this stand down. That'S all that matters for real and now it's time to get into the nitty-gritty, the very tedious work of the whole of of the whole job. Um i've seen some people that just use the um. You know the razor uh, but i prefer to use the scissors because you can get right along the crevices of that cap and get it cut all the way down like you need to. So the key is to pull the cap back, don't pull it down forward and be trying to cut pull it back and um. Sometimes you might find that you put a little too much glue or that you glued a little bit too far down, and it's very easy to fix that whenever you pull the cap back, because you can pull it back to exactly where you need it to be. And so you want to cut right along the front right in front of where the glue stops it. So don't pull the cap all the way back up and then start cutting, because we need that see that little inch, maybe like a half inch whatever. That is. I would say of cap, that's glued down and that's melted already. That'S what we need, so you don't want to cut behind it and you don't want to leave too much hanging on that's not glued down because it's going to be a mess period. So just cut that all the way around make sure you cut the ears off, don't leave her ears there, because she gon na be real, uncomfortable and be looking real, crazy. Okay and like i said, if you need to just pull it up a little bit more cut, some more just make sure that there's enough cap laying there for the lace to cover, and then after that, i make sure i go in and secure the front of That cap make sure it's as melted as possible melt it as much as you can. Okay, i mean it's gon na melt regardless, but make sure it's nice and pretty you don't want it sticking up. You don't want no little fuzzies, no rollies. None of that so um i just go back in with a little bit of got to be, and i don't spray spray it directly onto the cap. I spray a little bit on my finger. You know rub it in there real good and smash it with the end of that rat tail comb, and that usually does the trick for sure see that smash it with that red tail don't be scared, they ain't tend to hit it. They want this lace laid smash it in there and then i go through with a um. I don't use alcohol. I usually use baby wipes, i'm big on baby wipes, like i love baby wipes. So that's what i use to clear that up. If it's any excess got to be there and then of course, we're going to take some concealer, i use just what i have that i use for my face, because i didn't have anything for her, but it still worked out you just kind of got to mix Them and play around with it, because this is what's really going to give the ball cap the ball cap. So if it's not a bald cap, i mean what are you doing so, as you can see, use that soft brush and just gently go in there before? I was using the wrong brush and it was caking up so bad and it was just not it wasn't giving okay so use a real soft brush and dab it on your hand and go from here to here all the way across there and make sure you, Your cap is bald if your cap don't look ball. If she don't look, bald headed you ain't, do it right, go back and start all the way over start from the tippity top? Okay? Finally, on to the fun stuff, get the lady wig down, you couldn't came! No faster, so you want to cut the ears place. The wig on her head make sure that it is fitting and that it is placed where she wants it to be placed. I always tell them put it where you want it, because i mean obviously, if they gon na, put it way back on the back of the head, no ma'am, if they're gon na put it away on their eyebrows, no man, but i let them place it where They want it because everybody you know is different: they got their own preferences and it's all about pleasing the clients, not nothing else so anyway. I make sure that i go through. You know part that section out where the ears are and go through there and you cut all the way around the ears get rid of all that excess lace, um and even the hair that comes off of there. It'S okay. As long as you ain't um, you know install no baby thing, wig you're gon na be fine. You can lose a little bit of hair because when i pluck these wigs, so much hair comes out and they be they still be so full. So don't worry about that at all, so once i get the ears cut, i just go back through and hit the hairline with the hot comb to further melt it to give it that scalp effect hit it on all sides. Keep going keep going hit. It don't burn her, don't to burn her, don't burn her and then, after that, we're gon na go through, and i actually had to cut off some more of the front of the hairline to make sure that it matches up with her own hairline. I find that doing the triangle cut, helps to just give it a more seamless effect, and i learned that from almost leia bae as well, watching her tutorial and it definitely works and gets the job done. Okay, so just cook triangle triangle triangle: make sure that it matches their hairline, it's okay, to cut off all that extra lace, because we do not need that. Okay, otherwise she's gon na have a boxy hairline and that's not natural. That'S not what we're going for so yeah and just keep cutting keep cutting. Could cook triangle triangle triangle triangle just like that, just like that, usually you work that baby. I'M gon na make you i'm spinning rex, just like that um. So once we got the lace cut all cute all triangled out we're going to go ahead and add the same makeup that you applied to the cap with the same soft brush to the frontal and make sure that it all matches up. Because we need to make sure it all matches up otherwise, once again, what are we doing now you see how that's already blended into her skin and we ain't even glued it down and melted it. Yet that's what you want! That'S what you're going for hit it with the hot comb again keep hitting that hot comb on the edges, okay and then, of course, for the grand finale. It is time to lay the lace down. So you want to go ahead and kind of draw you out of line to make sure that it's where you need it to be and you're going to want it a little bit above where that cap is, and on top of it as well, for whatever reason That one little spot on her head, the cap just never wants to lay down it, never fails every time i do her hair, that's how it always is, but anyway, y'all know what to do: glue, glue, glue and glue and glue and glue and glue and glue, And glue them up and you want to do it in sections. I would not recommend going all the way across because the glue is not going to dry evenly and it just becomes a mess. I used to do that and it was a mess. I can tell the difference now with just doing layer by layer section by section, and it definitely gets the job done. Okay. So what i'm gon na give y'all now is what you call the real tea pick this up from i'm a slayer bae as well um. So the key is to get it really. Melted is to use them tweezers. Okay, so just grab the ends of the lace with those tweezers. That'S why it's good to cut it into triangles, because you can grip it a little bit better and it's um. It'S less likely for you to tear the lace. So that's what i do and then i go in and press down and that's what's really going to melt the lace into the skin. As you can see here, we ain't even done and baby. It'S melting, okay, with very little lace left over. Don'T nobody want all the extra lace in the front, looking like somebody's granny or something who don't know what she's doing y'all see that baby. Please tell me you see that, and this is transparent lace, but it's given very much hd, so yeah keep pressing, keep pressing, keep pressing, take your time and keep pressing. Oh y'all see that little slow-mo look at that. It'S giving it's giving and the better um the better that you pluck the hell out of that frontal. You know, as you can see the better it's gon na look. Look at that. Let'S go baby, that's gold! That is gold, i'm living for it. So we on the left side, i'm going to do the same thing again. Sorry, i'm kind of in the way didn't really realize that i'm a little new to this, but i'm still true to this. Okay, all right girl. So at this point your client should be feeling good. You should be feeling good, because you know that lace laid down you don't throw that milk band on there. It'S melting to the gods up underneath there. So now it's time to go ahead and prep. However, it is that she wants her hair styled, so she want a middle part. She want a side part whatever get we're going to get it done. Put that milk band off and oh look at that, hairline and sorry about the quality. I was recording on two different phones and clearly the phone that died and the one that was working quality is totally different uh. So it might look a little fuzzy, but i mean y'all get the picture, give her, that bust down middle part go back through and get rid of them, excess bleach knots or where you put too much concealer now, i'm gon na just let y'all know right now. The most efficient way to make sure that your base is flat is gon na, be that milk stick slick, stick mindy beauty slick stick is what i prefer to use from mindy beauty wigs, my brand, so you want to go in there section by section with the Hot comb, in with the slick, stick and lay it down bust it down. Then it's time for the baby hairs and then oh yeah are we there honey, we're there she's ready, she's laid and slayed. So i just go through with my spray bottle. That'S got a little bit of leave-in, conditioner and water in there make sure it's all the way together, pull that milk band off make sure you do it real slow. Just like that, it's just like that. Please stop playing with your girl. Please stop playing with your girl. I'M gon na do a separate tutorial for uh the baby hairs because there's some exclusive, but that's it. That'S all see ya.


Comments
xTiffanyx: ❤❤ Now I got something I can reference
Angelia IMeantToLoveYou Harris: Not somebody granny Go Kayla!!! Go Kayla!!! I See You
Jesse Hargrove: love ❤♥