Best Amazon Wig !? Frontal Wig Install | Baines Tv
- Posted on 01 June, 2022
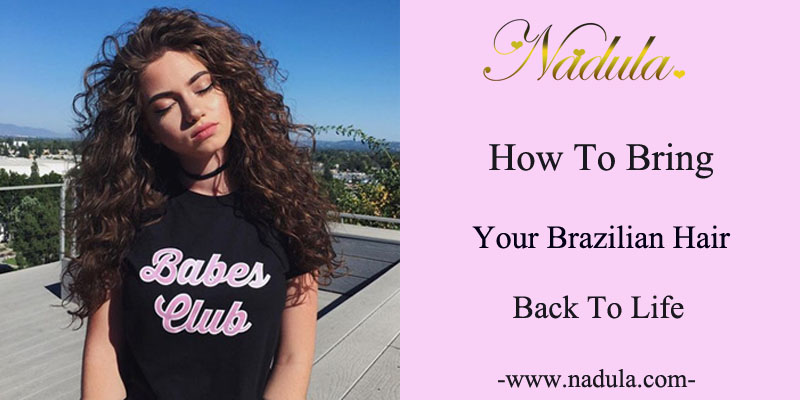
- Closure Wig
- By Anonymous
HEY BAINES SQUAD❤️ ENJOY MY FIRST YTWIG INSTALL
WIG: Creathair Lace Front Wigs Human Hair 13x6 Straight Lace Front Human Hair Wigs Pre Plucked Straight Frontal Wigs 180% Density Brazilian Virgin HD Lace Front Wigs Human Hair for Black Women (22inch, 13x6wig) https://www.amazon.com/dp/B09TJZ2ZST/r...
HOT COMB: Homfu Electric Hot Comb Hair Straightener Heat Pressing Comb Ceramic Curling Flat Iron Curler Designed Hair Straightener Brush for Natural Black ,Anti-Scald Beard Straightening Electric Press Comb https://www.amazon.com/dp/B089B3WJFV/r...
TUNE INTO ME DAILY ⤵️
IG : https://instagram.com/a.bainesss?utm_m...
TIK TOK : https://vm.tiktok.com/ZM8xm2RLB/
HAIR PAGE : https://instagram.com/vanity_behavior?...
Business Email : [email protected]
Camera : EOS M50 Mirrorless
Hey guys, it's your girl, abe beanz and i'm back with another video welcome back to my channel. I know y'all, probably like girl, where you been and two you look crazy. So now yeah i'll be working trying to live life. You know all that stuff, but um yeah, i'm back and today we're going to do always still, because why not? This is going to be my first voiceover, so yeah, i'm not going to be talking too much. It'S more like a. I want to say tutorial, but just follow along. So before we get started, i'm going to tell you guys about the wig um. It is a 13 by 6 six frontal one, because apparently you know they're just sending the one inch on the sides. I don't know what that's about, but whatever um and it's a 20 inch. I dyed it jet black and i don't know what sound i'm gon na do, but that's why i'm gon na take it along with me, because i know it's gon na be fine anyways. So don't even trip don't trip, but um. I did get this wig from aliexpress nah the express i did get this wig from amazon. It came in like two days or the next day. I don't know when you guys are gon na see this video, but just know i had a lot of stuff to do this weekend and my hair is not done if this is not giving cute and i'm not popping out like this. So i'm like you know, let me just get away and i really didn't want to like get inches inches as of yet so i'm like, let me just get something cute sure. Oh no. 22, inches 22 inches. I'M gon na put all the information in the description box, but as of now, i bleached the knots and watered out of jet black yesterday. If you know me, you know i barely wear braids under my wigs or if i do is two braids, but honestly i'll. Probably have this vegan for like a week so yeah, but i'm gon na be bumping smoking a little hookah pan, you know doing me yeah it's gon na be following along. So so right now i'm doing two braids just to like doodle braids, nothing, crazy or we've been at the end, i'm just really lazy, but we're finished yo all right now, i'm just gon na put my ball cap on. I didn't have like bobby pins to like, pin the braids up or nothing so after that, i'm just taking some even edge controls the edges back. This is what i usually do like if, even if i had like cornrows or whatever i just always use some type of gel as control to like gel my edges back make sure they're like nice and flat underneath the cap brush brush brush brush brush. Then i proceed to you know: gluing my ball. Cap down. I put the glue right in front of my hairline. Nothing too crazy. This method i like to do when my braids are not like tight. I just need the trim of the cap and it like holds down my braids if that makes sense like under my wig, because i don't have like skinny skinny meeks, but yeah makeup, ruby kisses. This part is time lapse. So that's why it looks a little funny, but yeah i get it y'all get it. It'S the same thing that everybody does right now, i'm just putting the same exact color, underneath the lace of the wig just make sure it's like your exact skin tone. You don't want it too light too dark. If you got parts then you could put concealer in your part. That could be a little lighter, but as for your hairline same color, i'm not sure if everybody does this step but make sure y'all put that same makeup. On the hairline itself that gives the scalp look and helps it blend way better. Then i'm just taking my even hairspray just to dry everything back out makeup is oil-based, so we don't want anything to mess up the glue process. Then i spray a little bit on a hairline, so i could hot comb all the hair back. You don't have to do this, but i just like everything out the way and neat after that. You just blow dry blow. Dryer bows are blow dry and then put that on. So here we are now i put the bands up in the back, so you know if it's real cute, real tight snug, then i'm seeing how much of the lace i want to cut off by the ear tabs. I always have to do this because my head is pretty small but yeah. Do it to one side, do it together? I did go ahead and use a round core to clean my hairline off camera. Then i'm using both hold active that first layer i go in pretty thin and i feel like the first layer just helps melt the cap into your skin. I don't consider this like a wig layer, you just to make sure everything's, nice and melted and then i'll go back in. I think i did. A total of three layers is layer. Number three: now i'm gon na be going hard. Nah music is really my element. Like music in let's here all right place, time is over right. Now, i'm using my edge brush to press it in i'm using a comb and the brush side. I don't know i feel like this stuff low key hopes, then i'm using my hot comb, i feel like the heat, helps it melt better. I don't know, but just don't burn yourself, because i haven't seen you all the time and now i'm gon na tie a lot to being right at the hairline tight, but not too too tight, and then i'm just going to blow dry it on low. For a little bit moving forward, i'm cutting the lace off with a razor. Sometimes i use the razor. Sometimes i use the little scissors i was using before right. So i know it looks like a little white cast around my hairline. Don'T trip? Don'T trip still go back in with the excess makeup you know, but once you do the whole baby, he is meltdown again everything gon na be stitchy. Don'T don't trip, don't trip i'm going back in with this evening, hairspray i'm not gon na lie. This is my first time using this, like with my install, and i actually liked it. It was pretty good while that's melting, i'm just you, know, prepping it here for styling, i like to blow dry, no matter what type of hair it is. Well, if it's deep wave, you know you're not gon na blow dry it, but straight or body wave or even loose weave, i'm blowing that baby out all right. I don't know what i want to do. My hair, like i usually just put it on and then decide after, but all right, so we have this my summer card, curls or like wavy or i lowkey wanted to do a half of half down with the two strings. I don't know or like i don't pack down just two little edges on the side or bus downside part, so i don't know so. Finally, i decided to do the half of half down with just the two swoops on the side and it probably looks like i'm doing a lot right now, which i am like once i get in the zone. I just start tweaking like i have to turn the music off and focus because it's game time now and i feel like i was recording five leagues like an hour already, so i was getting a little tired, but basically i used my wax. Stick: hot combed! It you know, put it on my baby hairs. Now, i'm just plucking like around the baby hairs around the part anywhere. That lace is showing, so it could look like more scalp effect, if that makes sense like trying to thin out the hairline a bit. You know this step goes a long way. I feel like most styles, let me just say this, but i feel like if y'all really just took your time and really just tried to thin out, it would look way better, sometimes it'd be too thick at the hairline. Like you know - and this is not even like on some hairstyle and stuff - this is just you know just going that extra step. Why not - and this is what i'm talking about - i have to hit the zoom for y'all. Some people will say: oh girl, yes, fleek. It'S given, but for me it's not like it needed to be way more realistic, so go that extra step and don't be scared to plug, like i know, i'm gon na reuse, this rental, of course, i'm gon na do a middle part. Probably a side part. You know, but all of this plugging is gon na help in the long run after that, i'm taking some sebastian shaper just to start molding. This ponytail after that, i'm just thinning out my baby ears see go to extra steps just a little bit. You know nothing's too crazy and listen, i'm not a pro like me. Seeing all of this. I hope you don't think like. Oh no, this is just what works for me. You know this step right here. If you don't take notes from my video how calm the baby is like cut them a little long and hot comb them, because this makes them stay down like stay down all right, so i can't really tell you how i do my baby years, but i just I'Ll just show y'all what i do if that makes sense, so i use the bastion shaper or like any hairspray, even even i just shape the baby hair with the hairspray like try to get it to lay down or whatever i go back in. I cut it. If it's too long, just to like mimic how i really want it to be like the hairspray allows it to move better like gel, you can't really move around with that too much. I like the hairspray. It gives it that fluffy not crunchy glue down. Look. You know and then once i like how it looks, i take the mousse and i just you know, make it look a little more uniform. If that makes sense, especially like the i guess, you could say the ends of the baby here, but yeah so hairspray first shape it and then move just in case y'all were confused. I'M gon na. Do it another way. Spray, your toothbrush with the hairspray then apply the mousse and then shape. If that's simpler to get. I tried both methods so yeah, i could see you know and then once the products would you have the most in the hairspray. It really doesn't matter like which step you do first, because, as you can see, i just did both just to you know. I kind of just do the first one differently just to shape okay, how i really wanted both sides to look if that makes sense. Just to mimic the other, but it's just the technique once you learn either or it's really the same. It'S the products that help honestly so right now, i'm just pressing off the hair. I don't want it to get bone straight. I just want it to look just not like poofy and messy, but i'll go in and get it going straight another day at this point it was like three in the morning - and i was just so tired, but i just wanted y'all to see. Like you know, a good overall look as an end result, so i'm just taking big sections. Trust me. I know i know okay, now, let's get into this pony so right now, i'm adding another scrunchie. This step just makes the ponytail sit higher. I told you that that's, but i'm just gon na take a little bit of a bundle that i had left over. I'M just going to add a piece of thread so just the beginning, and literally like the end. If that makes sense, so i'm just going to sew it to the scrunchie twice, make a knot, wrap it around and then sew the end. That'S it now. The last piece is what makes it break your ponytail, so i'm just flat ironing it a little bit just get a smooth hairspray and then i'm using girl, that's not gel! You can use any gel got to be whatever just something sticky. So you know it's nice and smooth comb. Comb comb make sure it's nice and flat. I keep saying nice okay, but just keep combing to make sure it's flat to end off the wrap around. Some people usually use hair glue, but i didn't have so just making do what it do. I'M using a little bit of the gorilla snot, i'm using the hairspray, you know going back and forth making sure it's just like tacky. If you wrap it tight enough, you really don't need no hair glue or nothing. So it's because i don't have like a lot of hair in this ponytail. If it was like thicker than yeah, you would need the glue. I honestly didn't add a lot of hair to this pony because i feel, like more hair would have just made it look like a actual ponytail ponytail, as opposed to like a half a pack down. So i feel like the hair added was like just enough literally and because it's shorter here, if it was longer hair, i probably would have made it thicker but, as i said before, we working with 22 inches of hair still looking cute, though still giving that look. It'S supposed to give if you're staying to the end of this video. Thank you. Thank you. Thank you make sure you guys follow me on instagram adobe, follow me on tick, tock, badass beans, and let me know if you want to see more hair, tutorials or, like you know, if y'all want to see the whole process. I like me, bleaching and stuff like that, but i feel like it's a thousand of that on youtube, but um yeah. I like how this came out playful cute flirty. Thank you guys for watching stay tuned for my next video


Comments
Briana Carter: Fav hairstylist