Easy Install! The Savage 13*4 Hd Curly Frontal Install For Beginners | Westkisshair
- Posted on 05 June, 2022
- Closure Wig
- By Anonymous
♡––––– #Savagebarbb –––––♡
Hey Muvva,
I hope I could help you out a little.
Wig installs take time to perfect;)
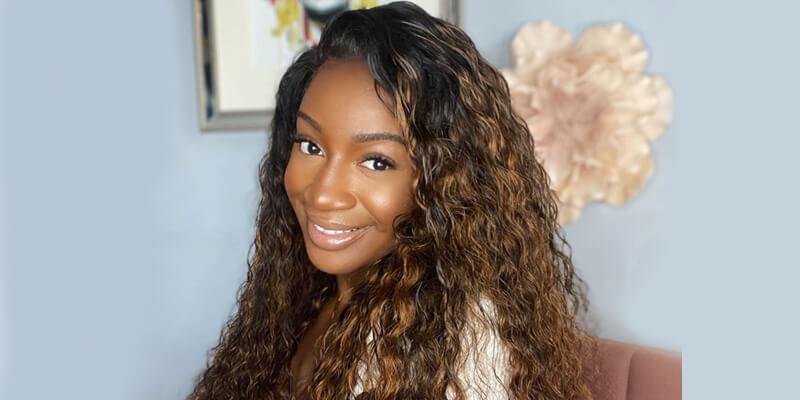
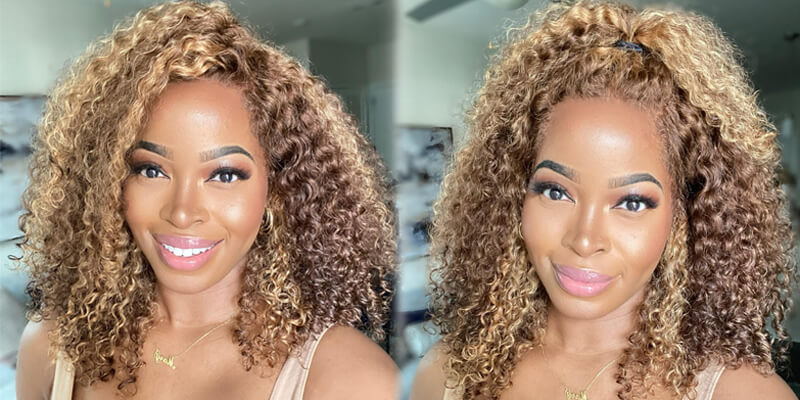
Honestly, I love this wig, and I am not saying that lightly. The wig is soft, the lace is thin, the knots are small, little to no knotting, and overall good. I am impressed. Y'all know ill to be the first to call a brand out but west kiss you ate chii.
Hair details: 180% density 13*4 curly wave lace frontal wig 20inch
Video Hair Direct Link➤https://bit.ly/39AyTt1
For more Videos, like and comment and obvi let us be friends.
But on a real note, let's be friends;D
Instagram: https://www.instagram.com/biigmuvvaa/
TikTok: https://www.tiktok.com/@savagebarbb?s
Snapchat: BIIGMUVVAA
Pinterest: https://pin.it/7tgcPzi
For business, inquiries, email me: [email protected]
Hey guys, it is savage barb, aka, big mother and today we're going to install this wig y'all been asking texting, yelling calling snapchatting threatening me to do an install on youtube, a detailed one that that y'all was very yeah. I was emphasizing the detail. I keep saying detailed, detailed detail, so i'm doing that for you today, okay, um west kiss sponsored this video. They blessed me with this beautiful curly, wig, beautiful brazilian mommy wig. I look like a cute chocolate. Funnel kit filled with chocolate, sauce filled with chocolate, sauce. Okay, stop playing like i look. Look at me. This wig install came out so good um, it's gon na be a voice over though so just get ready. Um everything is gon na be listed in the description down below make sure to comment. Make sure to like make sure to subscribe, but make sure to follow me on all my social media platforms. Everything is going to be linked down below, okay and obviously, for more week, install videos. You should definitely follow me on my social medias. So let's get straight into and hold on, let me do all of them. Let me do one last spin. Let me deal with kiss, but kiss me nah west kiss this bonnet is just a sex. It'S just giving me! I just look so rich, like i just look so like, what's good like all right, all right, all right, all right, all right, all right, all right, all right, let's get into the video right! The first thing we're going to do is see if the wig even fits your head and matches your hairline. If you guys want a wig cap tutorial. Just tell me if y'all want a plucking video just tell me um. This is definitely focused on the install. Only obviously, i feel like a bad guy period. Okay, so don't be doing too much yeah girl. You need to focus because you need to tell them how to do it all right. Let me tell y'all everything that y'all need. We will start off with foundation. Definitely a good wig glue, always use heat protector to prep the wig. Obviously you need lots of brushes. This install a hair, dryer and a hot comb. These are hair tints in case you over bleach, the wig. You will need a good mousse, especially for this install and hair sprays. I use got to be and bed head, and these are very essential. Last but not least headbands here, i'm just checking the wig. If i like it, and then i push the lace back like that, i also took some hair out because my hairline is pretty low. What i do first is always clean your surface. I use a rubbing alcohol to clean the surface, just like that, make sure to not overdo it, because you should not really be having alcohol on your face anyway. So basically, what i'm saying is work clean, so you don't have to really do this step too many times. I just do it one time if your surface is not clean. That means the glue is not going to stick to your head and the wig is going to come off. What i am doing here is cutting off the sideburns, so it has space for my ears. You want to definitely concentrate when it comes to um cutting off the sideburns, because if you cut too much, we can see the sideburns meaning we can see the wig cap and you do not want that chill. This is how you want the sideburns to look like you want it to really fill up all the wig cap in a couple seconds, i'm going to show you the other side where it overlaps is my ears and we finish speed it up all right now. I am double checking everything if it really covers the whole wig cap, and now we finna move to the glue when it comes to the glue. I do three layers and i use bold hold for this one. As you can see, i start off on one side. Then i go to the other side. I use the back of a razor to really lay the glue flat. You do not want no clumps, you do not want no air bubbles, nothing, you want it to be flat and thin layers also don't use too much glue, because that will make the whole wig look chunky and we do not want that. We want it to look natural, you get me all right, obviously, you're finished speed. The up. Do let the glue dry, clear to make this install easier, clip the hair in the back make sure nothing is in the way. It is really important for you to prep your wig before you put it on and for no hair to be in the way when you put it on the glue. This is the hardest part for a lot of people, really concentrate and put the wig on the glue. The hairline needs to match with the glue, and then you take your rat tail comb and really brush in the hair brush it into the glue. It is better to have less glue than too much glue, meaning it is better for you to go back and put glue under the wig again. Instead of having to scrape off all the glue of your forehead. As you can see, you really want it to be brushed in. You really want the lace to stick to the glue, as you can see, i'm literally like brushing and brushing and brushing it just for everything to hold. Now, if you don't feel the pulse in the back of your head, it's not tight enough. I kept touching the wig in its natural state because it was so soft and light which i really love, and now y'all finna see where i up at three two one shocked my headband had baby powder on it, which i clearly missed, but i fixed it with The bed head hairspray, it came out good with no tacky residue. Now i'm going to show y'all how i get my wig so flat, especially when it comes to curly hair. Take your time when it comes to the middle part, girl, don't rush it. You really want it to be a middle part. Okay, for this step, you will need your hot comb and your heat protector. So what i do is i get bits and bits just like that, then i'm gon na put on heat protector and after that, i'm going to use my hot comb and really get in there. You really want it to be flat: okay, flat, f, l, a t flat, make sure to always use little bits and pieces, don't overdo it. Um, don't use big chunks of hair because then it's not going to come out as flat as you want it to come out by the way my hot comb was on 20, which is the highest setting for this pocket. Let me speed up the process, so we can get to the next part. Do i decided to keep this hairstyle simple? I am parting, my hair into fours. I start off with a little bit of water and always brush your hair from bottom to top and not top to bottom, the girls that get it get it and if you don't get it, are you trying to rip out the hair out your scalp chill? Don'T get the hair too wet because you still want to use product on it. What i use is a mousse. I got from schwarzkopf. I really like this mousse. It is really strong, so i don't use too much also here brush it from the bottom to the top, instead of the other way around and also use a loose comb and not like a tight comb hold on cuz. Am i the only one who is enjoying this beat, so it is always good to leave your headband on until you're finished styling, your hair. If it's curly wig, if it's flat iron, the wig whatever leave it on, you want to leave it on as long as possible. I look good now, i'm just making sure i'm brushing the hair out, so it's fluffy, so we can really get into the edges. They didn't call me savage edges for no reason. You already know what i'm talking about to cut the lace, i think for beginners. The best thing is to cut it in four. Just like you can see here and then cut the lace bit by bit. Instead of cutting the full lace at once, i use this razor that you can get by any afro store or even grocery stores. I always start on the left. Side really concentrate for this part and go as close as you can to the glue. So you don't have no flabbies. Flabby'S is access lace. You do not want that. You want that to be tight, always triple check before you keep cutting, don't just cut the lace and then when the hair comes off. That is completely fine. I had some flabby, so i just went back with this baby razor and just really cut um the lace tracks and stuff like that off. Here you can see again how concentrated i am cutting this lace. You really don't want to just cut the lace. You really want to concentrate and do a bit by bit honestly. This lace was very easy to work with. I really love the quality thanks to west kiss, go back with the baby scissors and cut off these little flabbies and tracks. You want a finish and clean. Look as my lace tint, i am using the l'oreal foundation in the color ebony, don't overdo it with the foundation just take a little bit and start off too much foundation could actually lift your lace. This is before the tent brush it on lightly. As you can see, i am coloring the hair as well. Usually you can go back with some cotton pads and warm water to get it off the hair, but i really just forgot this part here. You can see my face because i was like what lace. This is the finished, look without edges. Obviously i look like a afrolatina, my wig. It don't move it. Don'T move my hair, don't move! This is everybody's favorite part, miss savage edges. Doing the edges period point blank as you can see, don't use too much hair really go light and find your form. I was trying to go for fluffy edges. That'S why i took a little bit more hair down there, as you can see to really look like jade away on a real note here. You also want to concentrate. You don't want to mess up your hairline, that's why? If you guys want me to do a plucking video, please let me know so i can really tell you guys how to pluck for your edges as well. This process is definitely going to take you a minute really to find these style edges you want. Do you want three edges? Do you want four, do you want five? Do you want it fluffy, do you not want it fluffy, all that comes into consideration now, pluck your edges very light, don't overdo it. You just want it to have like this natural finish. If you want to expand your wig journey, i definitely highly recommend you get a 0.5 flat iron. These are specifically to curl edges. In my case, this is how i cut my edges. Other people, do it the opposite way? I find this way to be easier and better looking. I am using this edge booster that i got from ash beauty. I only use a little bit at the top of the edges. As you can see, i don't go all the way through because i really only want that part to be flat. Now this part is definitely going to take a minute. Everybody got them one side, whatever they do, the edge don't come out. Looking edgy. Okay, like this. Definitely gon na. Take you a minute just be patient. Okay, we can work with that. We definitely can now working on the sideburns is the same process. You pluck it a little bit. Then you curl it. Then you take your edge booster put a little bit on top, get it flat and then style it. I really hope i helped somebody with this video and that you now have a layout on how to install your wig. We are almost done with this video make sure to like comment and subscribe. Follow me on all my social media platforms and thank you westkids again for sponsoring this video. You


Comments
West Kiss Hair: The curls are gorgeous on you! Nice share, thank you so much for trying West Kiss Hair!
Mark Asin: que fukada-jpp.monster encantan tus videos. Bendiciones hermosa Celina que Dios te cuide donde quiera los mortalesn abian apreciado tan hermosa mujer
User 15: 2:10 we want it, I’m telling you
Brandi Mackey: Can I get a plucking video please!