⚠️New Plucking Technique! My Zig Zag Part Plucking Method Tutorial Ft Yiroohair.Com Beginner Tips
- Posted on 09 October, 2019
- Closure Wig
- By Anonymous
————♛ YIROO HAIR ♛————
Same hair in the video➤ http://bit.ly/320XMoQ
Get 9% OFF With Coupon code: “beige”
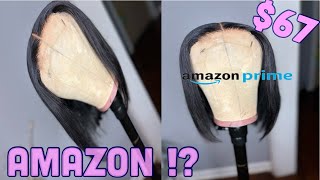
Hair type: Straight 150% density 13*4 lace front wig 20 inches
Yiroo Hair Official Website➤ http://bit.ly/2lXn7QG
Same hairstyle related products:
Straight 4*4 Lace front wigs➤ http://bit.ly/2IEatOJ
Straight 360 lace front wig➤ http://bit.ly/2nD2Cda
Recommend Top selling hairstyle:
Deep wave lace front wig➤ http://bit.ly/2lWPezv
Brazilian body wave 4 bundles with closure➤ http://bit.ly/2mV2F2Y
Brazilian deep wave 3 bundles with closure➤ http://bit.ly/2lYbauf
Contact Yiroo hair for Whosale/Aftersale:
Email: [email protected]
Follow Yiroo hair to WIN Monthly give away!!
YouTube @Yiroo hair➤ http://bit.ly/2lxJg7U
Instagram @Yiroo_hair➤ http://bit.ly/2lyJrQe
Facebook @Yiroo hair➤ http://bit.ly/2m2d9NR
Twitter @Yiroo hair➤ http://bit.ly/2kjHKWM
❤——————————————❤
Hey loves! ♥ Become a Beige-ian by SUBSCRIBING here ▼
https://www.youtube.com/user/Mahoghany...
NEW VIDEOS POSTED EVERY WEEK!
TURN ON POST NOTIFICATIONS
**I do not own the rights to any of the background music being played in this video. The background music is for entertainment purposes only. Here's the music playlist, check out the amazing Artists below ▼
1.) Ryan Little - flew da coupe. - https://thmatc.co/?l=37E30CB
2.) DJ GONZ - All Along The Boarded Front - https://thmatc.co/?l=7617E3A3
Thanks for Watching!
Contact me: ▼
https://beigemedia.wixsite.com/beigeoj...
L E T S B E F R I E N D S: ▼
INSTAGRAM: BEIGE OJAI
TWITTER: BEIGE OJAI
FACEBOOK: BEIGE OJAI
SNAPCHAT: BEIGE OJAI
BEIGE OJAI
P.O. BOX 520
LANHAM, MARYLAND 20703
#yiroowig#zigzagmethod#thebeigemethod#90sflips#howtoprofessionallyplucklacefrontal#lacefrontalpluckingmethod
Hey guys welcome back to my channel. My name is beige. If you are new here welcome, so today's video, I will be doing any tutorial on this wig that was sent to me from Yahoo. I'Ll have all of their information. The promo codes and direct links down below in the description box don't forget to check down below for more information. So when I opened up my package, I received my wig and a wig cap. The wake that was sent to me is a 150 percent density straight 13 by 4 lace, front, wig and 20 inches. The wig is pre plucked, it does come with baby hairs and adjustable strap and three combs. I am going for a top-up half down hairstyle with flips and because I want the flips in the top path over the ponytail to be the same exact length as the flips in the bottom half of the ponytail. I did get 20 inches in this way. Just so that when I put this hair up in a ponytail, I have enough length at the top. If I would have got this hair like a 16 inch or a 14 inch, the bottom half would have been the perfect length for my flips, but the ponytail at the top would have been too short. I don't want you to be able to see where the ponytail flip stop and where the bottom half of the flip start. If that makes any sense, so I do want it to be an all around even length, and you could do that. One or two ways you can basically add tracks around the base of the ponytail to extend the length or you can do. What I'm doing today is get a longer wig than you would need and then make sure that the ponytail is the length that you're going for and then just cut the bottom half to blend in with that ponytail. But eventually, if I'm not wearing this, this half up half down hairstyle and I take the hair down. The top is gon na be way longer, so that I'm just gon na have to eventually cut it all one length so that the overall way it can be. Even so, I'm super excited to be starting. This video, the first thing that I'll be doing, is grabbing. My hair dye, I do have one boxed hair dye from dark and lovely okay. So let's jump right into this tutorial. When you open up your box of dye, you will receive three items: you'll receive a cream developer, which is on your left, and that is 25 volume. You were Seve a middle product which is the fade-resistant rich conditioning. Hair color is basically a liquid color and you will receive the item on your right, which is a moisture, rich conditioner, we're going to just focus on the cream developer and the liquid hair color, which are the first two items I'm going to take. The top off of my cream developer and uncap the hair color and we're basically going to pour that darker bottle into the cream developer, tap it back and then we're going to shake it up for a few minutes just to make sure that it is fully mixed. It'S grabbing my quick blue extra-strength powder bleach, as well as my 20 volume developer, and I'm going to mix those two together to bleach the knots. So I have been getting a lot of questions on my zigzag method and I've been requested to do a full tutorial or a more in-depth video on how to get the results from my zigzag method. So basically, the first thing that I'm going to do is get my wig head and put a wig cap on the way case. I'M using a wig cap to do my zigzag method, because the wig cap is basically going to act as the color of your scalp. And if I was to just put the wig on the wig head, without using my wig cap, it'll be harder to see exactly how the wig is going to look once it's going. My head and the next thing that I'm going to do is grab the freshly dyed and washed wick that we just dyed jet-black and I'm just going to pin that over this wig cap you will need a few things. The first thing that you will need is a rat tail comb or some type of comb with a point for you to actually make that zigzag line. You don't need a clip just to clip the hair that you're not using, but you can visually see how much hair you're plucking you'll need tweezers, I'm using these from tweezer men. I love these because they're precise and they have an angled tip and you'll also need a bottle of water just to monitor how much you are plucking and to check your work. Okay, so let's get started okay, so the first thing that I am going to do is comb all of the hair back just so that I can gauge the hairline to see how much I am going to need to pluck - and I already see that there is Like a line of demarcation here, can you see that it's like thicker hair and there is a line of that thickness, all the way around? So I don't like that personally, I'm going to have to thin it out so that you won't notice that line of demarcation as much. The first thing that I'm going to do is basically just draw a line that just a section off this part, and then I am going to do my zigzag motion. So the reason why the base method does include a zigzag part is because it's easier for me to correct my mistakes when the line is a zigzag, as opposed to it being a straight line. If you are plucking a frontal or a lace, wig and you're doing straight lines, and you pluck too much in one area once you brush the hair, all back, there's gon na be like a noticeable bald spot where you pluck too much hair at, but now because We have a zigzag part here, or a zigzag line is going to basically cover your mistakes, if you so happen to pluck too much hair at once, and it looks super natural when you're doing the zigzag method as well. So I have my tweezers. I am just going to hold it this part of the hair back by using my clip and then I'm going to pull on this part here, and I am going to start at the base where the actual knot is and I going to pull the hair out And to check your work, all you have to do is pull that section back spray it with water and then comb it backwards or brush it backwards, and that will show you your progress, so we're just going to spend our time just plucking random hairs. You don't want to pluck too much in one area. You want to make sure that you are spreading out your plucking and you're just thinning out that line of demarcation and the hair line completely. So the zigzag line is part of the beige method and there are other customizations that I have within my method that, if you are unfamiliar with make sure you guys check out my previous videos that I have already uploaded, because I do share a lot of tips And tricks from my Monday, I also feel like this is the most foolproof method. If you are a beginner and yes definitely try it, and thank me later make sure you tag me if you do try this method. So now I'm just going to go behind that part and do another. It'S exact. It does not have to be identical to the zigzag that we just did, but you do want to do it behind the section that you first started on for the very front of the hairline. I do just move the hair all back and then I tweeze random hairs from it all right. So now we're gon na basically do the hairline in sections. The next section is going to be above the one that we did and about this much space. So I'm gon na start with my initial part and then I'm going to do that. Sit back okay! So now that we have completed the laced tent, it is now time to move on to cutting out my hairline with plastic wrap. I have a full tutorial on this method if you have not already seen that video make sure you guys click the link down below or somewhere on the screen to be taken to that specific video thanks for watching I'll have all of the information down below in The description box don't forget to check down below for more info, and I will have the second video, which is the styling video for this wig posted soon hit that subscribe button. If you have not already - and I can't wait to see you all in my next video bye guys - is basil -


Comments
Beige Ojai: **THE CUSTOMIZED WIG WORN IN THIS VIDEO IS FOR SALE, EMAIL IF INTERESTED: [email protected]
Michaela Douglas: Ugggh you don’t know how much I love you for this! I’ve been having such a struggle with plucking!
Silky Saks: Thanks for sharing your tips and tricks. This looks more natural than you just pluck from the front
Certainly Cee Caldwell: Thank you for the tutorial. I needed this tutorial l didn't want to mess up my new wig such a big help.
Gemini Peterson: ♀️to go binge watch all her wig customization videos
SoAnah: I love this method but I be struggling with making them zig zags tried it on my own diy wig the frontal looks bomb to me but the zig zag are hard
minime diamond: Girl your plucking is goals I still cant pluck that good
PRETTYBROWNSUGAR76: I'm definitely trying the Beige method. I'll have to come back with an update
Laila Marciano: Girl how the hell I ain't know you was this damn good!? I need to go back and watch old videos
Myra Selby: Great method
Lita Midget: Makes perfect sense TFS boo
Blush Pink Budgets: Once again!!’ You have don’t it!! Lol I’m learning so much!!!
Keke Daily: can you do a update version of this video
Aurthina Douglas: Gurl u just amazing. How do i make lace tent ....goat
Kimberly Kyles: Ur welcome
sheisher: Woah,so you the GOAT frfr!
Kimberly Kyles: You Bad AZZ Hello