Frontal Wig Customization | Bleaching Knots | Dying Jet Black | Plucking | *Beginner Friendly*
- Posted on 21 December, 2021
- Closure Wig
- By Anonymous
13x4 Frontal Wig from Tinashae Hair 24” Body Wave 200% Density
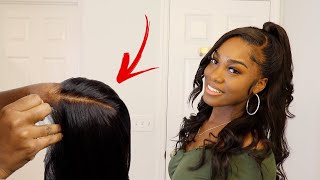
Hey y'all welcome back to my channel. Today we will be installing this wig that i ordered from tanisha hair. I did order the 13x4 lace, wig um. I think it's a hd or transparent, i'm not sure, but it is a 13 by 4 body wave wig in the inch 24.. So they do give you some wig caps and also they give you a pair of cute little clips yeah. So this lace comes pretty light, which is a good thing. You don't want your lace to be too dark, so this is how it looks and i'm going to go ahead and proceed to bleach my knots because, of course the knot doesn't come bleach on this wig and look at that. I just love this hair is so soft, it's so freaking soft and that's what i love about. It is so soft. So now i'm going to begin to calm off the baby hairs back, because i do not want any of that to be bleached during the process. So i'm going to just comb those back with the regular comb, so of course you will need your gloves, i'm using 30 volume developer. I got my powder, of course, my bowl and my little brush thing to go ahead and help me bleach these knives. So when mixing the powder with the developer, you want to make sure that the consistency is kind of like a paste. You want, you don't want it to be too runny, because it will seep through the lace and get on your hair and girl. We don't want. No orange roots, so no, so you just want to make sure you're very careful when you're mixing these two to make sure that that to make sure that the consistency is right. Okay, so when applying the bleach do not press too hard, just i'm not pressing too hard, i'm slightly putting on there. I don't want anything to bleed through completely and stain my hair, so i'm just putting it exactly on the um. The knot - and you don't have to rush just take your time and put this on here like this, so this is how it's looking as you can see fully saturated. The knots are already starting to change colors i'll. Let this sit on her for like 28 to 30 minutes, and then i rinse it out. So you of course want to go in first with your new neutralizing shampoo to stop any processing of the bleach. Then you want to go in with your shimmer lights. To take out their brass and this because you don't want any orange, you want it to look very natural, so you want to use the shimmer lights to kind of bring down the tone of the bleach. So so, and so once you're finished wash it bleach out. This is how you look very see-through, very natural. Now we're going to go ahead and blow-dry the knots, because now we're going to go ahead and get this wig to a jet black um. I don't like the natural black color that it comes in the natural color. So i'm going to go ahead and actually water dab this with jet black. So really i should have done this stuff first, because i had to end up going back and re-bleaching my knots, but you know, listen, learn. This is my first time ever doing this. So um i um it sprays. It got to be glued to protect the berry but, like i said it still ended up getting bleach. I will be using the adora jet black um. I got my bookie filled with hot water, i'm just putting my color in the water mixing it all together. So when adding the wig, i know this video is speedile, but i did do it real slowly. I dipped the ends up first and then i proceeded to dip the middle, and then i dipped the top. Now i didn't exactly go ahead and dip the top just straight off top, because i was scared to like bleach the lace, but i eventually just went on and immersed the whole wig in the water and, of course, like i said it turned the uh. The knots black, so i had to go back in and re-bleach the knots, but whatever i should have done this step first like i said, and then bleach the knots after that, but this was my first time doing this, so whatever everything still came out the way It was supposed to come out, but i let this sit in the water, for, i think, like 20 20 minutes, and this is how it came out black. Yes, that is what we want. I don't like the natural black color i like this, so i'm going to start plucking the hairline, because we want our hairline to look very natural, so half look um. I actually learned this from the girl playing on my tv screen, paris. I forgot paris danielle or something watching on youtube. Um part the front off. First, like the little front section of and like plug behind it, and you like do like you plug one section. You skip you plug one section you skip you're gon na see, but this is how i did my plugin so so so now did end up going ahead and parting a little bit closer to my headline, because i want this to look as natural as possible. So i parted a little bit closer and then i plugged behind the line as well. So this is how everything came out, of course, once it's actually on my head, i'm going to pluck a little bit more. Do my baby hairs and everything but stay tuned. While i install and slay for the next video you


Comments
keisha p: More videos please