Easy Full Closure Wig Install
- Posted on 23 January, 2020
- Closure Wig
- By Anonymous
#Tutorial #FullClosureWig #WigInstall
Super easy tutorial for a full closure wig install. No glue! You don't even need to know how to braid very well (I suck at it). In case you're wondering, a full closure is a wig that covers all of your hair. It's a protective style that's also extremely convenient. Enjoy!
Wig by Robyn Michele.
www.instagram.com/robynmichelebeauty
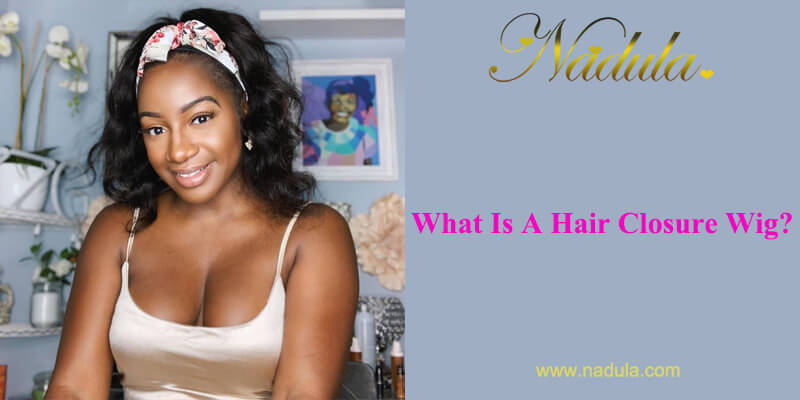
Hey guys so today I want to show you how I apply my full closure unit. What is a full closure? This it covers all of my hair. I think it looks beautiful and amazing, I'm going to show you how to do it. So for all my busy girls, I'm gon na, do a very quick time-lapse first, but if you want to watch the full tutorial it starts at that time. A full closure is basically a wig that covers all of your hair. What makes it look really natural? Is the lace in the front you see how you can see the color of my fingernail underneath it this lace is see-through, and so it's gon na look like a real part. So the first thing that you have to do is braid your hair, but you have to make sure that the part in your hair matches the part in the wig. The part is the most important part. The idea is that when the parts line up you're only gon na see your scalp through that lace and that's what's gon na make it look really really natural. I lined them up before I did the braid, but I'm just gon na show you how you would just put it on. You would like take a comb or something take note of where the part was falling, and then you want to do the part on your head in the same place, I've done these two french braids, I'm terrible at braiding hair. Ideally, they would be smaller, but what really matters is that it's flat you want this all to be flat. You don't want any like false bumps. So what I'm gon na do with the ends, I'm just gon na tie them and put them up and pin them. So that everything stays really flat, okay, okay, so the band is now on the tightest setting you might buy one that has a fixed band, so you don't have to worry about that. Some of them will have combs in the front so that it has something to kind of slide into is bobby pins. You can find different ways to secure it. So then just slide it on your head. Okay, now it does take some adjusting. So this is not yeah, we're not done yet just one making sure it's pulled all the way to the front same here now, right now, it's not secured in any way, but it's really very secure so like if the wind blows, I'm good. If I got into a fight - and somebody like pulled it, I'd be in trouble, but I don't fight so so, like I said, the most important part is lining up the part. So that's what I'm gon na do now. So I'm gon na kind of pick it up a little bit and make sure that they're lined up, and then I'm gon na use this comb to like accentuate that part. This is where it would be really great if I had teeny tiny braids, because I wouldn't need to do this, but I'm just gon na smooth this down or okay. So you see how you can see my scalp through that lace, because this is a really in lace, beautifully crafted unit, and that's really what you want. If you have something with a little bit of thicker lace and you feel like the color of the part - isn't right - you can go in with a little bit of concealer. It should be one shade, lighter than your skin, because that's the color of your scalp, your scalp, never sees the Sun, so your scalp is going to be a little bit lighter than your skin and you would just take a brush and you would go in and Dab in there you can also use powder. You can repress powder, so what I'm gon na do now that I have it in place and I'm happy with it. I'M just gon na pin it, so you can pin it a couple different ways. If I were doing something where I needed the front to be seen, I could pin it back here to keep it in place, but because I'm gon na wear it like this with the center part, I can just pin it here next to the ears. That'S where it feels really secure, I'm just taking two pins and sliding them in I'm just locking this down. Now I'm gon na take out a little bit of my hair, like just a few strands like that's it just to give it kind of a natural hairline and I'm gon na Flatiron those with it now about moving the part. You can move the part anywhere where there's lace, you can move the part and it will look natural to move the part, though you do need to wet it, because if I were to just comb it like this, it would never stay see that it's gon na Keep flopping over so you need to part it where you want it spray it down with some water brush brush brush. I picked some clips and stick it in there to like keep it down and then, when it dries, your part will be set in place and that's it. It could not be easier. I could not love it more. It feels very, very, very, very secure. I don't worry about it moving or like sliding back or anything like that. I feel, like the part, looks so natural and I don't have to put this really harsh color on my hair. I don't have to put harsh heat on my hair. It'S just very protective. Very convenient, so I want to give a huge shout out to Robin Michelle. She made this. This is a custom unit. She did a beautiful job. So if you want your own, you should definitely check her out. You have other questions that I didn't answer here. Please put them in the comments if you like this video, give me a thumbs up and please subscribe. If you haven't already new videos every week,


Comments
Mercedes T: Mara! I love the video and love your hair!! As always, thank you for the tips!
Vonnie Haxell: Very pretty and easy! Love you and great video!!
Divac Brookins: Where did u order your wig from..?. Its Real Cute, Please leave link for me please....