Easy 6X6 Lace Closure Water Wave Wig Install | Soft Crimps| Tinashe Hair
- Posted on 27 February, 2020
- Closure Wig
- By Anonymous
●▬▬▬▬▬▬▬▬▬※ Tinashe Hair ※▬▬▬▬▬▬▬▬●
Tinashe Hair Official Website: https://www.tinashehair.com
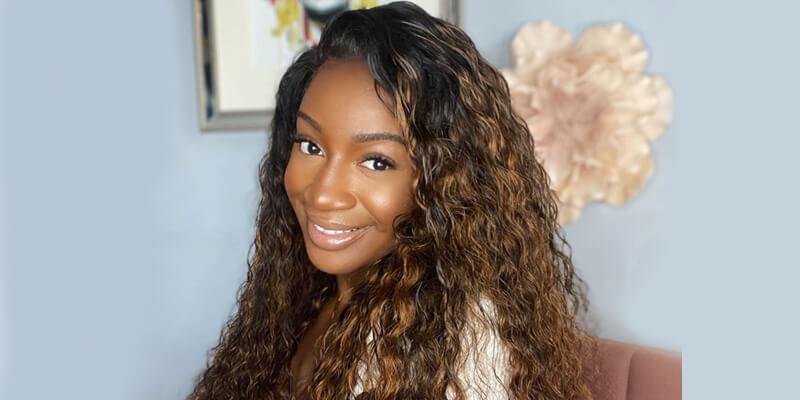
Hair details: Water Wave 6x6 Lace Closure Wig 180% 24 Inches
Same Hair in the video:
https://www.tinashehair.com/product/6x...
New Upgrade Higher Quality Lace Wigs Up To 55% Off
Spring Big Sales:
$5 OFF Over $99 Code: Th5
$10 OFF Over $199 Code: Th10
$20 OFF Over $299 Code: Th20
6x6 Lace Closure Wig:
https://www.tinashehair.com/product-ca...
13x6 Deep Parting Lace Front Wigs:
https://www.tinashehair.com/product-ca...
Human Hair 13x4 Lace Front Wigs:
https://www.tinashehair.com/product-ca...
Short Bob Wig In Different Types:
https://www.tinashehair.com/product-ca...
#Tinashehair #6x6laceclosurewig #lacewiginstall
Want To Win Free Hair And Get Our Latest Promotion? Click Here →
Instagram: http://bit.ly/2Isud9X
Facebook: http://bit.ly/34FxUAm
Contact Us: Whatsapp/Tel: +86 17537405381
Email: [email protected]
Welcome to IAmBeautifulHustler Channel
Be sure to SUBSCRIBE & TURN ON YOUR ALERTS
CONNECT WITH ME✨
Personal IG: Iambeautifulhustler
Business Instagram:_Beautifulhustler & @thebeautifulhustlerbrand
Twitter:_Beautifulhustl
YouTube: IAmBeautifulHustlerTV
✨SLAY WITH BEAUTIFULHUSTLER✨
TO PURCHASE MY PRODUCTS :
WWW.iBhSlays.com✨
Lace Melt Adhesive,
Melts Belts,
GLAMWAX
and more ❤️
Have YOU Purchased your LACE MELT ADHESIVE YET?
To Purchase : www.ibhslays.com
✨✨✨✨✨✨✨✨✨✨✨✨
Spanish Mami Proof✨
Puerto Rican Mami Proof✨
Out the scalp proof
Swimming proof
Sex pulling proof
Waterproof✨
Sweat resistant
Adhesive : Lace Melt Adhesive
@thebeautifulhustlerbrand
YouTube :IambeautifulhustlerTV ❤️
To purchase: www.ibhslays.com
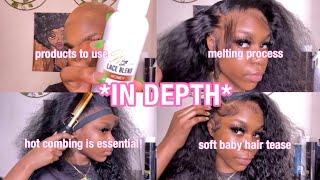
Hey beauties and welcome back to our beautiful hosta TV today we will be doing a 6x6 lace closure week. Install in today's hair is provided by Tinashe hair. Now, as I mentioned, this is a 6x6 lace closure wig unit. Now this is a 24 inch of their waterways hair and, as I mentioned, it's a 6x6 closure wig. So that mean it is 6 inches wide and 6 inches deep. As far as parting space - and today I will be doing this wig installation on my mom today. So shout out to momma hustler because she will be my model for today now off-camera. I did go ahead and please do not plug this 6x6 closure wig and to bring my curls back. I did add some soft clumps to the wig. I did not use any holding sprays or anything like that and I actually kind of crimped his hair when it was like damp and the curls still the curls still with a crimp. Still, you know were created in the hair while it was like half dry. So I was actually surprised and happy about that, but I'm gon na jump straight into this tutorial today and begin to add my layers of the beautiful Hustler lace, mid adhesive. I did go ahead and do the ball cap method only spray, the center of the wig cap with the holding spray. Since that's the only thing that's gon na have on it the rest of the cab. I just left it alone, but when I cut off that extra lace, I mean that extra cap, it did not roll up or anything like that on the sides, and I also have a new ball cap method, which I actually got from another youtuber. Who actually did a review using my glue? I will put our information down below as well, so you can see the review that she did using my lace flutings also. Another youtuber is what I did a review using my glue. So if you want to find reviews on people who purchased me use my products just you know, look it up on YouTube and you will find them, and I also already added my foundation color, underneath the closure as well, and I did use the palette from Ruby Kisses cream foundation and level 16, I used a lighter shade and that dark skinned girl palette. So that was the color I use on the cap and underneath that lace, close your lace as well, but right now, I'm just going to add all of my layers of lace me to he stuff. I did think I think I did about five layers of this glue and you just want to make sure that you put a good amount and you also allow it to dry clear. So I did about an inch wide. You know section of glue as far as how wide I used it, but I did use five layers and right now, I'm just taking my scissors and I'm cutting off the thick band on the side of the lace closure wig, and I like to do that. So on one time do the baby hairs and everything like that. I can get a nice and seamless installation. I also do this with my closure, so winds as well - and you know they also help with a nice, a nice seamless installation as well. But now I'm just going to add my last little layer of lace, glue before actually pulling my lace down into this glue, and I really didn't crop out too much in this tutorial. I'M probably about like the first 10 minutes of this video or maybe 12 14 minutes of this video. I did not really crop every pump anything out so pretty much. What you see is what I'm doing - and this is pretty much like step by step of how I did this install and then I only cropped out like the place as far as don't like baby hairs and stuff like that. Like just show this in pieces, so you will get a full tutorial on how I created this look. But, as I mentioned once, I finish applying this last layer of glue and I let it dry clear. I will begin to pull this lace down into the glue. So now that this glue has dried clear, I'm just gon na go ahead and pull the lace down into the glue. And if you applied it correctly and you also use a good amount, then once you pull the lace down, you should automatically stick. But just have your client or whoever you are installing on just hold it down for you as you blow dry on the heat setting and just really get that lace, melting and I'm just taking. As I said, my blow dry on the heat setting and just using a little rat tail comb and just combing their hair and that lays down into that glue just to ensure that it is melted. Now today I did not use the milk bail. I don't want to use it just to show you that you can still have your lace melted just using you know like the heat and just using enough glue, and just you know, pushing that lace down and everything like that. So you will not see me, use the melt bail today, but her closure wig was still melted in and I'm just taking my fingertips as well and just pushing that lace into the glue. And now that I am done blow drying, I'm just using that extra lace to pull that lays the hair into the glue and just really applying that pressure before cutting off the extra lace. And I just had to take my scissors and slit some areas that way. It'S easy for me to raise a comb off the extra lace and then I'll just going with that eyebrow razor and carefully just raise it off the extra lace, and you want to do it. As close as you know, you can to the hairline, not even a hairline, but to where the hair starts on the lace. That way is not too much. You know extra lace laying down anywhere anything like that. So I'm just going to continue to razor that off and then I'm gon na take a few clips and clip back on the lace that is still lifting. So I can take it down and I just you know, put a little glue on the back of my hand or you use a little pallet or whatever you can to just pour just so I squeezed a little dot of glue and just taking the end of My rat tail comb, just um, you know splattering, that glue on sitting underneath those little cracks before actually pushing the remaining of the lace into the glue. To finish off the note, and as far as the edges, you can do the full six or the full layers that you did on the rest of it or you can just do like a good two or three layers of that glue and tack it down. Because it's just the address is up to you is your preference, but I just went ahead and apply other layers that I wanted to apply and I'm just taking the comb and just pushing everything on in and once I do that, I'm just going to begin to Pull down a section for the baby hair, so now I'm just pulling out three little sections, one at the end of the closure, one that will go across the stool towards the top and then on the other side of that closure. I will pull some hair down as well, and you know pretty much where you place your baby here really would kind of like make up words of style. So you want to kind of have a visual of where you want your baby hair to lay weren't, actually doing your installation and everything like that to give to style that extra like umph to it. So I pretty dependent on the person's head shaven, depending on the final look of how I want to start to be. That'S where I decide I'm going to place the baby hair. If I am doing some, so I just figure out a few places, don't want them to lay, and now I'm just gon na go in with an eyebrow raised and I'm gon na chop those baby hairs down as well and using a little free spray on the Baby hairs in the hairline, I'm just gon na comb and you know blow dry that want to heat as well before, actually shaping out their baby hair. How I want it to be, and then I will get into you know, like the finishing touches on this look and as I mentioned, I did not crop anything as far as this up to this part, but once I actually get into scooping the baby hairs and Everything like that, I will kind like speed up the process, because you know I do baby hairs on almost every tutorial. So I think you guys kind of get the hang of it. So I'm not gon na go into too much detail about that, but I am gon na do a full baby a tutorial anyway soon, so you know just on different ways and different. You know methods to do it so stay tuned for that soon, but yeah, I'm just gon na add a little wax stick on top of the hair, just to get their hair to kind of lay down a little bit and then I'm gon na go in with That you know the bedhead hardhead spray and using my edge brushes and my finger, I'm just calming and swooping, and you know using a blow-dryer on heat as well to kind of mold it and get it into place and then, depending on how you do your baby. Here it's depending on what your client, someone like some people like soft baby hair, some people like baby hairs with the gel because it lasts longer as well as the holding spray, so I've mix it up. Sometimes I do a combination of two different ways. It just all depends on what the client wants and also what I want to do as well. So that's pretty much. What I do is far, as you know, doing a baby hair method, but I'm just going to quickly touch a few bases showing you guys the baby hair, and then I will proceed on with the finishing touch. So now, I'm just gon na take my wax there. Just making sure I get all those frizzes I want out, you know just wish everything is nicely and smooth, and I'm just going home a little bit more and just really pressed the roots out nice and flat. I didn't want this to be completely flat. That'S why I have this slightly humped up, I'm towards the friend I'm just smoothing out the back and making sure everything is flowing in a direction that I want to flow, and I did, as I say, as soft crimps of this hair. While it was still kind of like damp, so that's how I got the curl to look like this, but nevertheless I'm pretty much finished just touching up the baby here on the side. That was bothering me and then I'm just going to take some concealer. Instead of the part, I did not use any black spray today, simply because I just didn't feel like it was necessary because, like the part was already kind of skinny, so all I had to do was just define it to me, really make it. You know like pop, so I didn't use any black spray only on the concealer, but I'm just you know, spraying down everything, making sure it's nice and neat how I like it to be, and just you know, playing with the crumb a little bit to just fall. A certain way or just lay out a certain way, so I'm kind of gon na spread it out comb it a little bit and I'm just going to go in with that same will be kisses level, 16 level, foundation palette and conceal my part using that same Shade I used one her cap and underneath that lace, closure and yeah conceal that part, and I will pretty much be done with this look. This is a very quick and simple install. As I mentioned, I didn't crop out anything really like the last little bit, but I hope you guys enjoyed this tutorial and finishing. Look here was a video of how everything looked before. I did, unfortunately, a little quick, selfie video at the end, but I tried to get like the back of it, but once she actually stands about to cheer, you guys be able to see the soft crimps in the back as well. But I thank you guys for tuning in to my tutorial. Once again, this was Tinashe here in their world away of 24 inch 6x6 closure details below and thank you guys for watching.
Comments
Kimberly Clark: I absolutely love your tutorial a lot, and your lace glue is amazing with just two layers, absolutely love it! Thank you for being an inspiration to this old school hair stylist!
xxdancebeautyyxx: I love watching your install videos i learn soo much
Carla White: Beautiful as always❤❤❤
ReNiqua: Cute, the hair looks good and so do her make-up
denea whisonant: Beautiful
Thug_Roman: Your mom is so pretty
deseraymiles87:
Calandria T: Would you say this wig is big head friendly?
Nikki Styles: Would’ve loved to see how the hair looked on her prior to you crimping it
Ellaysha Boykin: Why ur products never restocked when it's suppose to?
Shell Shell Beyond Beauty: Want to purchase your glue but its been like 2 weeks out of stock
Liseth C: Yes.. very beautiful wig, but as much as they put it well, those factions as little polished as that nose so wide, nobody will believe that hair is hers, a hair of this texture usually the girls have the face features thinner Maybe some kinky curly could look better in her.