Easy Bombshell Curls For Beginners! 5X5 Hd Lace Closure Wig Install| Ft. Yolissa Hair
- Posted on 10 June, 2022
- Closure Wig
- By Anonymous
Hey Babes and Babydolls, I'm back with another install to slay.
''I'm going to be the prettiest girl I the party'' especially with thiS bomb body wave hair from yolissa hair. LIKE COMMENT AND SUBSCRIBE FOR MORE VIDS.
Hair details:
●▬▬▬▬▬▬▬▬▬♛Yolissa Hair♛▬▬▬▬▬▬▬▬●
*BUY ONE GET ONE FREE* Shop Now➤https://bit.ly/3lRvMzF
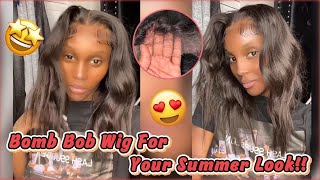
Hair Info:#yolissabodywave 5x5 HD Lace Closure Wig 24inches 180% density
❤ #yolissahair Official Website:➤https://bit.ly/3sZ50cI
TOP 1 #yolissawaterwave :➤https://bit.ly/38SwV7b
Best Discount? Join in Our FB Group:➤https://bit.ly/3momOuu
Magic Stick Curling Wand :https://checkout.square.site/buy/TZPT5...
Contact me:
Facebook@Brandii Jaee (Janel Monroe)
YouTube: https://www.youtube.com/channel/UCyOr8...
For business inquiry: [email protected]
Start to finish wig install very detailed : https://youtu.be/_BoGq132IeA
Music : “Music by Southstreet24-Media”
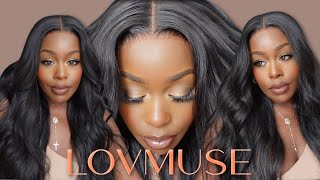
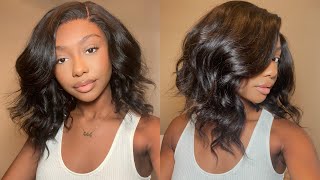
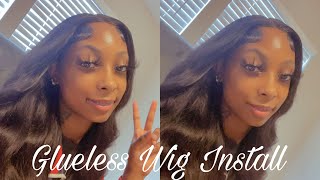
Where'S bubbles she's, probably upstairs combing your hair, so she'll be the prettiest kid i'm gon na be the prettiest girl at the party what's up babes and baby dolls and welcome back to my channel. Ladies, if you're new here welcome. Ladies, if you already been here, you already know i'm back with another video of a hair. Tutorial too. This hair is from yolitsa hair. It'S a 5x5 hd lace, closure, wig, it's 180 density and it's 24 inches long. This is their body wave unit. It is absolutely gorgeous when i pulled it out the bed. It was absolutely soft y'all, like i love it again, this is their body weight, 5x5 hd closure wig. It comes with two combs on the side and you get a comb in the back. This cap size is a size small that i have and look at that look at that like it is very hd. So i'm gon na go in with my quick blue um bleaching powder and my 30 volume developer and i'm going to mix this and i'm going to begin doing the bleaching process for bleaching. My knots um i'm going to mix it until i get like a really thick paste. I do have other videos breaking down how i do the bleaching process and all that, but this is just a quick install so yeah. So before i bleach um my knot, i take some spritz and i spray it on the baby hairs just to kind of lay it back. You want to make sure all of this hair is out of the way so so that it doesn't get bleached um. During your bleaching process, next i'm going to place it on the wig scene, i'm going to secure my pens and i'm going to begin applying these all over that lace. So once i'm done applying it, i let it sit, and i set my timer for about 25 minutes and i'm going to let that bleach do its work afterwards. This is what it looks like. As you can see, you want to make sure you push the bleach through the lace so that it touched the root of the hair okay, and that is what it looks like after i've rinsed the bleach out. It'S looking real good okay. So now i'm going to place it back on the wig scene and i'm going to dry my hair and basically style it. So i'm using my chi iron guard heat protectant spray, just to make sure i do not burn the hair and i'm applying some serum. This is the same serum from that chee brand. I think it's pronounced chee, but i love this stuff y'all. It works really good and i'm just going to secure my pants and i'm going to begin blow-drying, my hair before i style it just to make sure it is really really dry. You don't want to style your hair while it's weak, yeah, so yeah. So once i'm done drying the hair, i'm going to go in with my hot comb and i'm going to straighten the hair back after i straighten the hair back. I part the hair down the middle and i straighten the hair down the sides to make sure that the install is nice and flat a hot comb. Gon na do the trick every time. Okay, i feel like you, cannot install a weed without hot comb at first. Okay, hot comb is going to give you that flat install. So if you do not have a hot comb go, get you a high cone and make sure your install is split like you want to make sure those fly. Aways are nice and laid. This is a trick again. This is the professional curling one that i will be featuring in this video today to get those bombshell curls, it's called the magic stick. Ladies, this is a very beginner friendly, curling wine. When i say this is absolutely the best thing that i have ever came across, y'all every heats up to 450 degrees, and i want to tell y'all all about these curlers at the end of this review. This is how i'm going to get my curls. As you all know, in my previous videos, i always flat - i mean curl, my hair with flat iron too, because i do not know how to curl with the regular curling barrel, and that is what these curlers are made for the girls. That really just don't know how to use the regular barrel, but here i'm just applying my cap and i'm going to do the ball, kill method. I'M not really going to glue the entire edges down, but i'm going to just glue the front part of the cap. Where the closure will be laid, and next i'm going to go in and spray some spritz all over the front of the cap, i feel like this helps me see my hairline and it helps me know exactly where i need to place my glue and where i Need to cut my cap now you can see my hair as you can see. I'M gon na blow dry it and i'm gon na go in and apply the glue right at the edge of my hairline. Again, i'm not applying this all over because i'm not doing a whole frontal, i'm just doing a closure so yeah. I take the end of this razor comb and i begin spreading the glue in and once it gets tacky. That'S how i know i'm ready to start laying my color using this ruby kisses foundation, i'm going to apply this all over the cap just to help my cap blend a lot better underneath the wig you want to use a foundation shade, that's close to your skin Tone and after i apply that i go in and cut my cap, so when i cut my cap i only cut the perimeter off. I don't really just cut the ear tabs just yet because i don't want it to start sliding back. Like i said, i only glued the front part where the closure would be next. I try the wig on to see if i could enough of the cap back, and i did so now - i'm going to lay my glue down right where the closure will be laid and i'm going to do two layers of this glue just to make sure it Gets a good grip and then you're gon na let that dry and once it gets nice and tacky, i'm going to pull the wig forward and apply it right. Where i place that glue once i have the wig laid exactly where i want it to lay. I take the comb end of my hair to brush and i begin pressing the lace into the glue next, i take my blow dryer and make sure it is nice and dry before i move on to the next step. Again, i'm pressing it in to make sure it is nice and flat and melted after i have my lace secured where i want it to lay. I go back in with my hot comb. Okay, i'm gon na go in with this serum before i hot comb it and make sure the hair is nice and moisturized. I do not have a wet stick right now. I don't know where my wet sticky is. I forgot to grab one, but i'm gon na. Take this tresemme holding spray, and i spray that all over the top and i'm gon na, take my hot comb and begin laying it flat um as well in the beginning, when i did it on the wig scene, i like to try to do it on a Wig stand to prevent burning my scalp, because this can get hot doing it so be careful okay, but make sure your wig is nice and flex. I go in and cut those ear tabs that i had left earlier and i just took the rest of the cap underneath the wig and i'm going to take my yolita head scarf and i'm going to tie my hair down to make sure my lace gets nice And flat because i'm going to be the prettiest girl in the party okay, so here are the curlers that i was talking about you guys i'm going to curl my hair and show you all how easy these curlers are to use. You just clamp it and once you get it clamped on there, you twist the knob and you release, and i didn't quite get that right. But i would do it again. You clamp it and you begin twisting only the knob and it wraps the hair around the barrel. For you, you don't have to do much and it's super easy. I love these curlers y'all. I was able to curl my hair and get those pretty curls. Yes, because i'm gon na be the prettiest girl in the party but yeah, i'm gon na, be i'm gon na stop talking right here. You know let y'all watch as i curl this hair. So - and here we go you guys so i'm at my last few curls and i went ahead and took my head scarf off because i'm going to go in and cook the lace. I cut down the middle first and i cut at the top doing zigzag cutting motions because you don't want to cut straight across, and i love hd lace y'all, because it is super easy to install and it is easy to blend. So if you mess up cutting like you, can't really tell like it just blends so yeah. This is the finishing touches, i'm going to finger comb, my curls and basically just out of here y'all. This is the finished look of this yolissa hair. I absolutely love it. Okay babe, so this is the final result after i have installed and curled the hair. This is your lissa's hair. This is the bodyweight unit. It'S 24 inches, it's a 5x5 hd lace, closure, wig, it's 24 inches and it's 180 density. This hair is like super super cool. Also i curled my hair using my magic stick, one. I will link the curlers down below in the description box. It'S up to 450. It takes 30 seconds to heat up. These curlers are super beginner friendly, because i have a hard time curling with one curls. If you know the majority of my videos, i always use flat ironers to curl my hair, because i cannot curl with a barrel for nothing and always leave like this big dent. Due to the fact that you have to clamp the hairs curly, but with these you just spin spinning around, let me try to demonstrate for y'all, so you just take it clamp it spin, the hair, you just begin twisting and it basically just wraps the hair around. For you, you don't have to do any twisting. You just switch the knob. It was super easy to curl my hair, and now i can. Finally, you know curl my hair and get those really pretty bombshell, curls that everyone else wears because yes, ma'am go get you up here, okay, even with me curling, it holds the curls really really well. This is the finished look of this alyssa hair. So, thank you. All for watching make sure you like comment and subscribe and i will leave everything in the description box. So thank you all for watching and i will see you in my next video you
Comments
Totally UNĒK: You are the prettiest
Let’s Talk Rose: You that Pretty Pretty!!!
soulcatcherone: please make a braces update
Totally UNĒK: That length baby