*Step By Step* Best Vacation Wig Install Ft. Yolissa Hair | A B I K A S H
- Posted on 06 June, 2022
- Closure Wig
- By Anonymous
HEY GUYS ....
THANK YOU FOR WATCHING,
DO NOT FORGET TO LIKE, COMMENT & SUBSCRIBE AND TURN ON YOUR BELLS. AS PROMISED HAIR DETAILS PROVIDED BELOW
●▬▬▬▬▬▬▬▬▬♛Yolissa Hair♛▬▬▬▬▬▬▬▬●
*BUY ONE GET ONE FREE* Shop Now➤https://bit.ly/3FFWOTN
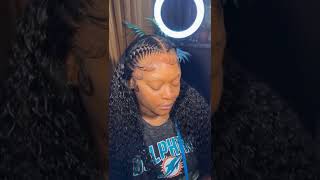
Hair Info:#yolissawaterwave 13x4 HD Lace Front Wig 24inches 200%density
❤ #yolissahair Official Website:➤https://bit.ly/3FIMSZt
Classic Wavy Curls #yolissabodywave :➤https://bit.ly/3Ms8c8t
Best Discount? Join in Our FB Group:➤https://bit.ly/3momOuu
Follow Yolissa Hair On Social Media
Instagram: https://www.instagram.com/yolissa_hair...
Facebook: https://www.facebook.com/yolissa_hair/...
✔Wholesale Contact +86 15803834514
Hi guys welcome back to my channel it's abby here. If you're new here welcome, i do a lot of lifestyle, beauty, fashion kind of content. If that's something that you're into don't forget to hit that subscribe button, so you don't miss out on all the fun um. So, as you guys can tell by the title, i will be installing this hair that i was kindly sent to by yolissa hair um. I love this hair so much it's a water wave unit um but yeah. If you guys, are interested in how i got this. Look stay tuned, okay, so um i will be trying this hair is from you, lisa hair. I have never ever tried ulisa hair before um, but i've heard some good things about them. So they sent me this hair, it's 200. I keep playing in it by the way um it's 200 density, it's a 13x4 hd frontal and it's 24 inches. So we're going to start off with the install. So i did already bleach the knots and i plugged the hairline a little bit. It did already come pre-plucked, um, so yeah. So what i'm going to be doing is just cutting out the ear tabs. I also did go ahead and put concealer on or foundation on my lace already, so i used the ruby kisses concealer um, the shade that i use is shade. 15.. Before i go in with my bolt hold i'm going to be cleaning my hairline with um. It says 99 alcohol, but i don't believe this is 99. I don't. I don't believe this is 99, it's somewhere in the 90s, but it ain't 99, but yeah, so i'm just gon na be going in. I do two layers because that's enough for me for us for how long i want to keep it on so so i will be going in with the ebbing lace adhesive. I believe this one is the second the strongest hold. I think the black one is the strongest one. I want to try the black one after this, but this one is really good. It dries very fast and it does a great job at holding, even when you use it like without lace glue. I'M going to take this elastic band that they also sent with the hair okay. So i think it's been 10 minutes. Okay, so we're gon na start cutting off the lace now just slit here. So when i'm cutting it, i cut it in sections based on the slit. My then i'm gon na go in with the spray one more time i use the end of this um brush. I'M just gon na go right in the middle and then i'm going to hot comb um the here like the edges and the middle part just so it can be flat. I'M going to be going in with my carry care wax. Stick i like to put this on in layers because i like to go in with the hot comb and layers do okay, i'm scared, because i burned myself with this hot comb multiple times. So next thing i'm going to do is just the baby hair. So i'm just going to i guess section off where i want my baby hair to be my oh going in with this little straightener. It'S not small enough. I want to get one, that's actually really really small, but it doesn't going in with my nairobi setting mousse. I'M at the back of my hand, taking this edge brush. Okay. So while we're waiting for the baby hairs to do their thing, we're gon na try to tame all of this. So i'm gon na take a towel. I'M gon na be going in with just water. There might be a little bit of oil in this bottle, but for the most part, it's just water, i'm just gon na go in with this aussie miracle curls to leave in almost done not a lot a little bit. This do i'm going to come back when the hair is all dry, just to show you the finished product, all right guys. So this is the final look um. The hair is not 100 dry. It'S like 90 dry. Only the inside over here is still dry, but everywhere else. For the most part i mean it's still wet everywhere else, for the most part is dry, the hair is still soft, still fluffy, and i it is a bit frizzy, because i've been playing with it. It'S hard not to touch your hair while it's drying, but i love this hair. It'S really pretty um. This is how it looks like where it ends on me uh when it's wet it actually, like touches my butt but yeah. I love this hair, so much um. What i did do off camera because i really need a mirror close to me. That'S why i didn't do it on camera, but i took a comb went like this on the part, and i used this spray. It'S the salon, graphics, high beans, intense temporary spray-on color, and it's in black uh. You can buy this. I like the beauty, supply store, that's where i got mine and on the part i just used my the same foundation. I used to that. I put on the lace at the beginning of the install um. I don't like the whole highlighter, i mean concealer. Look, it looks weird, so i just picked something that was closer to my shade, because when i don't have makeup on the concealer, it's not matching but yeah other than that um. That pretty much concludes the video um. If you guys are interested in anything related to this hair, i will leave everything linked down below. Thank you so much to you, lisa here for collaborating with me in this video, and you guys know the drill already. If you guys, haven't, subscribed already, don't forget to hit that subscribe button and also turn on your notification bell, so you are alerted when i do post and also don't forget, to give this video a thumbs up i'll catch. You guys in my next one


Comments
Yolissa Hair: Wow the hairline!! The wig looks so natural on you and stunning!!
B Charles: This is so detailed. ❤️it!
Marci John: You n the hair