Breathable Closure Wig Install Using Luvme Hair
- Posted on 09 October, 2021
- Closure Wig
- By Anonymous
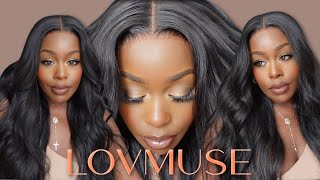
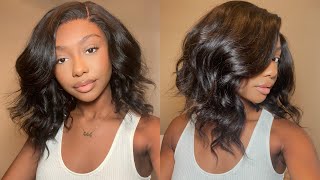
Product: Body Wave Glueless Breathable Lace Closure Wig 18''
Web link for the same wig:
Luvme Hair Website:
https://shop.luvmehair.com/discount/Ne...
Extra 23% off coupon code: Ness
Hello, everyone welcome back to my youtube channel so in this video i'm going to be showing you how i installed this breathable wig closure wig from love me hair. So if you're interested in watching this video stay tuned. So in this clip, i'm showing you guys everything that comes in the package when you order this unit and some of the things that you'll be using while installing this unit do for all my units, especially my frontal and my um closure unit. I do 10 to 12 straight backs for all my clients. This ensures a flat and seamless look at the end, and here i use a regular beige cap i like using the beige cap, because i don't know i just feel like it's best for all my clients. So all my darks and clients, i use a beige cap and then i tint it with um they're, a dark foundation or a dark um concealer. As you see i'm doing there, i tint it to match your skin color and use that same color on the lace. So i asked my customer to hold the wig for me and i apply it gently not messy onto the um the lace i pop the wig on her head to make sure everything, looks nice and seamless. Yeah got ta, make sure that back is secured and it doesn't like lift up or have like any bumps. We just want it to be flat. So you see me, i keep tugging making sure everything is flat over here and yeah. So after the wig has been securely um placed on her head, i go ahead and clean her skin with alcohol, and then i proceed to spray a skin protectant on there before i put my glue on there, okay, so today's glue is sponsored by erica j and I'M joking, i always respond to me, though erica come hell at your girl, so i'm using um four layers of the erica j glue. I think this is her regular um green one with the green ryan on there. I'M gon na go ahead and use four layers. So i spread four thin layers in the area that her lace will be placed right on top of it, then i blow dry it on cool, for it to be clear, go on with the second coat go on with the third and then go on with the Fourth and then, finally, we will lay her lace right onto the glue and then melt it. So you will see that in the next clip. Okay, so now that all four layers are evenly dried, i'm going to pop the leaves directly on where we applied the glue and then we're going to use our blow dryer yet again on cold and press that lace into her skin. This is how you're gon na get that melt. Okay, so we're gon na press it into her skin like and then we're gon na cut the the excess lace off so be very careful here. So you don't cut your your skin or your client's skin. So take your time and cut it slowly and then, whatever um part you miss, you can go in with the glue and your right tail comb and detail and make sure each piece of the lace is laid and melted into her skin. Okay. So you see, these are the parts that i missed when i first applied the four layers of glue, so i'm gon na go in with tiny pieces, tiny dots of glue and apply that four times dry it and apply the second one then dry it and apply Up to four layers then lay that last bit down and melted do so now that everything has been properly glued down, i'm going to use our trusted melt belt from the exclusive. Of course. I will leave it in the description down below, so you guys could purchase it from my website. It'S only eight dollars very affordable, but it gets the job done. Trust me, you will see the results in the end, so here i am using our hot comb. It'S not released yet it goes all the way up to 500 degrees. Can you believe that, like oh, my god, so we're gon na use that to lay the closure flat like we need it to be on flat flat, like y'all know what i'm saying i get me right so now that the closure has been laid on flat flat. We'Re going to be using our barrel curler from baby bliss pro it's the 1.5 um barrel curler. So it's going to give us some nice loose curls. You know gon na give us some body to the hair. You know we want some body in the hair, whatever so yeah. If you guys want a detailed tutorial on how i curl you know in general, just let me know, but this is the results i pinned the curls. You know we don't want it to fall too. Quick and the curls and then sprayed it with our um sebastian sharp um. I believe that's the name. We sprayed it with some sebastian um holding spray. As you can see here, i use a lot so sometimes it could get overwhelming for my customers. Sorry guys! I don't want your curls to hold that's all. So here is very self-explanatory. I let the pin curl sit for um a minute or two, and then i took them out and i'm just gon na comb it out and style it right and we'll see how the end results came about or whatever, okay. So after taking the pins out, i go in with our wax stick. It will soon be released on our website and exclusive.com, and once this was once it's released, i'm going to put the link in the um description box, so check it out and stay tuned. So i put the wax stick to lay all that fly away down and i go in with the hot comb to melt it in and set it in place, as you can see here. So yes, definitely get you a wax stick and a hot comb when it comes out for sure and as you can see, that hair is looking late, the baby here is dead or whatever i didn't show how i did it on on camera. But if you want a detailed video on how i did the baby here, let me know okay and then, if you need any touch up, go in with a um, concealer or foundation color and then pat it in the areas that need it. Um for those who want to know what concealer i use, i use the rk by kiss or rb by kiss. I think that's what it's called in the color 16. That'S the last shade! So that's what i used to this customer and, as you can see, it turned out flawless. So the thing that i'm spraying is a coconut mist from morocco, i'm not even sure, but it's a coconut mist, smells amazing. My customer loved it and look at those curls baby, look at those curls and look at her she's, so happy she's, filling herself, korea that she should here. I am just um using a wide tooth comb, combing, the curls out framing her face and how i want the curls to lay and yeah look how beautiful the curls came out like she definitely loves it. Look at the smile her face. She couldn't get it off. Like look at my little cute self coming into the camera, y'all, don't mind me just focus on the hair: okay, ignore that we were just practicing a little um, a little tick, tick-tock video that we wanted to shoot so yeah. But this is how it came out if you loved it, give us a thumbs up, give us a thumbs up and comment down below what other video you want us to shoot and we will get it right to you and also make sure you share and tell A friend about us bye, guys and see you all in the next video you
Comments
BUTLERU: Looks so natural. You did that
M'Niyah Lynn: Can we get a glueless install tutorial?
Nadia Jean: Hello can we have a detail tutorial how to do the curls please
Mzz Gee: So beautiful