Best Affordable Wig On Amazon | Ft. Iseehair + Install And Review!!!
- Posted on 19 June, 2022
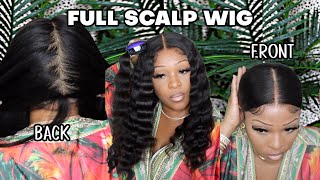
- Closure Wig
- By Anonymous
My first video for YouTube is ready!!! …I am extremely happy to start this journey with you guys …so STAY TUNED !! for more because there will definitely be more to come …latreeeeey!!!
Link to hair: ISEE Hair Transparent Lace Front Wigs Straight Hair 13x4 Lace Front Wigs Human Hair with Baby Hair Pre Plucked Bleached Knots 180% Density Remy 10A Brazilian Straight Lace Wigs for Black Women (22inch) https://a.co/d/
eiqHv9E
Link to elastic bands: Elastic Band for Wigs 3.5Cm Edges Bands with Velco Ends, 2PCS Adjustable Elastic Band for Wigs, Elastic Headband Edge Laying Band For Baby Hair Closure Frontal Wigs https://a.co/d/6JYOWoB
Link to my ig: https://www.instagram.com/tingzfortune...
Link to my snap chat : https://t.snapchat.com/5rGXdFZK
Background music produced by : Brenton Morris
His ig : https://instagram.com/thereal.b_morr?i...=
Hello, my name is shazain hall. Welcome to my channel um things with things, and i was thinking about a hundred different ways of how to basically introduce this channel, but i'm just gon na straight up. Tell you guys yo! I do hair and straight up. I do hair um, i've been doing makeup. Um i've been putting off uploading to this channel because i didn't know how to start an intro - and i was like look today - is a new day, so i'm gon na just get into it. Um, if you guys have any questions for me um, i will be doing a separate video for q, a um, so you guys will get to know me and this channel more and what i would be doing on this channel um just in case i'm not only Gon na be doing hair or beauty stuff, girly stuff, i'm gon na be doing a lot of different other things um. So if you guys are interested, please stay tuned um for more, and i will also try my best to consistently post, because i do have a job where you know. I have to figure out the times on how to get through that, but i'm gon na do my best to be as consistent as possible. Um, as you guys can see. The hair that i will be doing in this video is the hair that i'm wearing right. Now, in this intro it is a week after i did the hair um. I just wanted to show you guys what the hair looks like a week later. It feels really nice um. It'S not crispy dry oily um. It'S really it's still in good condition. In my opinion, so this is what it looks like a week later after i did it. Um enjoy and i'll see you guys at the end so step one. We are going to be using our bw2 powder and our 40 volume developer, and this is going to be used to bleach our knots and get the desired tone that we want. There are other ways to tint your lace. There is tin spray and there's also foundation. If you are not sure if you want to use bleach, i also have my protecting gloves on so that i don't get any bleach on my skin. As you can see, my bleach is pasty and that's exactly the texture that you want to go for when you are bleaching a lace, because it will not run down into the pores and cause unnecessary bleaching into the hair. It'S best to use a butter knife as well to spread the bleach on there, and this is what it should be. Looking like when you are applying bleach to your lace, wig, it will stay in its place and it won't cause a big mess. So after you're all done applying your bleach, you just take a piece of foil press it down into the lace and let it sit for about 30 minutes. That'S how long it took for me to get the desired tone that i want. You could do it for more if you feel like it's not good, but i recommend doing it for about 30 minutes to get your desired tone. So i decided last minute that i wanted to do a skunk stripe. I will do a separate video on how to do skunk stripes if you're, interested and yeah this is was not a part of the plan. So i'm just gon na keep this clip in here just to show you guys um that i'm doing it so that you're not confused. When i show you how the hair looks after i'm done doing everything and like wait a minute that was a completely different hair. So to avoid that confusion, i'm just going to leave this right here. So this is all the hair that came out after i bleached it and brushed it, and this is including the hair that was in the drain. So this is the look that i got after the bleaching and plucking process. I did go ahead and pluck off camera, but i will do a separate video to show you guys how i achieve this look so stay tuned for that, so it is now the next day i did start the hair at 7 pm, which the plucking took a Lot of time, the bleaching took a lot of time. I wanted to make sure everything was nice and you know clear for you guys to see i plucked it and i went ahead and braided the back, because when i install it, i need all that space. All that hair out of my way so right now, i'm gon na go ahead and wipe off all the oils off my forehead, so that when i do this wig cap method, it works the way it should okay. This is a very important part of installing a wig, so right now we're going in with the bold hold, and i got this for my local beauty supply, i'm going to start off with the sides of my head and, yes, i am applying the glue on top Of the cap, because this is the way that works best for me - you do not have to do it this way, but i think this way works better than me using got to be glue, it just stays longer in my opinion, and it's the easiest way for Me to achieve the look that i want your glue should look clear and tacky like this. Otherwise it's not done. It should not look white like on my forehead. It should be clear like on the side of my head: y'all don't come for my glasses or my chomper scissors. Okay, i know they. I know i know so. I wanted to shed some light on this real, quick um. I'M doing this method and i was like, let me show you guys real quick. So basically, this is i'm not sure what this is called, but i saw someone do this on youtube. I don't really remember who which video i was watching, but i learned how to do this method. So, basically, i just cut the middle and cut the sides and left the back flaps. What this does is it keeps the wig cap from coming off when the wig is on. If you do not know how to sew um, you could either tie it on the top of your head, or you can tie the back like i'm doing right now. Here y'all go again making fun of my scissors. Look. I couldn't find my regular scissors, so i had to resort to this. Please spare me today so here i'm going to take my glue and the tip of my tail comb and just lightly put the glue on the edges of the cap so that it'll stay down. So here i cut three sections into my lace: frontal, so that when i glue it down, i could do one section at a time and trust the process. It will work if you do it. This way do not rush this part, because this part is very important. If you're looking for a flawless look, i feel like i really look extremely rough right now, but you know you guys. I just woke up - and i wanted to finish this, so i could show you guys what i could do so i woke up at the crocodile to do this hair and finish these videos. Okay. So if i look rough or run down, it's because i just got on my bed girl, so i got these two headbands from alex, not alex for somebody amazon. I got them from amazon. I will put the link down below in the description if you're looking for bands for cheap. These were about 5.98, i believe, but, like i said, i will have the link down below, so you guys could check that out and they came with two here. I'M gluing the edges the same way i did for the wig cap when the wig cap had a little extra at the edges, so i'm applying it the same way. I did so that it won't lift in the front, and you want to put as little as possible, but enough that it'll stay down, so i'm just going to repeat that same process and i'll be right back with you guys. So so this is how it looks when i'm starting to do my edges. Unfortunately, i do not have the clip where i was doing the edges, because my phone had died and i did have to go later on that evening. So i just decided to you know, continue i'm doing my hair afterwards, but i do have clips of how my hair looks after so just stay tuned and enjoy the rest of the video. I didn't mention this before, but this hair is actually 14 inches, but at the end of the video you do see that it's shorter and that's because i did cut it off camera. I wasn't too fond of the length, so i just bobbed it. So if you see how it looks now, that's not what it's gon na look like later. So so, if you made it to the end of this video, congratulations you're a winner, um, i'm very very, very, very excited to upload this video because i've been putting off youtube for a very long time. But if you guys are interested in this hair, i will put it down in the description. It was originally a 14 inch wig, but i cut it down. I didn't record that part because it was really a last minute decision. Just like i didn't record myself doing my edges like what am i doing or what really, but because of my first video, i thought you guys might spare me so i won't i promise i will do another video on plucking bleaching, um edges, everything else that it Includes you know um and skunk stripes, like i mentioned in the video. If you do not know how to do that, i got you. Oh, i can't wait to do more videos and post it to this channel yeah. So you guys will definitely see a lot of my. Let me not make it sound crazy, um, a lot of my personalities throughout this journey um. I can't wait and please do not forget to subscribe. I thank you guys for actually sitting through the end of this video to hear me ramble on, but with having said, and on that note, latre and i'll see you guys, you


Comments
jazaine hall: Love it
Joliemadam Joseph: Proud of you baby
Dee Noel: ❤️❤️
Josianne Jumpp: Goo mammi ❤️