How To Make Your Closure Look Like A Frontal | 6X6 Closure And Straight Bundles |Vshow Hair✨
- Posted on 08 February, 2020
- Closure Wig
- By Anonymous
Amazon Straight Bundles with 6*6 Closure: https://amzn.to/2OWoKZm
Straight Lace Front Wigs:https://amzn.to/38lufcw
New Arrival Full Lace Frontal Wigs: https://amzn.to/2XIOXP4
Amazon VSHOW HAIR Store: http://bit.ly/VSHOWHAIR
Same Hair In The Video: http://bit.ly/2L2Q2fD
VSHOW HAIR Official Store: https://vshowhair.com/
Use Code: JOINVSHOW, Save $9 for your first order.
Subscribe VSHOW Now:
VSHOW Email:[email protected]
VSHOW Whatsapp & message:+86 186-3740-6595
Instagram:@vshowhairamazon: http://bit.ly/2JJxWi5
Pinterest: VSHOW HAIR Amazon http://bit.ly/2qfoLiW
YouTube: VSHOW HAIR Amazon http://bit.ly/32XIOzN
Welcome to IAmBeautifulHustler Channel
Be sure to SUBSCRIBE & TURN ON YOUR ALERTS
CONNECT WITH ME✨
Personal IG: Iambeautifulhustler
Business Instagram:_Beautifulhustler & @thebeautifulhustlerbrand
Twitter:_Beautifulhustl
YouTube: IAmBeautifulHustlerTV
✨SLAY WITH BEAUTIFULHUSTLER✨
TO PURCHASE MY PRODUCTS :
WWW.iBhSlays.com✨
Lace Melt Adhesive,
Melts Belts,
GLAMWAX
and more ❤️
Have YOU Purchased your LACE MELT ADHESIVE YET?
To Purchase : www.ibhslays.com
✨✨✨✨✨✨✨✨✨✨✨✨
Spanish Mami Proof✨
Puerto Rican Mami Proof✨
Out the scalp proof
Swimming proof
Waterproof✨
Sweat resistant
Adhesive : Lace Melt Adhesive
@thebeautifulhustlerbrand
YouTube :IambeautifulhustlerTV ❤️
To purchase: www.ibhslays.com
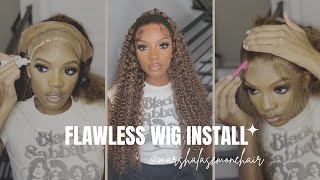
Hey beauties and welcome back to iron, beautiful husband, TV today i'll be doing a 6x6 lace. Closure quick reads: installation with a nice style, and today's hair is provided by visual hair. Now they did send over this 18 inch, 6x6 lace, closure and some bundles up to 24 inch, and they did send over 3 bundles of straight hair. Now, today, we're gon na jump straight into this tutorial, and i do have the unboxing down below. On the left hand, side of this video, so you guys can see what's included inside of this package, but, as I mentioned, we're gon na jump straight into this video. I did go ahead and bleach the nods and I did not plug this lace closure whatsoever. It was pre plugged to perfection, so all I had to do was just bleach the knots and I am going. I went ahead and took some Ruby, kisses creme foundation and level 14 using a darker shade and applied that foundation on the inside of that lace, closure and on top as well. Now this new Lord trick I like to do is after I apply the foundation. I like to add a holding spring and blow dry that - and I do this because you do not want the makeup to transfer over unto the skin, because your lace on that will prevent your lace is sticking if you have any dirt oil or any makeup residue On a lace it would not hold as long as they need to so you want to make sure you do that, so that foundation does not transfer over now. As I mentioned, this is a six by six lace closure and I am doing a quick leave installation, but for the style today I will be doing like a connected link, type of style, and so it will be like parted down the middle and everything like that. So I'm just gon na place that closure in the center of her head and I'm just gon na, go ahead and sew that closure all around as she hold that lace closure down in place, and you want to make sure you do so it from left side To right side completely, so it lays completely flat and also once I finish, sewing that down. If you notice, I did leave the thick flaps one there, but once I actually glue the closure down, I will cut that extra thick part off, so it can be more seamless, but once I get in to finish sewing down this closure, I will begin to lay Down the closure and glue it in everything, so now that the closure is all tied down, I'm just gon na go ahead and begin to cut off then take a little flap that I mentioned previously and, as I mentioned, this will help make their closure lay down. More seamless - and you know nice and neat now - you do want to go ahead and pull that lace up and because you do have like a high-low hairline, you still want to place the lace glue in the full of her hairline and, of course we are using Maya he says, which is that beautiful hustling lace - maybe he says - and you guys are going crazy about it. Yes, it's waterproof. Yes, it's wet proof. Yes, it's everything you needed to be, and it gives you that super super strong hold, and it really knows that lace and - and you guys have been ordering my glue and my arm also my other products like crazy - and I just want to thank you guys for The continuous support we have bigger bottles coming soon and other little goodies so make sure you stay tuned for that now. For today I will be using the little spreader and if you have recently ordered my glue, your package does come with these complementary spreaders. So it's you know nice and convenient for you to apply your glue and spread it out, and everything like that - and I will be using about five layers of this lace glue today for this closure and, as you can see as I applied to one side, the Other side has dried clear so quickly, and this is really a good thing, and this is what you want your glue to look like before you apply more layers, you do want it to turn nice and clear, which less you know is either a ready to be Placed down or ready for you to add an additional layer, so you can add as many layers as you like up to at least seven. So I would say seven layers is the max. You don't want to overdo it with the lace glue, even though you can still remove it with numbers, alcohol or another part of product that I will be releasing soon to you guys. So just you know be mindful of how many lanes you are losing my recommend that you don't exceed setting. But, however, as I mentioned, I did use five layers of this lace glue and I'm just gon na go ahead and pull that lace right into the glue and I'm going to comb and blow-dry on the heat setting and I'm gon na. Put that again, I'm gon na blow dry on the heat setting I'm gon na blow dry on the heat setting, because I get this question a lot a lot, especially in the comments I always use the heat setting whenever I'm doing pretty much anything blow drying blow Out you know just anything I always use the heat setting and, as I mentioned before in my previous tutorial, I learned this little trick from slave our joy in my boom and he applies elastic band before cutting off the extra lace and I actually love this technique. So I'm gon na be doing this technique more often in my videos, so shout out to you boo for this awesome idea. So I just went ahead and took my milk Bell and I applied it on top of that lace and just let that lace melt on in before I cut off the extra lace and I will be using the eyebrow razor today to cut off the extra lace And, of course, I have my melt belt for the meltdown today, as well as that lace, knit adhesive working together to give you the best results ever so I'm just taking that eyebrow razor now and I'm just going to raise off the extra lace and then I'm Also gon na go in with my scissors because, as I mentioned, she does have that high-low hairline and to prevent the lace from being too far down. You just want to apply the glue in the same like pattern to her hairline flows. So, as you can see, the lace is a little higher up in the center, but it comes down on the sides, but it matches her hairline perfectly. That way is like as I, whereas I mentioned it would not be. You know too far down and then I'm just gon na go in with my rat tail comb and just place that lake, smart, adhesive and those little pieces that still need to be tacked down and once I finish applying all of that and push that lace down. Using teeth of my comb, you will literally see that lace like disappear into her skin, and I will also go back in with my melt belt once again and tie that lace down just to make sure it's like extra extra extra melted like to the tee and Then I will go ahead and begin to bonding and tracks in the back for her quick weave installation. So now that all of that is tacked on I'm just gon na go ahead and take my Mel belt once again and just tie that lays down just to make sure it's like super duper. Duper melty like no like guys using my he's in the mail bill together. Just gives you like that oMG the best note that you can possibly get like no exaggeration, and I need you guys to leave me more reviews. I see I'm the reviews that you, you know you guys stayed with my products in the comments but always feel free to tag me, and you know DME text me like I do respond. I do read every DM and everything like that so feel free to just leave any comments. Questions concerns anything like that and I am getting really really close to 70k subscribers on YouTube guys. So I will be doing a little competition and a little giveaway so make sure you guys stay tuned for that and you must have my product in order to enter the contest. So if you one don't want to miss out on this, just go ahead and grab you a bottle of that lace. Mary, he stuff, cuz things is about to get real okay, but moving right along this part. Right here is pretty much. You know easy peasy, lemon squeezy, I'm just a double wedding: the tracks and gluing it, and I do have a full, detailed video already on my channel on how to double a weft, your quick weaves and what that does is allow you to add way more hair To the installation, and also it's you know quicker than just going track for track track for track, you can actually add more bundles when you double the weft and the hair. Does you know seeing fuller when you do it this way and as I mentioned as well, it is quicker, and that way you can have you no faster hair services and not you know beyond one client for to too long some, I always double with my tracks, Especially for quick weaves, I do it sometimes in some ones, depending on how thick the tracks are from the you know, the company that they got the hair from you know or if they don't have enough hair. I just it all depends different situations, but I'm just gon na continue to bond their hair, all the way up to the closure, and you do not want to put the track on top of the closure you just wan na. Have the tracks meet right up to that closure, so everything can just blend and lay as flat as you need it to. As you see that I did here and now, I'm just gon na go ahead and comb all of that hair down and forth of style. Today, it is something I've never done on my channel, so I was really excited to do it and I was getting very much scalp tease natural tease, like I absolutely loved, just finishing, look that I did do so right now. I'M just combing everything out and, as you can see, it's looking super natural super very much like skin is nice and tight is stuck on there. Okay, that beautiful as the placement does not play. Ok, just not play games like the hold is superior, but I'm just gon na go ahead and, as I mentioned, I'm doing a style that I never did on my channel. So I was really really excited to do this today and it's kind of like a arrogant. A inspired look, but I just threw like a little remix on it. He did a style where there was the two little bang pieces with the little old-school twist, but instead of doing a twist, I wanted to do the linked rubberband look, but with that same partying style. So right now, I'm just parting, the hair down the center and I'm just hot combing all of that out. So it is nice to me and flat. So when I do the rubberband connected links, everything just lays down nice and neat, and it's super-super easier for me to work with. So I'm just you know, taking my beautiful hustler, glam wax and just using that hot comb making sure the part is nice and sleek and making sure everything gets laid down to the tee and guys just really take your time and make sure the part is straight. Like you will hate to finish the style and then realize the part is crooked, like it just really throws off the whole entire style, so just make sure that you do take your time and straighten that out and I'm just gon na home. I mean hot comb. Everything till it's flat. I am parting off a little section in the back of the closure to hot comb, the rest of that backwards, and you want a hot comb until everything is flat like it is so so important to have flat installs, especially with the ladies. You don't want nothing to be humpy, you don't want nothing to look like a conehead like the brace underneath play. A major major factor like it is 80 % important that you do nice flat braids, underneath your clothes, your wigs, whatever that you are doing, that requires you putting a lace on top because the flat of the braids, the flatter the install the smaller the braids, the Flatter the insole, so just keep that in mind whenever you are doing lace and that way you won't have any issues whatsoever and, as you can see how flat this is laying and before I hot comb, the back, it did have that hump look. But once I hot comb there, as you can see, it is SuperDuper flat and that's why it's also very important how small Amy you do the braid down underneath and I will do a video for you guys. I will do a dedicated braid down video for you guys for different styles, and you know versus quick leaves and so once, but to be honest, whether it's a quick leave or sullen, I do the braids pretty small, so it wouldn't even matter and even for weeks, But moving right along so right now what I'm doing is creating like a diagonal triangle, my part of the hair down the center - and I did like a triangle from the center on out and I also pull down a little piece that would be for like that. Bang area, and once you part off the triangle section that you want, you just want to create small parts within that section, so I'll just go ahead and make the first triangle and the other two will be more like trapezoids. I guess, because I'm not doing triangle parts inside of that triangle part I'm just uh parting off three sections in each piece. That way, when I connect everything, is you know nice, small parts and not big parts? So, as I mentioned, the first one will be like a triangle and then the other two will be more of like a trapezoid squarish parting and you just want to rubber band those pieces with a little black rubber band, and once you finish rubber band up this Section you want to create another triangle, but instead of starting this triangle, this triangle from the front to back you're gon na start this triangle from the back of the first one and then bring the triangle shape towards the front. So, instead of the pointy part being at the front this time, the pointing part would be at the back and the wider side will be towards the front. But you know it may sound a little bit confusing, but I will show you what I mean once I finish. You know this part here and you will also see once I finish rubber band everything exactly how I part of it like you will understand it. It'S really not that confusing, as it sounds guys trust me now, as you can see. As I mentioned, I started that triangle from the other direction, so they're more than our side is going towards bet and the water side is going towards the front and this section and as you can see like guys, this is very much like scalp. I loved loved loved, his hair loved disclosure, loved just install love to style like this is really one of my favorite looks. Some people feel like it's childish or whatever. The case is, but that does not take away from the fact that this style was a sling. Very, very natural, very dope and very creative, and, to be honest, this is a style that a lot of people are wearing now. A lot of the old throwback styles are coming back into style. So let's just keep that in mind. It'S just like history repeats itself. Styles, come back out, clothing come back out, shoes come back out was just a big psycho and rotation of just the way our world works pretty much. So this is like, and you know, a throwback, a look but we're just adding some loose or flavor to it and I absolutely loved it loved it. But once I finish you know rubber banding. All of these sections. I am going to connect all of them together to go straight back and then I'm going to UM hot comb, the opposite side. How cold this side, I'm sorry and just flat on everything and then create the baby hairs for this side. And then I'm going to repeat the same steps to the other side as well. So what I'm doing now is just connecting the first rubber band to the second rubber band and then the second to the third. So just have one piece of hair all together. They just want to connect the first to the second and then the first and second will be connected to the third, and that's just pretty much simple. How you just connect all of the links together to just make it one very, very simple, so yeah it's pretty much explanatory, and I'm also showing you here how I did it so once I do all of these sections and rubber bands, I'm just going to connect Everything straight back as I'm showing you right here, and here was the finishing look once I finished, connecting everything it is so freakin cute, and I had to remind myself so many times that this was a six by six lace closure I kept thinking. I did a wig I kept thinking. I did a frontal, like I totally forgot that this is the closure and that's how much space this closure takes up and that's just how dope this installation was, and now I'm just going to go ahead and Hawk home everything down making sure it's nice flat and Neat and then I'm just gon na add two little swoops for the baby here, because even with the baby here, I forgot that it was a closure, and I was gon na - do baby hairs from ear to ear like it was the frontal, and then I had To remind myself like girl, this is a six by six honey and you definitely slayed it. So I'm just gon na put out a pickle. I mean a thin little section from the front of the closure for my baby here. I just want to chop that down and just you know, soup, that baby here, just nice, quick and simple, and I did not use any black spray today to like do the parts or anything like that, and I didn't even consider the parts because I loved how Natural, the results were with this style and I love the quality of this lace closure. So the show you did them thing that just hair okay, like I have not one complaint. I have no complaints at all about this hair, so make sure you guys go ahead and check out the description, details and the cute punk holes and get you some of this hair. I absolutely loved it, as I mentioned like. I have no complaint, but this is pretty much the finishing look. Let me know what you guys think down in the comments. Do you like it? Yes or yes, notice? I did not say no. Yes, sir, yes and I'm just taking a little of that heat protectant as a washing and just shining up the hair, and I have a two little bang pieces there, and this was definitely her birthday, slay. So yeah, let me know what you guys think down below. Thank you guys for tuning in to iron before us, the TV, and I will see you guys on the next tutorial.


Comments
Carline P: I love how down to earth you still are & your work is beautiful!
Lamarea Live: I love your video I can’t believe that you did that with a closure. Good skills
Amber Skye: I have a 7x7 and it got me leaving the frontal game alone lol
Jamilla Worsley: This style is dope!! You definitely slayed this style
Yumba Luvarro: You are sooo talented sis!!!! I need you to do my hair!!!
Princess Toyia: You slay every hairstyle that you lay you lay your hands on
Reall. Semahhh: I am going to try this I love hair videos ❤️
Efinity Atkins: Could you show the braid patterns for your closure sew-ins?
Tamyah Young: Yessss please do the braid down video! For a Sewin
Nancy B: Oh nah with a 6x6 closure?? Girl you bodied this
Killaxflow: Very beautiful work
A Daniels: You ate this up this came out so cute.
cece Rene: Can u do another curly lace closure and bundles ❤️
Yumba Luvarro: This legit is amazing!!!
Sweet P'zzz: I love...love...love your work!
Anuli N: Girl!!! Been waiting for this video for ever
Jock Talks tv: She stay fly and you keep her on point
Lifesizebarbiestacy: This is pure
Mikayla Franklin: How far up do u place you closures In front of the cap
iesha monix: You slayed this hunty good job
Kay kay Smalls: I am feeling tht I see you're in Miami, I am abt 4 hrs away. I gotta make a trip. Tht install is everything
Lavinieaaa: Lol I’m scared to order this hair off of amazon. There’s only 4 reviews
Towonda Grant:
christabella201: Looks gr8. So to enter your give away your subscribers have to buy something from you??????? Is this right....or maybe I'm just not understanding.
Renee J: Bomb
NVR12345: Omg I’m so mad at you, your lace glue sold out