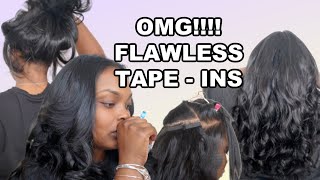
6X6 Closure Wig Install | No Baby Hairs
- Posted on 21 March, 2020
- Closure Wig
- By Anonymous
Thank you for watching, please like and subscribe!!
I forgot to mention this is the hair in its natural body wave texture.
Hair: https://truegloryhair.com
Closure: https://amzn.to/39bMTn6
Some of the links provided contains affiliate link
Email: [email protected]
Instagram: Verdlynn
Welcome back to my youtube channel, it's a girl, devynn, and I will be showing you guys how to apply a 6x6 lace closure. This hair is by true blurry here and have a 6x6 closure with some straps attached to it, an elastic band. I will just be putting that wig on my head and yes, I did make this wig myself and now the closure is not from true glory here. I did get this closure somewhere else. They do now. All first takes place these closures, but I bought it before they did so I'm just going in and I'm just playing with my part just getting it to where I like it. Now I'm just going in with some alcohol in the cotton swab, and I am just applying that to my scalp to get rid of any dirt and oil that may be on my scalp. So that way I can have a flawless application. Next, you want to clip that hair back and just really just get it out of your way. So next, I'm going with some bold hold lace, glue and a popsicle stick, and I will just be adding some dots onto my scalp or my forehead and I'll. Just be smoothing that out you want this layer to be as thin as possible. There will be some glue that does stay on that popsicle stick, but that is okay. You want this layer to be thin as possible and before you play your next layer, you want to make sure that this is completely dry. Since I'm impatient, I've decided to fan it just to help speed up that process, but it does become clear, very quick and the key for it to being that clear is making sure you have a thin line. I cannot emphasize this enough, so I'm going and again and I'm doing the same process, and I will be repeating this process two more times. You know I I personally just go up to 4. You can go up to 5. So after you do your 3 to 5 layers, you want to pull that wig forward and just start to attach it. I like to start in the middle before I do my ends, so as you guys can see it did that and I'm just further just making sure that it is where exactly that I want next you're going to take a clean comb. I suggest that you guys use whatever left over alcohol that you guys had on that cotton swab and just apply it to the teeth of the comb. So that way, you can further press that in as I am doing so that way, you don't get any oils on your glue. So next I'm going to take a edged brush and some gots to be blast spray, and I'm just brushing back my edges just to make sure that they lay back flat, I'm really over the baby hairs um. If I'm gon na put on a wig. I want that joint to look natural and me personally, I don't do my baby hairs every day. This is the very important step. So after you finish doing all that, you want to spray some of that that spray, on top of your hairline directly, where that lace and your skin meets just because that will further allow that lace to be flat and melted. I cannot emphasize this enough next, you want to take anything that you have a scarf, I'm using I'm some silk wraps and I'm just going to tie that around my head and just let that sit for about 30 to 40 minutes now after 30 to 40 minutes. I am going to just take this off and you want to be very gentle with this, so that way you don't cause your lace to lift. So, as you guys can see, I'm trying my best to take this off and voila it's off. So next, what we're gon na do we're gon na take off that excess glue and we're just gon na use some alcohol and a cotton swab just to do that process. So once that's done, you want to go on with some makeup and really just further make that hairline look as natural as possible. So max I'm just going in with a curling iron. You could use a flat iron. You could use a hot comb meep. I prefer to use this and I'm just making sure that my hairline is as flat and smooth as possible when it's starting. You don't want that hair to be bulky, I'm just going into the hairline and just doing that same thing. Where my part is you got to be very careful in this step, so that way you don't burn yourself. I know it looks like I'm very close, but I do this so much, I'm very quick and efficient with it. So now I'm just going in with some makeup, but I'm just going into that part just to make it look as natural as possible, and I'm going back in with that brush. I didn't spray any more spray on it. Whatever'S left over I'm just using that. Just so, I can tame any flyaways that may be there and y'all check out these curls. This hair is so beautiful. This is how the hair looks like after it has been washed, and I hope you guys like this video, please like comment and subscribe and just stick around and watch a couple more videos. Thank you.


Comments
R0yALtyS: Cute & quick!