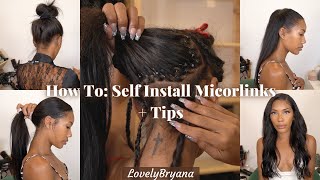
6X6 Closure Wig Install | Frontal Effect | Voluminous Curls
- Posted on 05 January, 2021
- Closure Wig
- By Anonymous
Hey guys so lately i’ve been installing my own wigs and they have been looking amazing. Watch this video to see how I melted this wig and achieved these voluminous curls. Hope you enjoy!!
——————————————————
KEEPIN UP WITH NORRASIA B.
MAKE SURE YOU LIKE, COMMENT, & SUBSCRIBE‼️
——————————————————
CONNECT WITH ME ON THE SOCIALS
INSTAGRAM-https://www.instagram.com/norrasiab/
TWITTER-https://mobile.twitter.com/nnabx_
———————————————————
✨STAY TUNED FOR MORE VIDEOS ✨
*IF YOU MADE IT THIS FAR TURN ON POST NOTIFICATIONS *
I DO NOT OWN ANY MUSIC IN THIS VIDEO
What'S up, what's good, what's popping you two, it's your girl norwegian, norisha b, whatever you want to be, and i'm back with another freaking video now i know y'all wondering why am i on my ball, hey ho she i'm about to put my wig okay. So if y'all want to learn how to do this ball cap method, um go to my video i'm gon na either. Have it right here right here, but i'm gon na link the video for the ball cap method in this video, but i'm installing well reinstalling. This wig that i got um years ago. It was black. I dyed it to burgundy. Now i don't know if y'all want like a little video on how i dyed it, this color um, i feel like i might - should do a video like that. But if y'all want a video about how i achieve this color, then let me know other than that we're going to get into me reinstalling this way for, like the like, four or fifth time. I already did my ball cap method. So now i'm about to just brush this wig out. Okay, so that's probably good so um yeah! This is my wig adjustable, strap um. This was hand sewn um, not by me, but it was hand sewn um. So i'm just gon na probably do a middle part with some curls or something like that so yeah, let's just get into that um, i'm only going to be probably wearing this wig for a week or um a few days a week in a few days. So i'm not going to put several layers of glue on. However, if you want to wear your wig for several days, i mean several weeks at a time. That'S when you keep applying and applying and applying glue. So i'm only going to wear this wig for about a week, so i'm just going to put on like one and a half. Can you even put on one and a half layers? Now i'm just i'm probably gon na put on like one thick layer, then a second layer, that's real thin, so the glue i'm using is the ghost bun glue um, i'm pretty sure. If you know about wigs, then you've used this before so i'm just going to apply it over top of my kit. So i used to when i was a very much immature at this process, but i'm getting better over time, but i used to like put it right here like right here and it was like dumb. So now. I'Ve seen that people like put it like above, like on top of their lace and then blend it out, just take a moment of silence for my ball. I can't mess it because, like it wasn't looking like this before it wasn't anyways. So i'm just going to put some glue on top of my lease, not my least my cat, so i'm just going to put it on top of the cap and i'm not going all the way down, because the wig that i have is not a full frontal Lace, it's just a 6x6 closure, so i like the 6x6 closures because it gives you that very much frontal look without it being all the way down here so which i'm going to lift these tabs up, because i don't need them all the way down here. I'M covering everything but yeah i'm going to apply this glue on top of my cap and then i'm going to blend it downwards so that it can cover. So i'm going to take my little look: i'm not going y'all raggedy raggedy, but i'm going to take this cone, i'm going to blend it forwards like that. Okay and this first layer i did was very thin. So i'm definitely probably going to do the second layer. Very much thicker, but yeah i'm going to blend that out, and this helps me get that that natural look, because for some reason i don't know why. But y'all wigs be all the way down here and your hairline is all the way back there and it don't make sense, so it don't be looking natural and it's like if your natural hair is back here. Why is your wig right here? I don't get it. It gives very much hat so anyways we're going to put that in like once. It clears that's why i don't. I don't really need a blow dryer right now, because once it clears i'm on to the second layer, so once you see that it's clear and not white, no more, then you could just apply the second layer. So i'm going to apply the second layer layer a little bit like closer, so i can blend that out a little better and then i'm gon na blend this one out and then it's gon na be about that time. To put my wig now, this one's gon na take a little bit longer to dry, because i apply a little bit more. However - and i learned that when you apply the glue on top of the cap - that's how your cap doesn't slide back, because i was having a lot of problems with when i would have my wig. It would start sliding back after a few weeks, and it would look still look good but, like i don't want, i don't want to have to take once i take off my wig. I don't have to take off my cat if i'm going to put another wig on if y'all get what i'm saying but yeah. So once it dries clear, then you're ready to put on your wig um and i'm putting most of my glue on the front. Because that's the part that i've been having some trouble with and that's what i'm going to focus on and this wig i have then the glue bliss with just the got to be glue spray um when my glue starts lifting or when my glue starts to you Know wear off! That'S when i started using my got to be glue spray. So now i'm just going to put my wig on in the back, but now in the front and just continue to let my um my glue dry. Okay. So, as you can see, i have a 6x6 closure look how far it goes like that's, giving very much frontal, and i would highly suggest you guys who just because i don't know when i had frontals, i had them like. I had a frontal once i believe, once or twice and the ear tabs they kept lifting like i kept having to like re tack them down. So that's why i'm, you know just became interested in the six by six closure, because it gives that very much frontal. Look and y'all will see, because i can do my edges and i don't understand why y'all still doing fronts like i know all right. So the thing is, if you're going to be doing all them. Styles, like ponytail, half up half down side, part middle part. Whatever get a frontal, but if you want to be like someone like me who just wants a middle part or a side part then just get a six box exposure like it gives the same effect. So i'm just going to blend this little bit of glue that i don't want to blend yeah and just in a few seconds it's going to be clear, um, i'm going to make sure i take my clip and put this here back because yeah i don't want Any hair sticking on my um closure, while i'm trying to take it in okay, so it's almost about that time to start attacking, so i'm just going to start with. I just pull it down a little bit and what i'd usually do when reapplying my wigs, i try to just do section by section when i'm trying to take it down. Okay, that's the easiest way to go, because if you try to put it all on once it ain't going we're getting okay, so first i'm going to start by pulling down the middle and then i'm going to do the sides. So that's where my middle is okay, so, as y'all can see this little part right here is lifting up like just a little, so i'm gon na apply some more glue right there. Oh yes! So for this particular look, i'm going to just pull out a little bit of baby hairs. Um before i put down my elastic band and not a lot like. I already have like baby hairs already made for this wig because i already wore it so yeah and i don't usually do baby hairs right here. I just do baby hairs like right on the side a little bit, i'm going to take the baby hairs. Oh, as you can see, okay, so while that is my elastic band, is laying down my hair and getting it super flat, i'm just going to start by styling, so i'm just going to brush on my hair. So, as you can see, my part is already basically done because i just had um this wig on, so my part is already done, but to define my part a little bit. I'M going to take this lip color that i got from la colors. It'S this color um, so it's close to my hair because usually i would use some spray. But since i can't use that because my hair is burgundy - well, not burgundy, but like red um. So i'm gon na just use this. So i'm just gon na put that on little parts of my hair that need to be touched up and then, in the end, i'm going to add some um holding spray so that color will stay so that just did that um! You can see it helped to find my part now. Next, i'm going to add some a lot of body moves onto my hair and then i'm gon na start brushing it to get it like flat and then i'm gon na um begin to um. Add some serum and flatten this to my finger. Okay, and i see that my parts um needs to be a little bit defined, so i'm going to use my other brush to deform a part all right that really just helped, like my part, looks super straight now. So i'm just going to brush that a lot a lot of body through my hair to get the top super flat and now i'm going to add some. I got some salon. Color restore it's a color protect system, top coat serum um, it's by professional hair luxury. The songs paris is, this is color correcting. I mean color protectant top coat serum, so i'm just going to put that on my hair and it gives it like a nice shine. So i'm just going to put that through my hair, all through my hair, all through my hair top. You know you definitely want that shine finish to your hair and then i'm going to add some some flat iron protectors and straighten. And this and it's a hit key protectant to give it that sweet finish just a little bit so after that and i'm gon na brush that through and while i'm brushing it, i'm gon na blow dry it. So what i'm doing to my hair today and i'm going to give it some some curls, and i want that, like big volume, voluptuous look! So i'm going to brush that through because when you blow dry your hair, it gives it that it gives it some body and that's what i want. Okay. So now, i'm going to take off my um elastic band and see how my hair has leave. Okay, oh wow, okay! So, as y'all see it's like laid down, and now i'm gon na take um my wax stick and i'm gon na put that on my hair and flat iron, the top and you just flat iron in the direction that you want. Your hair and be very careful all right. Let me see okay, so that's good! Now i like the little volume, look up here, so what i do is i take my hot comb coming back, because you want that lace to be looking like perfect and yeah. I'M eventually going to take off these tabs. So don't say nothing about that, but yeah take that and then what i do is i take it. I twirl it and then i do like that to get that like volume up all right so and then i comb it down. If i don't want it too much volume, i comb it down with the hot comb like right there in the back, so i'm gon na show y'all get on this side. So what i do is i hot comb it back and then i take it twirl it and then brush it out and then that's how i get that. So i'm going to use the lighter body on my edges as well as this other spray line body for shaping spray for holding. So i just use a little bit. You don't want too much because mousse has water in it, which causes your um face to lift. So if you ever wonder like, why is my lease lifting after, like you like, applied it now, if you use a mousse, that's why so i'm just moose for me is for shaping, so you might have to do a thousand times to get that perfect, like baby Hair look and then once you get it because like to me that looks fine. Some of this - it's not even supposed to be in here, because i don't really like baby hairs right there, so i just put that in there but yeah. I just keep doing this with the brush and the comb is like really performing, but the brush i feel like, helps get that down smooth baby hair look, so i just do the brush like that for a few times until i see something i like is: oh After i tie that down, i'm going to add some curls to my hair flip it at the end right in the middle, then start rolling it until it's all the auto roll through and i'm gon na start bringing it up. Ciao and y'all be careful with this color cause it get like dumb hot, but this black part not hot, and then you just hold it hold. It i'ma hold it for like um like 45 seconds, and then after you hold it. You scrunch it up. Put some glittery glue spray on it and then yeah okay. So i'm now just about finished um curling, my hair. So i'm going to spray it and then i'm going to um brush it out and do the finishing touches and then it will be open and i'm not going to brush them out too much, because i still want to look like. I have curls, but i am going to brush them out a little bit to get that volume that you know we love to see and um once i brush them out, i'm gon na go back and form them again, so like form them - and i do have Um some layers in my hair, so yeah, okay guys. So this is the finishing product and the final look um. I hope you guys love it like i'm. Definitely filling this color. I love it so much if you want details about the color, don't forget to add. In the comment section - and i will definitely make a video, if you guys want that, um also just know that these curls took a nice little bit of time, but it's very much effortless and it's a thousand ways that you can do hairstyles at home. I'M just trying to help you guys, look fleeky um, just in case you know your hair salon might be closed during this time. But yes, it came off so good and it looks so amazing and i love how these curls are just bouncy and full, and i got that look like guys. This looks amazing and look at that ombre effect on this color. So, yes, guys don't forget to like comment and definitely subscribe to my channel um. I will be trying to do more videos like this and i hope you guys enjoy this video so much and definitely go subscribe. Oh
Comments
serenity fashion: This came out so good and I love the color. I would love to see how you got that color