Easy & Quick Guidelines For A Flat Closure Wig || Beginner Friendly
- Posted on 06 December, 2019
- Closure Wig
- By Anonymous
Wig Block- https://www.amazon.com/dp/B00W1BT1GU/r...
T-Pins -https://www.amazon.com/dp/B01NCSQCKQ/r...
Mesh Cap- https://www.amazon.com/dp/B00ZK4QMR6/r...
Metallic Sharpie- https://www.amazon.com/dp/B00009RAX4/r...
Chalk Marker- Dollar Tree
Measuring Tape- https://www.joann.com/prym-dritz-tape-...
Tail Comb- Beauty Supply
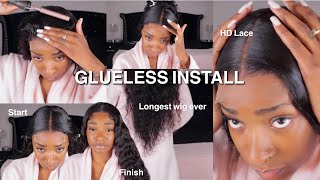
Hey guys, how you doing is this your knees and I'm back with another video. This video here, I'm gon na show you guys how to create your guidelines on you for your lace closure week, so you can create flat flawless, no hump looking week. So here I have my mesh dome caps. I got those from Amazon everything I use in this video I'll link it below here are some T pins. You get those from Amazon as well or your local beauty supply store, and I have a sharpie metallic marker and a metallic chalk mark mark. I got from my dollar store and my tape measure and a hair clip and my canvas bike. If I haven't mentioned that you need one of those I'm working with a 22 inch once a day and my tail comb. So here I am gon na take my mesh dome cap out of the package. I'M gon na place it on my canvas back on my wig back whatever you want to call it um. I use a mesh dome cast because I feel like those are the best options for me personally they're breathable stretchable. You know when you wash them, they don't take too long to dry. So that's my reason why I prefer those over that, but is used. It'S up to the customer if they want a tomcat mesh cap or the cap with the plastic in it. So here this is the back of the mesh dome cap. You'Re gon na go ahead and place that towards the back. That'S the part that goes in the back on your canvas block, so here I'm a place: the mesh dome cap on the wig block and I'm gon na put it where Widows black dots were so that is my hairline to Nate measurement. So I'm gon na line the front of the dome cap with the front where I have that dotted and then I'm gon na align it with the dot in the back. So the reason I have those dots because that's my usually my most frequent measurements - that's the average head size head front to Nate measurement. So I just went ahead and marked if I don't have to measure it out each time. So I'm gon na go ahead and take a tee pin to secure the cap, so does it move or slip? While I'm doing my guidelines and I'm gon na adjust the cap to where it is nice and flat and it's no extra cab, it was extra crap. I would have to show that cap out and I'll make another video now, if you guys want me to matter-of-fact comment below, if you guys want to I'm gon na, go ahead and take my tape measure now and I'm gon na and that's my lace closure. I'M gon na be working with today. I don't even know where clothes came from its clients. Cuz you're sensing me so I'm gon na take my tape measure and I'm gon na place it on in the center of the dome head. So I'm going ahead, I'm just to my cat, make sure it's nice and where I wanted to be excuse me at least the camera means I get all the ingles. So I'm gon na go ahead and take that and I'm going to place it when the sensor of my cat up my dummy head just like that in the middle I am going to pin, I usually pin the measuring tape a half an inch to an inch Above the line of the dome cap, because I usually place my closures about a half an inch to an inch above the line. So when you're, when you cut the cat from underneath when it's on for your client, so where the unit the caps not showing you and the client has enough lace, so there you want to make sure the tape measure is laying flat down the center. It'S not lumpy, it's not sliding anywhere. You want to make sure it's secure, so I'm gon na go ahead and take the pin a tee, pin and pin that right there in the back under sensor. So this ensures that my spaces, when I make my tick marks for my spaces, make sure I have even nice spaces for my guide line. So we can have nice even tracks and no gaps in our tracks when we're sewing them down. So first I'm gon na i'm working with a 4x4 inch closure, so I'm gon na mark where the closures are gon na stop. So that would be at the four inch mark. So I went ahead and I marked that so that gives me that insures the amount of space I'll be working with in the back, if I mark the first four inches out. So that's off limit just like that. Now I'm gon na go ahead in the back. Here and like I said before, I'm gon na be doing inch inch 1 inch spaces between my track, so I'm gon na go ahead and mark the 14 inch verse. So that's where my first line is going to begin when I draw out my full guide line. So I apologize my hands in the way, but in a few seconds, you're gon na see what it looks like so you're gon na mark at each one inch line, and you don't have to do one inch spaces. But it is recommended when you are using a sewing machine method, because I don't know if you guys know what you guys are beginning here. So, if you're yeah, if you're excuse me, if your guide lines are too close together, the cat will wind up being too small. But sometimes you have a lot of track. You can, if you don't know how to W choice, you could do half inch spaces and that would still be fine, but you just have to make sure your caps not shrinking while you're sewing so 1 inch guide lines. Is the ideal amount? So there you go. You mark are your tick marks and they're gon na look just like that, and now you can remove your tape measure. So here I'm gon na be pinning down where I wear my lace. Closure is gon na be. If you already know how to do this step and it's redundant or dirty or you know whatever go ahead and fast word, fast-forwards a timestamp 1 minute 19 seconds. That was where I continued to show you exactly. How are the guidelines out? But if you don't know, this might be a helpful step for you on how I pin down my lace closures to sew them down by the way, if you guys want a detailed video on how I pinned down my legend coaches and sew them down, so they Won'T be flat and lumpy and humpy, so you have flawless place close your wig comment down below and I'll definitely make that video for you guys, I'm here to help. I want you guys and successful wig business. I want you guys, have beautiful professional, looking wigs and that's what I'm here for to extend my knowledge to you guys, I'm self-taught and it's been a long time coming and I just want to help others. You know jiu-jitsu and get the bag so comment below. If you guys want me to have a detailed video on one that so if you watched the part where I paint down the police closure, that's what it looks like compared to your tick mark that you made so now we're gon na go ahead and start creating Our guidelines guys so go ahead and grab your sharpie marker or your chalk marker and go in so here. I know I have some guidelines already made, but don't pay attention to those just pay attention to this step right here. So I want you to go ahead and make straight lines across the sensor of the cat, so just like that, just extend it. If you see where those two stitches are in the middle of the cap or in the cap, go ahead and draw from side to side and those lines, try your best to keep them straight. You can pretty much get a steady hand by laying your pinky finger on the canvas box to give you more of a steady hand, or you know just take your time and make sure you get a straight of a line as you can cuz the Shred of The lines are straight of your stitching and the more flattening your waist kind of look. So just follow my steps. You also want to use a light hand with this. You don't want to do it too hard. You don't want your lines to be too thick as well, because that also can throw it off your spacing a little bit so just go ahead and use a light line by hand and just make fine lines. So when you're all the way through. That'S what it's going to look like so here I erased all the lines on the sides and get a first start, so you got to get a visual of what it looks like so now, you're gon na take your chalk or your marker and extend the lines To the band and in the band of the cat here I want you guys to pay attention that I am making a slight curve downward just a slight one. But if you went and did the lines directly across, you will get when you reach the top. You won't have enough space to make lines so pay attention. Is that you see how I am slightly curving the lines downward not too much of a curve, but slightly and don't worry about the lines being super neat again, the more you do it, the neater. They will become and they're just guidelines. So that's the reason I like to use the chalk market because the guylines washes away when I wouldn't wash the wig when I'm complete with it. Verse is the sharpie marker, where it's permanent. You always see the lines. So when your customer, your client, looks in your cap, they see the guideline. I feel like it's kind of tacky, so I would recommend you get a metallic chalk. Marker first is the permanent marker. So just go ahead and mount you can mount your hand or if you already have a steady hand, you just go ahead and take your time and draw those lines, and you want to make sure when you reach the edge of the cap on the band. You want to make sure there is enough space right there as well between the lines you don't want them to be on top of each other, because I also recruit a sloppy looking. Wig and it'll be lumpy and not neat, and it doesn't look good, so just make sure you're not overlapping the lines they will come kind of close to each other sometimes, but it just makes you have enough space. So when you're sewing you're, not you know doubling the checks on each other, so this is what your guidelines should look like so far, so neatly space. You know not perfect, but it would do so here. I want you to pay attention. I am. I have four lines left, so I am gon na go to the second line and I'm gon na draw my line out from there. The reason I do this is because sometimes it's like dummy proof, sometimes if I continue to do the lines in order when I get to those last ones, I don't have enough space. In my cat I mean I'm not raising my cap to draw a line. So now I'm confused, so I always go ahead and do the second line. When I'm down the four lines. I always do the second one from the top, because this would you know basically show me how much space I have left to draw the lines in between those just go ahead and watch what I'm doing so now you have those two lines left and now you See how much space you have to bring them around so now, you're gon na go ahead and go back to that fourth line from the top and go ahead and draw that line boom. Just like that, you see how neat it looks and there's still enough space. It'S nicely spaced and I'm not overlapping any lines. So that's like a foolproof way of making sure all your lines fit and they're neat and yeah yeah. I got the picture so do the same thing on the other side boom. Just like that. So now I'm gon na draw out my closure, my closure line. That'S pretty much the track that I will be using to close, be closure up. That'S basically my finals, the finalization line. That'S when I reached the finish line so that I'm gon na go ahead and draw that line last and make sure it lines up with the closure nice to me just like that. So now you have all your drunk lines drawn and that's how it's gon na look. This here provides the foundation to a nice laying flat closure. We, like you, know flat sort of gods. Now here I'm going to take the clothes off, so you can see exactly what it looks like without the closure. I didn't sew down the closure in this clip, but um. This gives me an opportunity. If I you know, if you're the one that don't like to start with the closure on, you can still take it off, but you still have the guide line so where the coach is gon na be so when it's time my sort of clothes on in the End it fits perfectly like the perfect puzzle, like you know so, boom, that's what it looks like. So if you made it to this point and if you enjoyed this video and there's something that it's helpful guys please like comment and subscribe, I really appreciate it like. I said earlier, I want you guys to win in this wig business. It'S enough point I here, for everybody is enough bag for everybody, and I want you guys to be successful. I will be coming with a full how to make a closure wig on a sewing machine series. Soon it's coming it's coming to come in so anyways like I'm gon na subscribe, and I see you guys later mwah you


Comments
Brooklyn Griffin: Finally !!! Someone who explained how to place the lines on the wig . Thank you !!
Reyanna Robinson: soooo detailed, love it ❤️
kristin mann: Omg! Thank you so much! I messed my first time. I'm so glad I found this!! Now all I need to do is learn how to stop my thread from breaking!
cici jones: Would definitely love to see a video on what to do if you have extra cap.. Not many videos out there... Great job on your video...
As Told By Lee: I love the video how do you calculate how many lines you need for a standard Bob closure wig only using 2 bundles?
Allie Jussaume: Very informative. Now I understand and can mark my wig cap. Thank you
Shirley Compaore: So detailed!! Thank you
Mika Torres: Awesome! Finally a great video on this. Can you also do a video on how to prevent the wefts from rippling up when sewing them on the wig cap on a sewing machine?
Lynette Sandy: Hi am Lynette, it's my first time looking at your channel, and I must say very well done, good teaching. Thanks
Jay Kabba: Hi! What an amazing video. Thank you for sharing. I’m just curious to know the top 2 lines are they 0.5 inches apart? And if you were creating a small wig does the 1inch apart rule apply to medium or large caps?
black ivy: Thank you so so much! Very helpful
Mia Green: Yes, I would like a detailed video!
mimi j: Thanks great job!
Diana Miller: Hi Shanice can we put single wefts on the cap instead of doubling the wefts?
Shan _: when you sew in the elastic band of the cap does that make it harder to put on your head? Im afraid if losing the elasticity if i sew all the way across the cap
mimi j: Can you do outline for frontal for 4 bundles?
Apryl Mickles: Great Video, can I use this guideline for hand sew wigs as well?
Melissa Mills: Would the guidelines still apply if your using a hot glue gun instead of sewing machine?
Diana Miller: What kind of thread do you use on the sewing machine to sew the wigs?
Hair with Mo: Lol your window shadow already gave you the perfect guidelines at the sides. This video was helpful. Thanks a lot ❤️ new sub!❤️
kwalegha Bassaagi: Wow...all I needed ..thank u
Betty Johnson: This what I need thanks for this video
Abronomah Sikawofie: Thanks for sharing ❤️
Jada Pearl Sings: This is great♥️
JadaInesse: Hi! What happens if I made all the lines but then I run out of hair. What do you do ?
Faith Nieketien: Is mesh dome cap better than the stretchable spandex? I use the stretchable spandex but notice after a while it becomes loose
sigourney sylvester: Thank You
Diana Miller: I am wondering why it is when you cut that piece from under the closure why is it your wig gets bigger?
Diana Miller: I am wondering why it is when you cut that piece from under the closure why is it your wig gets bigger?
Money mike ingram: Shanese where do I purchase hair from you ? It’s always so pretty . (Using husband page lol)
Sherry D Lewis: Thank you!
Tamica Bullard: Thank you sis
Parie Trap: yesss please if i may beg , show us how you cut and trim that back lace
Shanequa Shuntay: I use the same chalk pen the sharpies come off too light
casseyboo89: Can you please do one for frontals? People be capping in their descriptions but never really show us how to draw lines for that.
159hrd: Love video but need you to make me a wig. A short one for a small head.
Breanna Smith: My lines are driving me crazy.