Shake-N-Go 100% Unprocessed Human Hair Closure Cap Body Wave 12" (4X4) --/Wigtypes.Com
- Posted on 16 November, 2018
- Closure Wig
- By Anonymous
SHAKE-N-GO 100% Unprocessed Human Hair Closure Cap Body Wave 12" (4x4) --/WIGTYPES.COM
https://www.wigtypes.com/100_unprocess...
COLOR: NATURAL
STYLE: BODY WAVE
2.25X4.5 CLOSURE CAP - 12"
https://www.wigtypes.com/100_unprocess...
BODY WAVE BUNDLES- 14", 16", 16"
https://www.wigtypes.com/100_unprocess...
“INSTAGRAM: @WIGTYPES”
”Visit: http://www.wigtypes.com"
“Music: http://www.bensound.com/royalty-free-music”
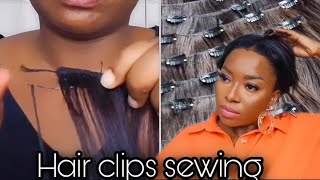
Hey guys welcome back to the channel, so today I have a pretty exciting review for you guys. This is not a regular rig review. I'M actually reviewing a closure cap. Yes, you read it right close your cap and I've been excited to review this for a while. Now so, finally, I got the chance to review it and basically you get okay, you know what you're making a wig right. You have to get the wig cap or the dome cap or a mesh cap. Whatever cap you use, and then you have the closure and you have to you - know, sew it on and all these things this is great for beginners, because it makes it so much easier. You basically get the closure already on the cap. That'S why it's called closure cap, so the closure is already added on to the cap. You don't have to do that. Don'T worry about it and I make a lot of wigs right for myself. Yes, so um one thing that used to challenge me when I first started making wigs was actually attaching the closure to the cap, because sometimes it's like a little bit bulky. If you don't do it right, you know like, and it takes a little bit of tool. Look at that much time, but it takes time you know to line it up right and everything like that. So basically, this is already done for you, which is awesome right. So, first of all, we have the full by full closure cap, and then we have like a regular closure cap before my localizer cap. You guys know for my, for just means you get at least, and you can part it wherever you want to that's perfect right and then you get a regular closure. Cap mean, and it comes with an actual part in the wig. Yes, it comes with a part in it, so you can. Actually you don't have to hide it wherever you want. The part is already there. You can shift it if you want to, but the part is already there. So it's up to you. If you want a four by four closure cap - or you just want a regular closure cap with the part already there, you know they make it so much easier for us - oh, oh, my god. So, first of all, let me talk about that. The closure on the cap right so the closure on the cap. You get a pre, fluffed hairline, so the baby hairs on there. It'S pretty long, the baby hairs, but it's it's good because you can always customize it. You always cut it down and stuff like that. Just customize it you guys see how I did mine. I think it's pretty like this. I really like that, and I use the 4x4 closure cap I'll show you guys in a little while I'm excited but I'll show you guys what I did to get this pretty little look soon. Also, the hair on the closure camp is body wave, so keep that in mind is unprocessed, so you can die on bleach and stuff like that and let me go into the cap. No, so basically, the cap has a stretchable mesh net material. It'S well ventilated, so you can. Your here gets the breathe and stuff underneath and it has like a little stretch to it, which is always great. They come with two cones up front one at the back and you have an elastic bag. If you make a wig, if you ever seen, anybody make a wig, they always add elastic bands right so that being in minutes all the all these things for you, because the elastic band is already added the course is already added, and if you don't want it, If you don't like elastic bands, if you don't like the cones, you can always take it out. It'S an option. You can just always cut it out the good thing about it is already there just in case you need it. You know you don't have to try to find top and like sew it on and stuff like that is already there, which is great another plus to this cap is that it comes with. You know that rubbery material that helps traction. It helps the wake from that slipping off your head. It helps a cap from not moving anywhere that rubber material underneath it goes all the way around the wig cap at the ends. So that's great. You have that there and with that, no it actually makes it feel a lot softer and a lot more comfortable. I like that. I don't care about the traction. I don't care about any slippers. I actually care that it feels a lot more comfortable. That'S for me personally, you know, but anyway um that's about the cap, I'm going to go ahead and get into this review I'll talk more about the hair more about everything, but with a cap and everything so just keep watching alright. So, first of all, I got three bundles of the 10a unprocessed 100 % human. Here I got two sixteen inches one fourteen inch. They were all body wave and I got them in the Cullen, so the tools I use for this. Well, you, you know, you have to have your pins needles and thread. You got to have some clips to clip everything out the way. If you need it, you know to clip the hairs all the way, and then I had my scissors. Of course you need scissors. If you're gon na cut or anything like that - and you would also need some t pins to hold the tracks in place when you're Sol and of course you need a canvas head, you can use a can of a set or a Styrofoam head, whichever one works For you and I just make sure to get all the hair from the closure out of the way and I pin down the cap to the canvas head just to make sure that it doesn't shift or anything like that right now. That'S all I hear I got from one bundle, so I proceeded to like just pinned the tracks down and I started sewing obviously you're gon na start from the back and go work your way all up to the top. This is not a tutorial as to how to make a wig, so I wouldn't really explain too much as what I did, but I'm just gon na you know and show you guys what I did. I just basically sould be here from the bottom. All the way up to the top okay at the back, I did the fold-over method, but, as I got closer to the top, I started cutting the weft and that's just because I wanted it to lay a lot flatter. So at this point I was done. I just had a little bit over 14 inches here, left over just a little piece, and they here looked beautiful. It filled it felt very soft and everything like that. So I loved it guys if you don't know how to bleach the not so you don't want to be too nuts you really don't have to all I did here was use my foundation powder that matches my complexion, put it on the bottom of the closure of The 4x4 closure, and then I sprayed it with some got to be glued through his blast spray and that's just a lock it in place. That'S all I did. I did that about three times and it locked everything in place that way anyway, a part it will look natural, you don't have to you, know, bleach it or anything like that, and that's just an easy and simple way that you can do it. It'S also very cheap okay, so you can do it like that, but just make sure every time you spray it you let it dry for a couple of minutes. Just before you add the second layer on top of it. Okay just make sure it dries first. So here, right after I laid the baby hairs and I decided to give it a center part - I loved it. This is straight up like after I made it and stuff like that, and I decided to just curl the front of it just to give it a little bit more. You know just to put a little bit more into it. I decided to curl the front, but I just all like Carla, didn't curl anything else, just the front to kind of you know just frame it and stuff. Like that, that's it's you guys, I didn't add any product to the hair, none whatsoever only some edge control at the front, and then you know my foundation powder at the bottom and stuff like that, the hair feels super soft. I had minimal shedding. Well, I should say minimal to no shedding at all. It'S really great. I really love the hair on a whole and I can't wait to see how it holds up. I'M gon na wear it. If you guys want an update, just let me know and yeah closure caps on here, making everybody's life so much easier, and it's really big enough friendly. I love that about it. That'S one of the knees is why I love it because it's so big enough friend, if you guys, want an update in about a week or two I'll, be sure to do that. Just let me know in the comment section down below also leave your thoughts on this closure cap situation. I want to know what you guys think about it, but anyway, thank you so much for watching. I really hope that you enjoyed this little review and I'll see you guys.


Comments
WigTypes Official: The links to the Closure Cap and the hair used is in the description so please make sure to check it out.. Have a great weekend guys!!!
Gabby's Hauls & All: I love the fact this is so beginner friendly! You did a great job and I really enjoy when you do videos like this! Have a great weekend ladies!!
Deez Dymondz: Love the closure cap... starting to make my own wigs & this'll help... Thanks Girl!!
qtbeddecor: You did an excellent job making this beauty!!!!! xoxoxoxoxoxoxox
Sasha Tajaré: I am motivated!! You slayed this wig and this closure cap is everything!! ❤❤❤
Courtney M.: I love this concept and you slayed this wig
christina gutierrez: now I wanna try and to start making mine own. You made it look so simple. Update us please
Jay: I was waiting for a video like this. ❤️ I’ll try this once I’m more familiar with wearing and styling my wigs.
Domo Unique: OMG this is such a neat concept! if this was a 13x4 or even 13x6 it would be even more amazing!
Tiffany Davis: Love it, you slayed that wig
Angela D: Nice. The cap is awesome for anyone, but especially like a newbie who wants to start making wigs
Yvonne J: This is a pretty unit on you, very natural looking!
Ashley Washington: Yes please do an update. You did a good job
Stephanie Hardware: PLEASE MAKE MORE HUMAN HAIR VIDEOS !!!!
Candice Sanders: I gotta do this for my birthday trip. So cost efficient too
Ms Pretty Sexy & Black: OMG THIS IS A GREAT IDEA I AM GOING TO TRY TO MAKE MY FIRST WIG, THAT IS MY GOAL FOR 2019 A NEW YEAR A NEW ME &&& THE PRICE TO ORDER THE HAIR AND THE WIG CAP WITH THE HAIR CLOSER INCLUDED IS GREAT AND IT'S A AFFORDABLE PRICE P.S. Your Wig That You Made Came Out Real GOOD
StrongazDiamondz: Beautiful! Can you do a review on the new Zury Sis Sassy H Coral unit?
ablckdiamd1: Love it!
Queen Leo: Yes I'm getting this so pretty
nature@itsbest: Omg I love this it's really cute on u
towanda burrell: I lovvveeee it
Thick2013: Can you review Laflare BRAZILIAN REMY LACE WIG DADA ? Thanks You did a great job.
~Daphne Amy's World~!: I purchase this it was the regular cap at my local beauty supply store I have to redue the wig because the plastic wig stand made tracs loose so ill be getting a foam cap and redue the wig. This timw and suck it up with being hot at home or ill have professional fix it I get lazy . Love the results looks like a sew in wig were
Tiffani Williams: Nice I'm so getting this
Tiffani Williams: Will they be making an ear to ear lace one
april G: So pretty Love
Nicole H: Pretty!!!
Yourfairweatherfriend: I wish the closure cap went from ear to ear. :/
Gabby's Hauls & All: Update please!!
Fashion Originals: Yes I need this
Deyemond Nicole: The 4x4 link isn't working
The Resellers Edit: Skills!!!
Magikalblackness:
Shanay Jones: Pretty
Deeva Ellis: The link isn't working