Fringe Tapered Bangs And Layers On 4X4 Closure Wig - Aligrace
- Posted on 24 February, 2022
- Closure Wig
- By Anonymous
WIG SALE & MORE https://dollcouture.bigcartel.com
Hi Dolls! Here is a video featuring #AligraceHair #FringeBangs #ClosureWigInstall Any questions let me know… Thank you dolls soo much for all of your love and support. Xoxo, Kooch
●▬▬▬▬▬▬#Aligracehair▬▬▬▬▬▬●
Best Quality,Affordable Price
Use My code " Princess ” get extra 5 % off
• Ali Grace Hair Official Store
➤aligracehair.com?utm_source=Youtube&utm_medium=video&utm_term=2021.9.16&utm_content=homep&utm_campaign=Princess
• Hair Detail: Straight 4x4 Closure Wig 180% 24inch
Hair In video ➤ https://bit.ly/3Cej4Ba
• Hot Sale Now:
Body Wave 13x4 lace front wig ➤https://bit.ly/2Xn21hG
Kinky curly 4x4 lace front wig ➤ https://bit.ly/3hBFftb
• New Arrivals:
Straight Highlight Bob Wig ➤ https://bit.ly/3ElmFza
Highlight Straight Lace Wig ➤ https://bit.ly/2XmEYn9
Highlight Bodywave Lace Wig ➤ https://bit.ly/3hC4nQw
• Do you want to promote #Aligracehair?
Share and earn commissions : https://bit.ly/3kk5jbR
Ali Grace Social Media
Youtube Ali Grace Hair: https://bit.ly/2V9L3ho
Instagram @aligracehair_1: https://bit.ly/3bVbuhv
Facebook Ali Grace Hair: https://bit.ly/2XNTbXF
• Ali Grace Contact:
Wholesale Website Whatsapp: 008618503747953/008617539012664
E-mail: [email protected]
#Lacefrontwig #lacewig #humanhair #closurewig
****FOLLOW ME****
Instagram: https://instagram.com/princesskooch/
SnapChat: PrincessKooch05
FaceBook: https://www.facebook.com/princesskooch...
Twitter: https://twitter.com/princesskooch
Subscribe to my Vlog Channel: https://www.youtube.com/channel/UC4xwk...
Shop Doll Couture: http://dollcouture.bigcartel.com/
Dolls Email Me @: [email protected]
***For Business Inquires Email Me @: [email protected]
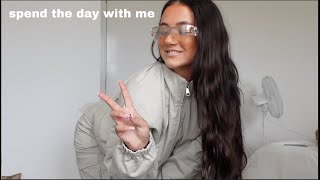
Hey dogs, so i am back so this is going to be a video on this hair. I was going to wait to film my video tomorrow whenever i'm actually dressed dressed, because i have somewhere to go tomorrow, but i was like no. Let me just go ahead and film my intro on outro now, because the hair is still slang. Okay, so this hair is from ali grace. This is the bag that the hair came in real cute little satin bag. Also on the inside, i did get some wig caps. I did use one, but not that one and then also got this little booklet which tells you how to shampoo the hair and care for it and all of that tea. So you can take care of your wig. This is a closure wig and this is actually a 24 inch straight hair wig and it's 180 density and the closure. I'M not sure. I can't remember if it's a four by four. I think it's a four by four. So yeah i'll put it down below for y'all um, just in case, if i'm wrong, but i'll have the info down below anyways but yeah. So this is just like a regular closure wig. I did go in and cut bangs on this wig. My other favorite closure. Wig that i had bangs on, i did sell it recently and i knew that i was going to be doing another one, so i went ahead and got rid of that one. So this is what i did. I did some bangs and i did them super fringed and, like you know, face framed, and then i did some layers in the front lightly bumped and then i also did trim the ends off to get a blunt, even cut a lot of times. I would just keep the hair and wear it just completely straight and just do the bang, but i wanted it to look a little bit more natural. If you will, i did go in and thin the bangs out, and everything like that. So y'all will see how i do it and it's really easy. It was a lot faster than what i normally do, because i find that i will go back and forth with bangs a lot, but this time it was pretty simple and kind of straight to the point so yeah - and i got this really nice tapered - look really Really easy, so if y'all want to see how i did that - and it's also glueless like i can definitely just take the wig off if you could see that i did not gel or glue it down spray it down anything like that, because with bangs i like To be able to remove the wigs, but i did use something that is going to prevent my wig from shifting back, so my bangs will stay in place, so yes, stay tuned for the video okay dog. So this is how the wig is. Looking on my mannequin, i already started off by putting a middle part on the wig and then i'm going to start sectioning off my bangs, going in like a triangular kind of shape. So you want to do like a slant leading from each side of the middle part, so it's kind of easier if you do it on your mannequin head, but you can really tell more so if everything is lined up once you put it on your actual head. So here i'm just putting on a wig cap, and then i'm also going to put on this wig band as well, and these are supposed to prevent your wig from shifting back. So i decided to try it with this wig since i am doing a glueless method and then i'm just going to go ahead and pop the wig on so once i have put the wig on then i can see how my middle part is looking. If i need to re-part it and just clean up any parts on the bang area as well - and you would just pull the sides over on top of the band to keep your wig from shifting and moving back. So i'm just going in with my hot comb and kind of relaying the middle part area. I did kind of re-part it just to make sure that it was directly in the center. I didn't really have to re-part the bangs and like redo them all the way, but i did go in and clean up the parts a little bit if y'all hear amiri. She is playing in my makeup drawer. So now i'm going to start cutting off these extra tabs. You can do this all in one seamless cut, but the tabs on the side kind of go back further than the hairline does. So i suggest cutting those off first before you go in and actually cut the lace off. That is going to be underneath your bang area, so i'm just going in and trimming this off. It doesn't have to be perfect. It doesn't have to be so jagged or anything like that, because we're not laying it down and it's going to be covered up by the bangs anyway, i'm just trying to remove all of the excess lace, because you don't want that to peek through and show through. Your bang area, so now you can see how it's looking. It'S not perfect. It'S not even really like a perfect triangle, but it's definitely more diagonal and you can see how i kind of twisted the hair so that i can go ahead and start doing my cut. It is kind of a little bit tricky, but it's easier if you do that twist method, like you saw me, do if you didn't catch it the first time just rewind it and play it back again, and you could see how i twisted the hair. This is going to give you that tapered kind of look and, as you can see, whenever i'm cutting i'm not cutting straight across. I am cutting upwards with the scissors like right here. I cut a little piece off to the side kind of more of a regular straight cut, but then i'm going back straight up with the scissors and doing this kind of motion, and this is going to let your bangs be more of a choppy messy kind of Look if you want them more so blunt and you still want a taper look then just go in and trim them straight across, but i did want mine's a little bit more choppy and wispy looking. So i'm just removing all of that hair that feel on my face and then i'm just shaking the bangs out and then i'm gon na go in with my flat iron. You can already see the sides are longer than the center is, and that is what i wanted shorter in the middle longer on the sides. So i'm just taking my same flat iron that i used on this wig and i'm just giving it a light bump. And this is going to kind of show you how long your bangs are falling, and it's also going to show you how full or how thin your bangs are. If they're too thin, you can always go back and part off more hair and cut more hair. I would prefer to do it where it's more thin than to um. Have it be already super thick because you can't really take away so much mines were a little bit fuller than what i wanted, but i'll fix that later. So now you can see. I am going in and trimming the hair, and this is how i always do my trims on my wigs to get a blunt kind of cut like for a longer type of wigs and it works out fine. It lines up nicely in the back and everything. So you don't have to put it on a mannequin and go section by section taking forever to do this. Just pull the sections to the front. Do two sections pull it to the front line it up, do a blunt cut and then go back in and just clean it up. So you can see the hair is looking real pretty and it's giving a more healthy vibe with those ends trimmed off. So i'm going to go in and also do some face firming layers as well. I kind of did this in a previous video, where i did a middle part and a lot of layers, so you can check out that video. If you need to see more details of doing these layers, but i am taking a razor to start off with, but i am going to go back in later and clean it up with my sheers as well, because at first i wasn't sure if i wanted a Whole lot of layers, or just a little bit so now, i'm going to use a little bit of hairspray on the bangs and then also a comb that has teeth more spread apart just to see, if it's going to give me that kind of see-through bang. Look that i wanted, because i did part down a little bit much hair for the look that i wanted. It'S still not too thick like it's not giving a chinese thick, big bang, but it's still a little bit fuller than what i want. So now i'm just going back in once again lining up the part making sure that it's straight and how i want it to be. And then i'm going to go in with my wax stick and just lay everything down for its final time of being laid down with the hot comb and really positioning it into place. I don't go in with my wax pick until i am sure that that's how i want my part to be usually or if you know like, if i have to do any reparting or anything like that, i always wait to do the wax stick. Last before i hot comb it down again, if y'all know what i'm saying so, yeah, i'm just hot combing everything down make sure you get that back section as well, because you want everything to be nice and flat. You don't want it to give a wiggy vibe whatsoever and it's kind of giving like a little hump in the back right now. So i'm definitely going to hot comb that down as well and just get it nice and flat. I'M making the look of his face right now, but don't worry about that. Okay, so now to straighten up the part and really just make it pop out. I am using some black eyeshadow. I did not have to put concealer or foundation or anything on the part to get that nice scalp, like color, that's just coming through from me, bleaching the knots and also the cap that i have on underneath. So i'm just going to use the black eyeshadow to go along the sides and really make that part look really straight and nice, so you can see how it really helped to define it and really just helps it to pop out. So now i'm gon na take some bio silk. I already used this to flat iron all of the hair, but i'm gon na put some on my bangs and also on the top of my hair as well. I also put more oil on my bangs this time, because i was trying to see if it would give the look that i wanted without having to thin out my bangs, but, as you can see, they are still pretty full, not fully a chinese bang like super Thick, but it's still not as see-through as what i wanted, so i am just going back in and cleaning up my face frame layers using my shears and you can see how layered it is and how it's looking. I really love these layers. Super super cute. So then, i'm also going to go back in with my flat iron and give my hair a little bit of a bump. You don't want it to be curled, but you do want it to have a slight bump to it. It'S hard to explain because it's easy to over curl it, but if it gets a little bit too curled just go back in with the flat iron and just hold it kind of more straight um. So yeah, that's what i did and then i'm also going to do the ends of the hair that is going to be down as well. Well, all of the hair is down, but y'all know what i'm saying i'm doing the back part of the hair and the sides and everything as well just giving it a little bump and i'll just go over it with the flat iron over and over slightly bumping. It to get it to have that little bump at the bottom, but not completely curled. So now i have went in and sectioned off a top part of the bangs and i'm just going to start thinning them out. And i am point cutting once again where i'm going upwards with the scissors. And then i also parted off another section of the bangs, which is the bottom part. I just need one at the top and one at the bottom, and i'm just doing this to make the bangs give a more wispy thin appearance. So then you can see. I did take my razor comb and i'm going underneath the hair to thin it out, and you can see how it's looking out. It is giving a little bit more thin and i'm just gon na keep doing that. Do it from underneath? Don'T do it on top because you will get a um like a harsh cut in your bangs, so always do it from underneath and do it very gently because you will take too much off and then it will look a hot mess. Okay, so this is how the bangs are looking they're more see-through now and then this is how everything looks together. This hair definitely gives natural. It'S full like i love how the ends look, and this wig is just so cute. So yes, stay tuned for the outro um, so i can tell y'all all the other information that i probably didn't share in this voiceover and everything so yeah stay tuned to see the finished results. Okay! Well, you already see it, but you know what i'm saying: okay dog. So this is the completed look of the hair. The hair is so pretty it's super silky also. I did want to mention to start off with to prep the hair. I did go through and flat iron, it all off camera. The hair is already straight, but to get this really silky super pressed out kind of look. I did use my babyliss pro nano titanium flat iron and this flat iron gets super super hot. I put it on the highest setting and i go through section by section flat ironing the hair just like if it was my own hair. I start off in the back and go section by section and flat iron, the hair and also whenever i do a flat iron. I do like to use my bio silk silk therapy and i find that this just really silks out the hair, so i've been using this whenever i do flat irons on my wigs um - and this also just makes your hair smell so bummed so definitely get you. Some bio silk in your life, but yes, this is so cute. I love it. I did just do my lashes because i've been feeling like a bald chicken, because i have not had any lashes on for like the past week or so um probably longer than that, because i really haven't did my makeup or anything. So i was like. Let me put me some lashes on to get your girl together a little bit okay, but yes, so this hair turned out so cute. I love it and i did not have to put any foundation in the parting area. If you can see it really, pops out nicely is giving scalp. I do have a cap on underneath i didn't have to do a ball cap. No glue! No gel like this. Just gives you a break like you still get to wear a frontal wig, but you don't have to glue it down and stuff. So i really like to do bangs whenever i just want something kind of simple that i can pull on and off. You know what i'm saying um and this wig was a little bit over processed like a little bit over bleached, but i did fix that and it looks completely fine like you cannot tell at all so. Yes, i love you dogs and thank you for watching bye to us.


Comments
Sabrina_Journals: Kooch!! Your hairstyles be popping sis
Shantay Perkins: Gorgeous as always Thanks for sharing
Eb Sitting Pretty: Absolutely Stunning
Simone Durham: Omg I love it going to check it out now
lolo louis: Giving me Nikki you both queens are naturally gorgeous
Beautiful Andra: Yes ma’am!❤️
Bargain Beauty: Gotta the cheetah print scissors out.. Okay now!
Princesskay: Cute
Halo Angel:
LaChey Danielle: Kooch
Bargain Beauty: 11:53 chile, check u out. It's time to start taking client
beautyvixen1:
Sabrina_Journals: Kooch
Ricardo Mendoza: hi ma'am