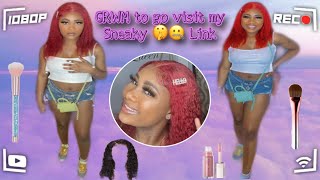
Best Affordable Amazon Wig *Review & Install*| Arabella 4X4 Closure Human Hair
- Posted on 20 October, 2020
- Closure Wig
- By Anonymous
Hey, Gwurl Here is the T on how to install this affordable 22 inch 4x4 closure wig from Arabella hair on Amazon for $137!
#amazonwigreview
#affordableamazonwig
**This video is not sponsored and is my honest review of products bought with my own money**
Business contact: [email protected]
_________________________________________________
Direct link to wig:
https://www.amazon.com/gp/aw/d/B08BL9H...
WATCH NEXT: 2020 BIG CHOP| 4 month progress https://youtu.be/tndMFRfBV0M
*I DO NOT OWN THE RIGHTS TO THIS MUSIC*
MUSIC: LAKEY INSPIRED - Arcade
Stream On Spotify: https://goo.gl/aLkwM5
Download → https://soundcloud.com/lakeyinspired/...
Hey girl today you're going to get the t on this wig that i got from amazon for 137, if you're interested in how i install this wig stay tuned, also i'll link the hair in the description box. Okay, we're going to start off by me looking ugly. Unfortunately, i'm not able to cornrow myself, so i just looked it back as far as possible. I ordered through amazon prime, so my package got to me in about five days i ordered on the ninth. I got it on the 14th. I ordered a 22 inch. 4X4 closure wig. The wig did not come with the wig cap, which i thought it was so i didn't buy one. So i had to use one that i already had, which i was impressed about, because with closure wigs, it doesn't really matter. You don't really need the wig cap anyway in other install videos that i watched they clipped this part off of the wig um, i'm not that experienced in wig installs, so i decided to just take it behind my ear and i was fine y'all. I was not feeling this wig at all, so i decided to try to do a side part. As you can see, i was having trouble finding a part, so i just decided to use the part that came with the wig already pre-plugged, so i shifted the wig over. So i could have that part in the middle and that gave me a little something to work with and, as you can see, the wig is super transparent and the knots are not bleached, but i'm gon na go back in and fix that later. After i install this with some got to be glue, okay here is where i make a big mistake: y'all, instead of waiting until after i did my hair to be my face, i did it before, and i was blending the makeup in with the glue, and i Ended up drying it down, instead of wiping it off and starting over, so that just gave me a hard time, so i would recommend not if you're gon na do your face. Don'T pull your makeup! I mean: don't blend your makeup, all the way up into your forehead until you're done knockout, you win y'all, see what i mean, so i'm gon na go ahead and remove that off camera and come back when i'm tying my edges down. I wanted to loosen up these grandma curls and lay the closure as flat as possible, so i invested in a hot comb from amazon as well as i was putting the heat to the closure. I noticed that i was getting these flyaways, which i learned from watching. Other install videos that this is a telltale sign that it's a synthetic wig or it has like synthetic hair blended in with the human hair, just a heads up, so i ended up going in with my flat iron to see if i wanted to style it as A straight wig or curly wig, and to put it to the ultimate heat test, to see if it was a synthetic wig or gnaw. I end up opting for the curls, so i decided to do some loose curls with my flat iron. I saw on other install videos that, as a trick, they used the free spray to lay down the flyaways and that ended up working for me y'all. I really don't know how to put the lace, so i'm just doing it for the hell of it. Since i don't know how to bleach knots or anything like that, i decided to go in with the maybelline loose finishing powder in the color dark y'all. I was scared to see what it looked like when i uncovered it, because i was still having that glue and makeup disaster here. I'M laying the edges with the freeze spray and i also left my natural edges out on the sides, so i can lay those as well just to give it a more natural look, since it's not a full lace front. So and that's how i installed the wig. I think i did pretty good for my first time. I would definitely recommend this wig to beginners. It was super easy to install and it was super affordable. The only con to the hair was that i believe it was a synthetic blend, but it still took the heat very well. If you like this wig or this install was helpful, make sure you hit the like button comment down below and subscribe to this channel.

Comments
sunshine jones: It came out beautiful Great job!!
Courtney Plett: I was looking at the reviews on this wig and came across yours so I checked out your video. Thanks for uploading! Definitely helped me make my decision. You look great in it!
Glamorous T: Omg I’m still mind blown that you can order wigs from Amazon
Linda Smith: Looks nice The more you do it you’re gonna be great
EvolutionDynasty: Yasss, it looks so beautiful. Happy to meet you. I always follow Channels that have natural hair or transitioning to natura, or any hair channel. I’m obsessed with hair and learning new things about it. I’m so excited to see your hair journey. You can check me out too. I look forward towards seeing more of you.
Miss Keta: Lmaooo I felt the plucking part I be have a hard time too New Supporter ❤️
Glamorous T: Yassss love me some hair tutorials ❤️❤️❤️
Bri Gai: Start off looking ugly??? Girl where?! You are beautiful! The wig turned nice especially for your 1st time I use to pluck and powder mine too
Monitca Hall: Your wig came out great I need that makeup you used for your scalp, it look so natural. Thank you for sharing
Dira B: Yesssss flawless ❤️
Nathaniele Hyppolite: Slayed this wig
AISHA MARIE: Looks good
Glamorous T: I don’t think that’s true that it’s blended with synthetic, I always use a wax stick instead of got 2 be spray to lay the fly aways down cause got2be makes it hard as a rock but, alot of human hair does that .
TIKTOK __LIFE: Love your videos
Glamorous T: Lol not grandma curls
Bla-Asian Com: Cool