How To Make Your Own Middle Part Closure || No Leave Out || Ishow Hair
- Posted on 23 March, 2019
- Closure Wig
- By Anonymous
➤#Ishowhair Official Website: http://bit.ly/2HlW1fm
Same deep wave hair in video: http://bit.ly/2F3paIx
ISHOW human hair #lacewig : http://bit.ly/2HzbAzC
Spring flash sale $5 off over $99 with coupon code: IS5
Aliexpress ISHOW hair website: https://bit.ly/2Fd1JOa
ISHOW hair 3 bundles : http://bit.ly/2W37Fij
ISHOW hair 4 bundles : http://bit.ly/2TJZoTa
ISHOW hair 3 bundles with 4x4 closure : http://bit.ly/2ClV4zk
ISHOW hair 3 bundles with 13x4 frontal : http://bit.ly/2W33xPv
ISHOW hair 4 bundles with 4x4 closure : http://bit.ly/2FexuGI
ISHOW hair 4 bundles with 13x4 frontal : http://bit.ly/2T8JOvM
Contact Ishow : Email➤ [email protected]
Whatsapp: +86 182 3684 8017
Follow #Ishowbeauty on social media join monthly giveaway:
Instagram (@officialishowhair): http://bit.ly/2T9THcO
Facebook (@Ishowbeauty): http://bit.ly/2Cjk62o
YouTube (@Ishowhair): http://bit.ly/2Fey9ry
lace - http://s.aliexpress.com/FfMzArEV
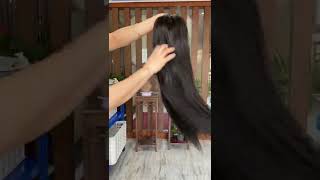
I guys walk with my cello it's under here, so tell me, show you how I made this middle part closure with absolutely no leave out so normally I don't really do baby hairs when I make DIY closures, but this time I thought why not - and I love The way it turned out so I'm gon na show you exactly how I made it right so for this video I used her from, I show her and I used four of their 22 inch Peruvian deep, wave bundles. So I leave links in the description box below if you're interested all right so this weekend we need some lace. Now the lace does not necessarily have to match your skin color, because you can use foundation to darken it. If you need to you and then next just carve out where you want your lace to go and then sew it down right. So when I was doing this, I didn't realize that my left and my right side didn't match in terms of like lace space. So there's more like lace on one side compared to the other, and I thought this was gon na be a problem, so I did like consider we start in by didn't, because I was like what's the worst that can happen like if it didn't turn out bright. As a middle part, I just make it a side - part umm, but yeah, so I didn't really saw and up until this plant basically sew down my bundles all across the perimeter of the lace and I've just left the lace section. So this video is gon na focus mainly on the closure. So after you've done that, basically outline where you want to ventilate. Now you don't need too much ventilation. You guys will see how much ventilate - and I did like - there's not that much and that's what I love about. Making and Gi closures like it's not like making a whole crochet wig, but you have to do loads and loads events later see. I'Ve outlined where I want to do my baby hairs as well, so the weekly line at the front is basically for baby hairs and yeah. So next I get a section on my bundle and I split into two using an hour back up and eyebrow raiser and the reason I do this is because I like teased in a West for the closure so that it can lay as flat as possible. So here I'm just going down my fellow wife's and I like to sew it down as opposed to doing it down, because this makes it more permanent like I don't have to worry about it coming apart later on, and so I definitely recommend suing if you have A sewing machine even better. I'M gon na try and learn how to use a sewing machine to make DIY closures soon and as soon as I master it I'll definitely do a tutorial. So yeah I'm just basically sewing all around my white outline and then I'll come back and show you guys how I've intimated. So at this point this is how the wig looks and now the whole problem of like having way more lace space on one side compared to the other. It wasn't too obvious, and so I decided to just leave as a middle part and not change it to a side path right. So I'm gon na show you how I've been today. So I get a small section of the bundle like this and then I cut off the WestEd section using some scissors and then I pull out all the really small hairs. I'M not gon na be able to use, and then, after that, I just grip it on the thickest part of that whole strand, and that allows me to make the most of every single hair strand whether its longest short. So when I was ventilating where the tracks were, I would grab as much hair as the nificant could take, because the eyelid needs to cover the tracks as quickly as possible. And then, when I got to the very middle, I would use like one to two hair strands. Just say: wouldn't look too bulky, so I also did this for the front of the closure so closer to where the tracks are. I basically grab onto as much high as possible, but then, as I got closer to the front where the baby has well, I basically used one to two hair strands and I also increased the spacing between each Beach, not say between each head. I'Ve insulated. There was more space as I got closer to the hairline, because I wanted the hairline to look as natural as possible and I didn't want to have any leave out as well say. I hope this is helpful. Here'S a clip of me basically been today in oh and another tip if you do decide to use a white pencil to outline your hairline. To be honest, don't use the white pencil just use like a concealer that matches your skin color or one that you can see because using the white was just long and then I had to basically try and get it off, and it was just too long, and I didn't want to cut above the white line because that would have been most of my hairline gone, so don't use a white pencil to outline the hairline use a concealer that matches your skin color. So once I finished, I got a hot comb and I got this from Amazon. I think is less than 30 pounds, I think in the description box below, but I use that to basically seal the knots and say I just basically running through whatever I ventilate it and then I just hold it there for like a few seconds and then I Got some concealer and then I put it in the middle part and just make sure the concealer matches your skin color so that it can look as natural as possible. And then, after that I also got some powder foundation. And then I put it on the inside of my closure so that it can basically match my skin color. Now, here's where I had the problem with the white marks and they didn't come out easily guys like don't be like me, use a concealer or something to outline the hairline. So after that, I cut off the part of the lace, I no longer need, and you can lay your closure. However, you want to, I use, got to be ugly, and also I put some concealer on where the white marks are just to hide them, because they just looked way too weird, and that is pretty much it guys. Thank you so much for watching. I hope you learned something from this tutorial and have a nice day.


Comments
Dante Velasquez: EXCELLENT! I need to not be lazy and ventilate lol A great thing to do to avoid using the white pencil is to lay some plastic wrap (cling film) under the lace closure and mark out where you want the hairline with a permanent marker. This way you don't have to mark the lace :-)
Peyton Pendleton: Great tutorial as always. Thanks for the helpful tip regarding the white pencil❣
Messie Tucker: I’ve been watching you for years and your never disappoint. Thank you
Belinda: Sandie you do such a beautiful work!!! I love how you do your wig and how well you explain in your tutorial. Clarity is everything to me.
Nurse Koko: Wow. You really inspire me. Thank you for sharing these videos. I will making my own very soon. Stay blessed and stay beautiful!!
Tan R3: Beautiful. I will try this new technique. Thank you
Splendid Hair: Thanks sis you definitely make life easier
Y N: Thank you for this, I just realised that I can try and revive my balding frontals!
Gracie Wandyte: Thanks for the tutorial You are so beautiful When you crochet the hair, do u insert the knit picker in just one hole?
Eniola Oke: It's really amazing and beautiful....I want to ask how long it took for you to crotchet the closure
Towoju Olominu: Thank you soouuuu mach. I'm definitely downloading this and trying it this week
Jerusha Dowdy: Wow I must try this thank you
Sonia Fernandes: Congrats sandi, for the channel that is growing so fast. May God bless u even more, ur videos are actually helpful.
Anne Wanza: I love it, where did you buy the crotchet needle,please share link
LivingLifeasKare: You are so talented
gold ubah: Thanks girl.....awesome
Sandra.: 2 videos in 1 day ! God bless Sandie
marcia harvey: Thanks great work, your looking like Naomi Campbell in this this tutorial.
Norah Natasha Mwansa: Wow
aderafam: Hey Sandie is it possible to ventilate with glue
ebere jessica: Thanks so much fir sharing. You are goodin what you do
Melissa Simeon: Great job. Link to the lace and what color you pick and needle please and thank you
Tina Ikujegbe: My goodness, this is too much work. But it's beautiful.
Trish kudzie: Wowww..you so talented..x
thoyinn than: I tried following you on IG, but I couldn't, give your IG link, great work
My2280: U are amazing
Rita Addai: Fantastic
Verona James:
isabella Ageng: please can I know the lace that u used mine seems like the holes are big
Ayodeji Oke: Dis is wonderful BT can take time
randibelle Lapa: You are the best
Cinderella Cyril: Yasss mama
OhMydarling bailey: This is like surgery
PINKKYS WORLD: Too fast