Left Him On Red | Install This 99J Frontal Wig With Me! | Wiggins Hair
- Posted on 15 September, 2021
- Color Lace Wig
- By Anonymous
Like, Comment & Subscribe!
Instagram & Tiktok: @zoenahabwe
════════დ #WigginsHair დ═══════
Get $10 off with coupon code“wiggins”!!
❤Direct Link➤https://bit.ly/2XOEtlH
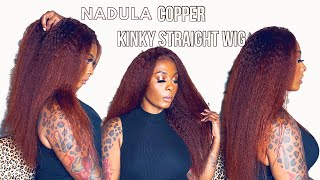
Hair details:dark #99J #straight #lacefrontalwig, 200% density, 22 inches.
Hot selling #lacefrontalwig➤https://bit.ly/2Wfn3hx
You may also like:
1. Premade colored wig➤https://bit.ly/3gkO35Q
2. Invisible skin melt #hdlacewig➤https://bit.ly/3mjFiwK
3. More Lazy girl approved #headbandwig➤https://bit.ly/2W7bmJQ
Follow @wigginshair on instagram:https://bit.ly/3AWuSHy
Tiktok@wigginshairbest
Facebook @wigginshair:https://bit.ly/3gkO75A
Email: [email protected]
WhatsApp Wholesale: 0086 18339906150
Hi guys it's zoe and welcome back to my channel we're back at again with another wig review. Um we've got wigan's hair today, and this is what came in the box as usual. You know lashes wig cap, you know the good stuff um. It also came with like there's my dog just trying to be nosy. As usual. It came with like a little big bag as usual, and the wig i've got is a 22 inch, 13x4 frontal, and it's this like really pretty burgundy, color um. I don't know you guys, probably won't know, but i had a similar wig to this before um when i first ever started doing like wigs and stuff, and i thought you know, let me just throw it back and bring this color back. I love it. So much um, as you can see, i was trying to decide if i needed to bleach the knots or not um, because it was red really and truly. I should have um don't skip out on this part, but yeah just bleach the knots for like 30 minutes, not as long as normally and yeah. This is what it looked like. The lace is super, pretty it's not gray or anything. It'S a nice beige, color um. I think transparent to be honest and yeah. This is what it looked like before i plucked everything i just did all of that off camera. If you do want an in-depth, like story on how i do all of that, i do actually have quite a few videos where i show like the bleaching process and the plucking process like again in depth. But as you can see, i definitely should have bleached the knots it's not as visible when it's on my head, but yeah moving on to the install this is just the color is just everything to me. I got the 99j dark, so this is the dark version. I think they've got a lighter one, which is more of a bright red um, but yeah. This is what it looked like. I started by tinting the lace with my nw58 mac studio fix powder. The only thing i found with this wig that i had an issue with was that the lace was super hard to tint. Guys, like i don't know what it was. I think it's because it was like so light, which is actually normally good, but the powder i was using wasn't penetrating as well, so i would recommend using a lace tint instead of powder or like a foundation just something thicker that would actually like come through onto The lace um so yeah you'll see me like going back in um further on and just making sure it blends with my skin and stuff. So yeah after i fitted the wig on my head, um, i'm just making sure like everything was just sound. My head properly as usual, i get a medium cap size and i'm just taking my hot comb and just making sure there's no little flyaways and like annoying hairs, just in the way um again like so annoying. I should have done this, but basically just make sure you wash the wig before, because i this is the first time. I think that i haven't like washed my unit before installing it, and it actually does make a difference guys that it's just harder. I don't know what it was, but yeah like there was just a lot more like flyaways, just trying to like get in the way of the lace like when i wanted to cut it and glue it and, like all of that stuff, so definitely skimp out on That um, i just parted my hair, not parted. I just clipped my hair back um, just making sure it's ready to be cut and, as usual, i use my eyebrow razor to cut the lace. Another thing i should have done was install like a um. What'S it called an elastic band, this wig fit my head properly uh like this side, i don't know if you guys are new to my channel. Basically, i really find it hard to find wigs that fit the sides of my head. I think my hairline is just weird as hell like. I don't know what it is, but um yeah. I should have used an elastic band because i really feel like it would have helped me just make sure that the sides were like stuck on properly and it just makes life easier when the wig like doesn't fit you properly. But you know we made it work guys it all came together in the end anyway for the ear tabs as usual um, i'm just grabbing my scissors and i'm just cutting like the part behind my ears, because you don't want to do this with a razor because You don't end up, you know, cutting your ear or, like you know, getting in the way of anything. This just helps for those areas that you can't really see properly. Um and again, i managed to do this without completely messing up the wig, so good job. On my hands and yeah, i just finished cutting the lace so yeah. Here i am again going in with my powder, because i wasn't really happy with the color. Quite yet um you just want to keep going and if you need a good lace, tint recommendation. I do really like the um it's from glamour, hair, london, i'll link it below. They have amazing lace, tints and they have loads of different colors as well. So i would definitely recommend you guys to use them to glue down my hair. I don't know why. I didn't show the product great job, zoe great video um, but i just used my usual got to be um. I used the black gel and i used the yellow hairspray and the blasting freeze spray, and i just you know stuck this down on my head. The usual routine guys it was so hot in my room i was literally struggling. I had to take breaks in between because i was sweating so much on my forehead, so it made it super hard to like get everything glued down, but we got through it. This uk heat is not a joke anyway, i'm just part of my hair off because we're gon na start doing the baby hairs in a bit, and i always find that parting. The hair really helps me when it comes to um. You know sweeping the baby hairs because you can see like what direction you want to sweep them in and today we're gon na go for a side part which i haven't done in like ages. I'Ve, actually that's a lot. I'Ve done it with curly hair before, but but not with straight hair um, and this was normally my go-to but yeah. I thought let's switch it up for today, so i'm just grabbing a section like this and just clipping the hair back again and doing the exact same from the other side um a little guideline, i sort of go from like the middle, like of my eyebrow just Before it arches and then all the way to the end, that's sort of like the length of the baby hair, and then i grab a little section for the sideburns as well, because i love a good sideburn. Then i grab my hot comb again and i just brush all the little black strays that i don't want in that section, and this just helps you know, keep everything back. I'M grabbing my wax stick from sleigh bay, london. I don't know if it's london, it's just sleepy, i think sorry, guys, i'm grabbing my work stick and i'm just taking my hook in again and just melting this. In again, this is gon na help us, for you know the next process, which is just sticking everything back but um again. This is just helping me to see what i'm actually doing with the baby hairs. I'M grabbing my razor and just chopping at baby hairs. I like using a razor for this because it creates a more natural like wisp. On the back of my hand, i just mixed together. Some of the black um got to be gel and a little bit of my olive oil mousse and oh yeah. I completely forgot to do this before, but cover baby hairs with a straightener. Just you know i don't know. I saw this on tik tok guys and i just wanted to try it, but i completely forgot to do it before i started applying the product. So it did fizz up a little bit um, but it wasn't a problem. We still, you know it still did its thing, i'm grabbing my edge comb and i'm just sweeping the baby hairs. Now i don't normally do this curling method of the baby hairs, but i do actually really like how it turned out, especially on the sideburn it made. It look a bit more natural rather than just like a blunt chop. If that makes sense, so yeah, it just looks really cute. I think i did the other side off camera and then i just grabbed my sleigh base. Stick again, you can use any like hair wax, stick to be honest, um, pretty sure. If you just type in hair like stick on amazon, they should come up but yeah. This is what i use anyway and i'm just coming back the hair with my hot comb, and i kind of wanted the side part to be quite sleek, not like so much of a soup, because i wasn't planning on curling my hair. I just wanted it to be quite straight and sleek, so i didn't want too much of a dramatic swoop at the top of the head, so this just yeah. This is how i created that, and i'm just going in on to the actual part as well. I kind of went a bit crazy with this um don't put as much as i did. It made the hair a little bit too shiny at the top for me, but it still looked good but yeah i wouldn't but yeah in future. I wouldn't have used as much as i did, because a little product goes a long way with this guys a long way. So this is what i look like once. I'Ve done that, i'm just tying my hair back with a little clip and as usual, i'm going to grab my trusty um edge, wrap and i'm just wrapping my edges and just making sure i tie this nice and tightly so that everything can marinate and just you Know sit nicely while we style the rest of the hair. Now i'm just bringing my hair forward and just brushing it as you can see, the hair is super super silky, guys very silky and bouncy, and because the hair was already straight, i didn't really do much in terms of styling. I literally grabbed my hair straighteners again and just straightened the hair i curled the hair inwards sort of like where it frames my face um, just because i wanted it to have a little, not volume, but just some definition, and this is what it looked like for. The pattern very important here, because i didn't bleach the knots um i did have to just quickly do this. I mean you should do this anyway, regardless, but this just really helped bring everything together. I grabbed my powder on a small angled liner brush and i just filled in the parts i used two different powders, i used nw58 and nc50 from mac. If you're wondering what colors i use and yeah, this is what it turned out like, as you can see that little like side, you know where i bumped the pieces of the hair strainers really helps bring everything together. I feel like it really added some character to the wig, and this is what it looked like. This is a super quick install for me like it was very easy and i really love the hair. It'S actually on my head right now, as i'm recording this. I think i it's been on my head for about four days now, but it's she's she's been great guys she's doing what she needs to do. I haven't had too much shedding um the occasional you know few strands, of course, when i'm like brushing it after i've had it tied up. But apart from that, like i'm very happy with how it is so far so yeah um here at the end is just what the full length look like, as i said it's 22 inches but yeah guys. I hope you liked this video make sure you like comment and subscribe and i'll see you in the next one bye.


Comments
Collins Lily: The color is so beautiful!!! Love it~
Yasmine K: Omg thank you for typing that it’s the dark 99j !
Dee Luther: ANOTHER GOOD VIDEO STUNNING THUMBNAIL THO U DEFINITELY SLAY THIS LOOK KEEP THEM COMING
Roselyn Eyoessien: Beautiful
Bec Maloth: Love your work
Mark: Beautiful lady. Merry Christmas ❤️
June kitoko: What hair straightener do you use?
DC Lewinsky: Girl you are fab
Oluwatimilehin Adejumo: Please where’s the corset you wore in your thumbnail from
L Brown: Nice tips sis
L Brown: So 99j is the darker colour
L Brown: Hey is this burgundy or 99j