Wig Party Tutorial
- Posted on 23 May, 2017
- Color Lace Wig
- By Anonymous
Hey guys! So below is the foundation tutorial that I filmed right before I filmed this one, like I mentioned before video quality/sound will only keep improving! Hope to see you in my next tutorial next Tuesday!
FOUNDATION TUTORIAL
PRODUCTS USED
ANASTASIA BEVERLY HILLS MARIO MASTER PALETTE
https://www.ebay.com/p/?iid=2224655237...
BLACK GEL GLITTER LINER
http://www.sephora.com/heavy-metal-gli...
NAPOLEON PERDIS LIQUID MATTE LINER
http://napoleonperdis.com/aus/makeup/e...
MAC MAKE YOU MINE
http://www.maccosmetics.com/product/13...
NAPOLEON PERDIS STARLIGHT LOOSE DUST
http://napoleonperdis.com/aus/loose-ey...
BENEFIT HOOLA BRONZER
https://www.benefitcosmetics.com/us/en...
MAYBELLINE LASH SENSATIONAL WATERPROOF MASCARA
https://www.maybelline.com/eye-makeup/...
NYX ROLL ON SHIMMER
RES11 ALMOND AMANDE
http://www.nyxcosmetics.com/roll-on-ey...
ARDELL NATURALS PACK
https://www.amazon.com/Ardell-Wispies-...
KYLIE COSMETICS VIXEN MATTE LIQUID LIPSTICK
https://www.kyliecosmetics.com/product...
LIME CRIME "TRIP"
https://www.limecrime.com/lipsticks/di...
EYE HOLOGRAPHIC GLITTER
https://www.amazon.com/gp/product/B013...
PINK WIG
https://www.amazon.com/gp/product/B00X...
If I missed anything please leave a comment down below and I will link any product that you'd like for me to do so (:
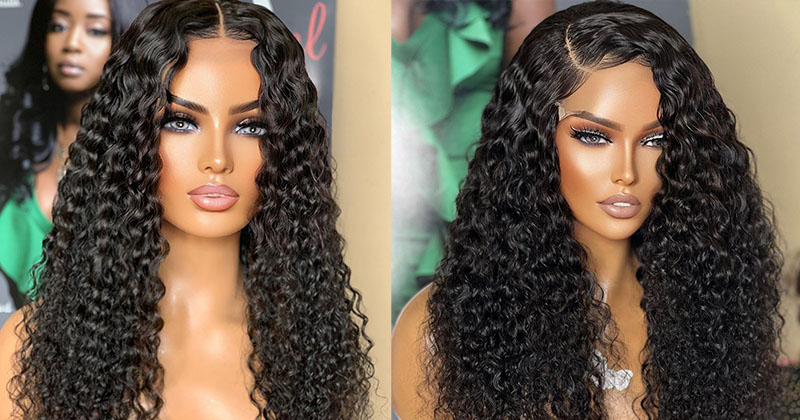
Hey guys welcome back to my channel, so today we're going to be doing a tutorial on this look right here. I filmed this at about 4:00 in the morning, so I didn't realize that I had forgotten to film an introduction. So here are a few clips of me: acting the full um. There is a foundation routine. That is that goes along with this tutorial, so I will be linking the video down below, as well as all the products I used and mentioned in this tutorial. So if you are curious to see what I did to achieve, this look keep on watching. Okay, so I already did my foundation. I'Ve already used a little bit of powder to kind of warm up my face. So now I'm going to go in and actually contour it, so my face has already been warmed up, so I used as a Anasazi ahead contour kit to warm up my face and now I'm going to be using a hoola from benefit. I'M going in with this bit of it the small fluffy contouring brush - and this is the view r19 from the pony Purdy's. Now I'm just taking a little bit of the product and then I'm capping off the excess and I'm just going to be creating like a little triangle so right from the tragus and then I just want to concentrate the color there. I just want a little bit more intensity since I already warmed it up a little, I'm just strengthening it. Okay, so here I'm just going to go ahead and continue blending I'm just kind of working the product and building up until I find the exact intensity that I'm looking for, I'm just kind of to diffuse any harsh lines. Gon na be grabbing my fluffy blush brush and I'm using this equal tools, powder blush powder, lip brush and I'm going to be doing you on make you smile and is by mouth powder I like to grab the product and then blend it up and tap off. The excess blend it out on the actual container so that I'm not thinking I'm not putting too much product on my face and I'm kind of creating a little trust mark. So I'm going in the apples of my cheeks and then I'm bringing it out and always always light hands. Okay, so same thing with my blush, basically with all my powders, I always like to use a small amount at first start white and then filled myself. My way, up until I find the exact color that I'm looking for this has a very this - has a shimmering outer town and since I'm going to be doing this kind of crazy shimmery eye look and we're going to have the highlight glitter highlight on it. Um. That'S why I want to use this a pinky shimmery blush. So now I'm going to go in with my aunts in my eyes, I'm using a mono palette from on a fascist, Beverly Hills and I'm going to be taking the shade Kim music two coats. One of my favorites and tonight create my creases already warmed up. I warm that up with um Melba, I believe yep Melba from Mac and I just kind of grabbed a little bit in wet through my crease. So now I'm gon na go ahead and grab Kim with a fluffy. This is a Smashbox brush, but it's just a dance, fluffy brush, okay, so same process with all my powders. I start light and then build up so find it all over the lid and this Smashbox um brush comes with a little fluffy blending brush on the outside. So I'm just going to turn over and just blend out the edges, because I don't want any harsh lines. Gon na go back and forth now I'm going to do that to the other eye. Now I'm going to be taking muse, but the color right next to it, it's more of like a violet pinkish and I'm just going to grab I'm gon na grab that same brush and I'm just going to use the very tip of it and go under. Take you taking it to meet the top of the top part of the shadow. Do that to the other side. Now I'm taking that fluffy brush fluffy side again and just blending out that edges. So now, I'm just taking edges. Ah, it's called the almond are a Monday, it's rest 11:00. You can see that, but it's from NYX it's a roll on shimmer and I'm going to be applying I'm putting this on mine. There'S a lot of you'll get a lot of fallout. If you just go straight into your into your eyelid, so I'm putting it on my on my hand first and then I'm grabbing it from my hand onto my brush and I'm using that same brush and just placing it all over the lid. And now I'm just going to be taking it down into the inner part of the inner corners of the bottom line lips. Now I'm going to be grabbing. Ah, this is also from Ecotools, it's just a fluffy brush and just in a tick. It'S a clean brush and I'm just lightly dusting away any fallout that I might have had so now, I'm going to go in to my waterline with a black liner, I'm going to be using a this shoot. Oh, you know I got this from from the Halloween store um, so those makeup stuff that the kind of like clown makeup or vampire makeup they usually come with a black liner um, and these actually work really well. They stay on for a long time. So I like using these, so I'm just going to go straight into my waterline and then my top one, so you get that top top inner corners. Okay, excuse that a alien face, that's about to come up right here, excuse all okay! So now that I have my liner done now, I'm going to go ahead and apply a light coat of mascara be using the Maybelline lash sensational eye, and this is a waterproof version of it, and I like to use a waterproof mascara for the first mascara. I use and just because it the makeup will stay on longer, attend to uh. I tend to overlap around my eyes and sometimes, if the mascara isn't, is it waterproof it'll end up I'll end up getting mascara at the bottom of my list? Okay, now I'm not going to take it anymore, Scarah, I'm just going to go in grab my bottom lashes with the same amount of product that I already have on the wall. Just the very light coat. Now I'm going to go in with my a Napoleon Purdy's mask eye liner. This is fun my favourite virus, just because it dries super super matte and it's a long wear. Okay, so I like to line it up first also, don't forget to apply a little bit of liner on your lashes so that any powder that got that fell onto your lashes is being um, because you can paint it over. So just at the very corner. Skin of your starter, and now I'm gon na start building. Once I have my wire, I'm going to go in with this, ah is at Claire's it's I don't have the name of it, but it's just a tree. His blindness at our class to learn. So I'm just going to grab a little bit of this and put it a little line in and I'll need a similar product to this um down below and, as I said this, but I'm just going in with an angled brush. I will get better at naming all the brushes beforehand. I know I I think I missed it in the foundation tutorial, because the first tutorial that kind of goes along with this one, I think, is one of those brushes just bear with me. Everything will get better in time promise now I'm just going to go ahead and do that to the other eye. I also want to apologize by looks a little tired. I had a really long weekend of makeup. I had a lot of fucking's and I didn't have time to film this video earlier this week or earlier in the weekend, so it is Sunday my battery died halfway through I twice already I'm invested. I already ordered some extra batteries so that I don't have to do this, but it is 142 am right now and I started setting up for filming to film since 4 p.m. now that the glare is on I'm actually gon na. Intensify this a little bit more. So I'm going to take my fluffy angled brush okay, so this is what we went over a little bit and then we used Muse to go on the bottom eyelid and now we're going to go in with NYC and I was is going to be in the Outer corner, I am just connecting that with a liner, an amazing, very light hand after adding a lot of products today, so I'm gon na go back with my blending brush from Smashbox and just blend that off and I'm careful not to touch the tip and right Here I wanted to just go in with a little bit more intensity, so just build it up a little bit more and you can always just keep going back and forth um with applying product and blending it out. Okay, so is excited to learn a little bit more yeah um before my lashes, I'm going to be using of these are Dell Naturals. These are my ultimate favorite. It'S what I do baby's on my clients. I got these up front ounce one. So it's a pack of six for ten bucks, I'm using my I'm using some that I've already worn so they're all yours, perfect! So usable is I grab I'm using my this duo glue. So I just grab a dog a bit and then I just let it loose it there and get tacky well, let it sit there for about a minute or two. So, while we're waiting on that, I'm going to go in and start applying those uh the glitter over my eyelid for the base, I'm going to be using poppin from by Kylie cosmetics. It'S a gloss that she had for her birthday addition. It has a really really pretty uh gold under Sean, so I'm just going to be using this flat, concealer brush and just grabbing some of that. I just put some in my hand - and I'm just grabbing it with that concealer brush and just applying that at the highest point. A nice point - and this is gon na - give me a little a really pretty highlight, on top of it, giving me that sticky, consistency which is going to get all that glitter to stick and then I'm going to be taking it down. To my the high points of my cheeks so kind of like a see motion whether it is essentially your highlight - and I got that glitter from Amazon to love using Amazon, because I have prime so free shipping - it isn't a free shipping. Okay. So it's just it's! This wetter, it comes with like little stars cars and then actual litter, maybe grabbing, as is with some tweezers, and then I'm just going in and grabbing some some of those little dude alliances, they're like octagons and circles and stars and I'm just kind of placing them. Wherever careful not to grab too many of the big pieces and put them all together, so everything kind of spread out so that I don't have a bunch of clumps knit comes. If, when I grab as I grab the product, it brings out with a tweezer since I'm putting it there, my tweezers are getting a little bit of that sticky consistency from the Lacroix. Oh, it's helping a product stick or the little design stick to it. So it's easier to just apply this tap, and so now I'm just going to go back to my lashes now that the glue is a tacky. So I grab some, but I just draw out the glue with the with the end of the code, the tweezers and I'm just going to write Withers and these four super super lightweightt with my Amish mafia, Beverly, Hills foundation. I'M your shade honey and I'm going to be taking my small Beauty Blender, I'm just grabbing a little bit of that foundation to the Beauty Blender and I'm just cleaning up the edges description. Okay, so now I'm going to be using a vixen from Kylie calls very pretty plump on lip color and then I'm going to be going in with our lime. Crap Lime, Crime Line, crime diamond crushers, and this is in the shade up shake shade trip. So I guess it's too late: it is no 206 and I got work at 8 a.m. tomorrow. Okay, so I apologize for the mayor being in the view. So when I am applying top liner, I like to start from the outer edges and then work my way up. When I'm doing my bottom one, I start in the middle and then I work my way out right, Arden's, okay, so now that I finished filling in my lips with a lip liner, then I'm going to go in and take the matte liquid, lipstick and just go All over where I had my, I had applied my liner. So now I'm going to go in with the topper, and I'm only going to finish on the inside just to kind of get that very crisp line. I'M going to be taking just or not a concealer brush my same foundation on the sake of Beverly Hills and whenever I clean I wipe and then contour might have a little bit first. So I'm going to be using that the same a bronzer that we using this one would be m3 3-0 brush pointy tip. So I'm just starting halfway through bringing it down straight line and then I'm cutting it. And when I cut it, I do a B diffuse. Any harsh lines, okay, so now for my highlight, I'm going to be using a starlight, I'm a loose dust, a big APR, 16 brush, it's just a fluffy done, but that's brush. So I will find a good dude for this. I promise because this is a great great product and I absolutely love it so I'll. Try find a treat for it for those of you who are interested, but don't want to pay for the shipping and handling just get out just because it's as it is shipping from Australia. I think it's like a 15 dollar shipping cost and I think that these are 25. I think so. I'M just gon na take it down number two, my nose and I want it. Oh I'm going to add a highlight on top of my cute installed, so I'm using this very small des prez's easy brush and these are from BH Cosmetics. Bh Cosmetics has a lot of really good brushes, they're, really really cheap. Okay. So now I'm just adding the inner corner highlight and doing the same thing to the other eye. Now I'm gon na go in with my lids I'll, be right back joelly room that pretty much completes our look. I got the wig from Amazon with 15 bucks. It was, it was pretty cheap, his really good quality. I didn't really bother me online to the party on Saturday. I was kidding no caffeine, so I was jumping around dancing and the weight did not come off. It was not to Richie and really comfortable on. I'M just earrings, I got them from forever 21. I bought them about two and a half weeks ago, so they should so have them. The shirt is also from forever 21. Anybody is curious or Pinterest bowed, and I hope you guys enjoyed it and I'll see you guys in my next video see ya.


Comments
Genesis Rodriguez: You're a natural at this ! Keep it up