How To Bleach The Knots On A Lace Frontal Or Wig Ft. Original Queen Beauty | Slayed Secrets
- Posted on 26 September, 2019
- Color Lace Wig
- By Anonymous
TITLE: How To Customize Lace Frontals & Wigs: Bleaching The Lace ft. Original Queen Beauty | Slayed Secrets
Hey Friends,
Doing things a little different for this video because I am sharing with you how I customize my wigs. Let me know what you think!
The initial hair review video regarding this wig is uploaded! Here's the link:https://youtu.be/g4gRiLbuS9c
Part 2 for how I customize my lace wigs and lace frontals to tint the lace video link is below!
Wig details: Original Queen 13x4 Lace Front Water Wave Wig (18 Inches)
The initial wig that I am wearing: https://youtu.be/xqW6VY37gHU
AMAZON HAIR LINK: https://amzn.to/2IhpENb
How To: Tint A Lace Frontal: https://youtu.be/aevTr9Nsf9g
ONLY CONTACT INFORMATION BELOW:
*Visit Our Website: www.SlayedSecrets.com
*Instagram: https://www.instagram.com/slayedsecret...
*Twitter: https://twitter.com/SlayedSecrets
*Facebook: https://www.facebook.com/SlayedSecrets...
*Email: [email protected]
***********************
AMAZON PRODUCT LINKS:
*Clairol Bw2 Powder Lightener - https://amzn.to/2IAXWeG
https://www.amazon.com/Clairol-Profess...
*Clairol Pure White 40 Creme Developer Maximum Lift - https://amzn.to/338Wolm
https://www.amazon.com/Clairol-White-D...
*Isoplus Neutralizing Shampoo + Conditioner - https://amzn.to/2W5ZANq
https://www.amazon.com/Isoplus-Neutral...
*Clairol Professional Shimmer Lights Shampoo Blonde & Silver - https://amzn.to/2IBkWKz
https://www.amazon.com/gp/product/B000...
**********************
OTHER PRODUCTS:
*Color Mixing Bowl with Brush - https://amzn.to/2TVyGVO
https://www.amazon.com/Framar-Color-Bo...
**********************
ONLY CONTACT INFORMATION BELOW:
*Visit Our Website: www.SlayedSecrets.com
*Instagram: https://www.instagram.com/slayedsecret...
*Twitter: https://twitter.com/SlayedSecrets
*Facebook: https://www.facebook.com/SlayedSecrets...
*Email: [email protected]
Other Videos to watch:
Amazon Wig Review: 13x6 Lace Frontal 10 Inch Brazilian Hair Wig ft. Arabella Hair | Slayed Secrets
Detailed Eyebrow Tutorial | Slayed Secrets
How To: Highlight and Contour | Slayed Secrets
Amazon Wig Review: 360 Lace Frontal Wig Body Wave Human Hair ft. MegaLook Hair | Slayed Secrets
Hot Valentine Makeup Tutorial ft. Anastasia Beverly Hills Modern Renaissance Palette| Slayed Secrets
Diamond Dynasty Virgin Hair Initial Review | Slayed Secrets
Amazon Wig Review: 360 Lace Frontal Water Wave Human Hair ft. Neflyon | Slayed Secrets
Amazon Wig Review: 360 Lace Frontal Brazilian Straight Human Hair ft. Alot Hair | Slayed Secrets
Amazon Wig Review: Wavy Curly Synthetic Fiber Wig (24 Inches) ft. Lekesi Wigs| Slayed Secrets
Amazon Wig Review: Noble Water Wavy ft. Joedir Hair | Slayed Secrets
Best Friend Slay: Soft Glam Makeup | Slayed Secrets
Amazon Wig Review: 4x4 Lace Front Brazilian Deep Curly Bob Wig ft. ATOZ Wig | Slayed Secrets
GRWM ft. BH Cosmetics x ItsMyRayeRaye Palette | Slayed Secrets
GRWM Drama Queen Eye Makeup Tutorial ft. Anastasia Beverly Hills Norvina Palette | Slayed Secrets
Amazon Product Review: EmaxDesign Makeup Brush Set | Slayed Secrets
Music:
Track: Markvard - Summer Wild
Music provided by Vlog No Copyright Music
Watch:
Free Download / Stream: TBD
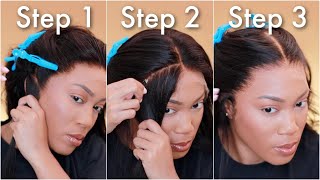
Hi everyone welcome back to slate Secrets YouTube channel in this video. I will be showing you guys how I bleach the lace on my wigs or even my lace frontals for this demonstration. I'M using this beautiful lace, front wig from original Queen here, as you can see on this wig, you can see the knots through the lace. So this is a perfect wig to use for this video bleaching, lace, fronts and lace. Wigs is a whole process and you need a lot of products, so I'm going to show you every single product that I use in order to bleach the lace for wigs as well as lace fronts. Of course, you don't have to do every single step that I did. There are a few extra steps in this process that I like to do normally, right after I bleached the lace for a wig, I do tint the lace as well, so that will be in the next video but anyways, let's get to it. So these are the items that you will need to bleach your lace. You will need a clear counter space, of course, starting with two plastic trash bags. I use the trash bags to protect my counter. You know, keep you nice things, nice, okay! Next, you will need a couple pairs of gloves because you are dealing with chemicals next, our scissors. I will be using these scissors for different things throughout this process. Okay, so this is the first chemical that we will need for this process. I use the clear all professional bw2, extra-strength powder Lightner, so with the powder you will also need the developer. So I also have here the clear all pure white creme developer in 40. Max lift. You will be mixing this developer with the powder to make the chemical to bleach the knots on the lace. The first shampoo we are using to wash off the chemical is the ISO plus neutralizing, shampoo and conditioner. You definitely need a neutralizing shampoo for this process, so the second shampoo that we are using for this process is the Clairol professional shimmering light shampoo. We use this shampoo to help with the lace color after the lace has been bleached. The next item you will need is aluminum foil. Next, you will need a mixing bowl to mix the chemicals together and then you'll need the Jumbo tint brush to apply the chemical on top of your lace after you're done mixing it you'll also need a disposable spoon and of course, finally, you need your hair and That'S basically it. These are all the items that I use to bleach the knots from my lace, wigs and my lace, frontals, alright friends. So let's clean up the counter space, because again we need all the space we need. I am accident-prone I like to knock stuff over unintentionally, plus I'm goofy very clumsy. We leave some space and need some elbow room up in here, so we're gon na move all this stuff to the side and get this party started. Okay, alright! So now that I have the counter clean - let's set up our space so that we don't ruin our counters. First, I'm taking this small white plastic trash bag, I'm basically cutting the white trash bag into a large rectangle after we are done cutting this trash bag. We are going to stretch it out so that it's flat make sure it's covering the counter as much as possible and then we're gon na tape, this bad boy down, so that it doesn't move now with the black trash bag. We'Re basically going to do the same exact thing: I use this black trash bag so that I can see the chemical. If I accidentally spill it, the chemical is white. So if a white chemical falls on a black trash bag, I can kind of have an idea of where I need to clean up where I need to not place my lace on what I need to not touch. It'S basically like an indicator, so you can see if I made a mess all right. Our counter is now protected. We can bring out the items that we need to create our bleach mixture. So now we need to move the out of the way of the lace. So what I am doing right now is coming out the hair and then I'm going to put some braids on the wig for this process. I'M going to just zip through because all I am doing is sectioning off the hair and braiding it as tight as possible. We just need the hair, that's on the lace out of the way, so that we don't end up accidentally bleaching sections of the hair on this wig instead of the intended lace that we want to bleach so just braid the hair as tightly as you cannot too Tight, though you don't want the lace to basically scrunch up and then after you braid, it just clip it with a hair clip, so that it's out of the way completely this process can get messy, and you can accidentally bleach places on this wig that you weren't Intending to bleach so in order to isolate what we are trying to bleach exactly, we have to move everything out of the way that could possibly get in the way - and this is the final look after braiding, nothing special. All I did was braid the hair. We will need to flatten the lace as much as possible, maybe move some of the clips around and now folding the wig inside-out. Normally I would use the flatter hair clips, but I didn't have any available. I had to work with what I got so now that the wig is flattened as much as possible. Now we can prepare our chemical mixture and safety first put on your gloves, then have at it. So I'm only starting off with a couple scoops of the powder. Later on, I did add more scoops of the powder, because I realized I needed more of the bleach mixture from my lace. I use 40 developer to process the hair in a shorter period of time, so the lower. The number is the more time that you need to process the hair the higher the is the less time that you need to process the hair. Oh, you see that this is exactly why I put this black trash bag on the counter, so I can see where the mess is see, how that's helpful but anyways right now, as you are mixing the two together the developer and the powder, the bleaching powder, that Is you want to basically make sure that the mixture is kind of like thicker than toothpaste? You don't want the mixture to be runny, because if it's too liquidy it'll go through the lace, maybe on the label, it might tell you how much of each of the products to add. My knowledge is only based off of my experience of bleaching wigs. So if your mixture ends up too liquidy just add more powder, that's just what I do you don't have to do that, but this is how I do this process, but if all fails, the worst that you can do is start over. So do what you got to do so that you can get that perfect lace. The consistency of the mixture needs to be thick enough, not to bleed through the lace, because if it is too liquidy and runny, you are going to over bleach the knots and you don't want that because you will then have to turn around and correct that. So this step is very important. I use the plastic spoon only for this purpose only for mixing the chemical together because using that brush when really helped out, I know some people use the other side of the brush or the brush itself. Maybe it works out for them, but it did not work out for me as I'm mixing. I'M also checking the consistency of the chemical and it looks like we are good to go my friend, so we can go ahead and this bad boy. So you see that we want it to be big, like that. Basically, it's the consistency of toothpaste or even a little bit thicker. So I think we're ready to go my friends. So, let's move on now, I'm getting the foil to basically size up the wig. You want enough foil to cover the entire wig, basically like you're wrapping a sandwich, so the amount of foil that you need is enough to cover the entire wig front and back basically 360 coverage. All right. We have the right amount of foil. So now we can go ahead and apply this chemical to our lace to start the bleaching process. So basically I take a scoop of the chemical and I am patting it on top of the lace lightly patting you just want it to touch just a light touch. You don't want to push it down into the lace because again, if you push it to four deep, you can potentially over bleach the nuts, and that is what we are trying to avoid today in this process of trying to bleach this lace. So basically, I'm doing a light tap of the bleach on top of the lace and then, when I get a general area that has enough of the product, I'm going to smooth it over. As if I was smoothing jam on a slice of bread to make it an even layer or coat of the chemical on top of the lace, you don't have to do that exactly make an even layer on top of the lace. But this is what I do for this step specifically, but don't press down just light tap and smooth, because you can potentially over bleach the knots on the lace, and you don't want to do that, because it is a lot of work to correct that mistake. Trust me now, I am done applying the bleach on top of the lace. This is how it looks like so I did have some bleach left over. I could have put that on the back lace, but we're not focused on processing the back lace. Today. Only the lace frontal so now I'm basically wrapping the wig in the foil just covering all the corners you can fold it. However, you want make sure that there is no open spaces for the heat to escape when the chemical starts to process on the lace and, of course, set your timer. I set my timer for 15 minutes after 15 minutes passed by. You definitely want to check on the lace. What you'll see is a bunch of bubbles on the leech that you placed on the lace that kind of lets. You know it's kind of done and it was processing. I like to also check, by scraping some of the bleach off, to look at the lace. I do see that the knots are no longer black showing through the lace, so I think we are good to go. My friends. We can go ahead and wash this lace out, so first, I'm going to thoroughly rinse out the wig as best as I can rinse off all that chemical off the lace. The neutralizing shampoo will stop the bleaching process on the lace after we have rinsed off the chemical from the lace, so just squeeze a fair amount of the neutralizing shampoo on the lace and scrub away. Don'T scrub the lace too hard because you don't want it to rip. Sometimes chemicals are too harsh for the lace that vendors will use. So you definitely want to keep that in mind. While you're scrubbing it's already bad enough that you know the hair is gon na shed because it has been processed. So keep that in mind, as you are washing this lace and just to make sure my bases are covered, I went ahead and did a second wash. I know you guys can tell from looking at this video. The lace is pretty brassy so and you will see for yourself, as you are bleaching this wig, that your wig is is brassy color. So that's where the shimmering light shampoo comes in. This shampoo will cancel the brassy color from the lace and it will make the color less harsh. It looks kind of Orange. We don't want to open little orange lace. We want it to come back to kind of close to brown. You know what I mean: that's what the shampoo will help with. I basically scrub until the purple shampoo turns white, you know you can scrub up until that point or you can scrub until you feel comfortable with how it looks it's completely up to you. So, for the second wash for this way using the shimmering light shampoo, I do scrub a little bit and then I'm going to let it sit on the counter for some time. This will give me time to go ahead and clean my supplies. The chemical has already stopped at this point. We use the neutralizing shampoo so now by using this shimmering light. Shampoo is just a cosmetic thing: okay, so now some more scrubbing and finally, we can take these clips out and unbraid the hair and start our detangling, because with all that scrubbing, I'm pretty sure there are tangles now and plus with the processing. As I mentioned earlier, the hair will start to shed because the chemicals, so I expect the lace to be not as thick as before, which is okay. It happens every time every wig is different from different vendors. Some vendors hair shed more than others. It just depends. Whatever formula they are using for their wig products, so this one actually did shed a lot from the processing, but the lace is still full. That just means that this lace was full from the jump. So I'm happy that I still have a lace front. So after bleaching, this hair is so thick, so it was no joke trying to detangle this way after all, the processing in the washing. This is the amount of hair that I lost from the lace. This is a lot of hair and I am a little nervous, but not really, because the hair on this wig is overall thick. I'M telling you you are going to lose some hair from this lace, but that's okay, because I was going to customize the lace frontal anyway, okay guys, so I am done so here we go. This is before, and this is after don't be alarmed, because I did do some edges from the processing. As you guys know, I am NOT a beautician. I just do this for fun. I like to learn how to manipulate wigs, so I just wanted to share with you guys how I do this process. So let me know what you think if you have any comments, questions or concerns, and, finally showing you how the lace looks on my head before bleaching, you see how the knots don't really look as appealing on my head before bleaching. This is exactly why I do this process and then boom. Look at that now. Look at this wig on my head after I bleached the nuts and tinted the lace. You can literally see the wig cap move. This lace, like this wig, looks like the hair is coming straight out of my scalp, and you see that no more nuts, no more nuts. This is exactly what I wanted. I am overall happy with the end result. We do not see knots on this wig anymore, guys we did it so the next video is me showing you guys how I tent the lace. This will help the wig blend more with my skin tone. Definitely watch the second part of this video to see how I tent the lace so go ahead and watch that video next be sure that you are subscribed to Slade Secrets YouTube channel so that you can see more tutorials but anyways. That'S all that we have for today, and we will see you in the next video bye, my friends


Comments
Jessica Bee: This was really interesting to see! I’ve never seen this process before. That’s a good idea to use the trash bags for easy clean up! It looks so much prettier afterwards!
Sistah Punk Studios: I've been really nervous about dying and fitting new lace fronts on my own, you made a great simple tutorial and it looks so professional! Hopefully I won't make too much of a mess and look half as good
Diamour: I’m about to buy my first wig so I definitely needed this video !!! Thank you ❤️
Des & Matt: This was such an informative video. I have no experience with wigs so at first I was lost, but then at the end the transformation was so good. Thank you for sharing this!
Mary Kokotova: This is such a unique technique. Thanks for sharing this
Ashley Sutton: That was super cool. The final project is amazing!
Pilar Barnig: I just bought a wig because I want my hair extended. I was struggling on attatching it until I found this video. :)
Haley Lee: I chuckled when you said oompa loompa orange Wow, this video is so informative. It was my first time seeing this process. It looked so much better afterwards!!
Jules L: Oh you made it so pretty!
Mercedes Polk: What kind of lace