The Best Curly Hair Wig Ft. Nadula Hair
- Posted on 25 November, 2022
- Color Lace Wig
- By Anonymous
Hey BABIES!
this a quick lil tutorial, I actually loved how this came out!
●▬▬▬▬▬▬▬▬▬ ◆ #NadulaHair ◆▬▬▬▬▬▬▬▬●
★ $20 OFF for $199 Code: Nadula20
★ $10 OFF for $99 Code: YTBGIFT
❤All the hair can be paid in 4 installments
Black Friday Up to 41% Off
——————————————————————
☛Video Hair Direct link: https://st.nadula.com/dg5ts
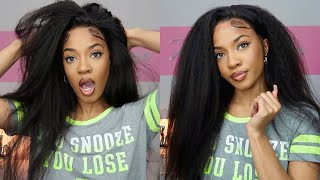
Hair Info: 13*4 Lace Front wig Jerry Curly, Reddish-brown color, 24inch
https://www.nadula.com/ ➤ Top Sale wigs: https://st.nadula.com/dg5tu
New Protective Style V-Part Wig: https://bit.ly/3p5yOkS
Nadula HOT Selling Affordable Lace Frontal Wigs: https://st.nadula.com/dg5u0
New Arrival Fashionable Wigs: https://st.nadula.com/dg5u1
Top-selling bundles with closure& frontal: https://st.nadula.com/dg5u2
Perfect install tutorial of Kinky Curly Vpart wig: https://bit.ly/3QldiF1
Nadula Customer Service Email: [email protected]
Aliexpress Nadula Hair Website: https://bit.ly/33oOx83
Aliexpress Nadula Hot Sale Wig: http://bit.ly/3068Mlt
Amazon Nadula Hair: https://amzn.to/38ttXlC
#Nadula #Nadulahair #Nadulawig
☛Youtube: https://www.youtube.com/c/NadulaHair
☛Tiktok: https://www.tiktok.com/@nadula.com
☛Instagram: https://www.instagram.com/nadulahair/
☛Facebook: https://www.facebook.com/groups/nadula...
Follow me!
Instagram: @Znuie
Twitter: @znuieaahjefi
Tiktok: @znuie
Business Inquiries: [email protected]
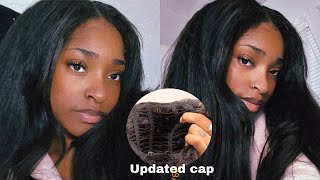
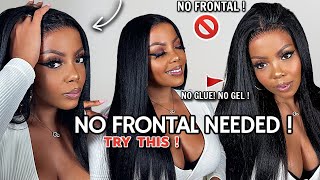
Hey y'all, it's Juliana back with another video and today I'm showing you how I installed this beautiful 13x4 lace front wig, it's a Jerry, curl reddish, brownish 24 inch, wig super beautiful y'all, see the curl pattern, didn't even have to put no product in there. I just co-washed it I bleached the knots a little bit because they were a little dark. I had to let my bleach sit on there for like a good 30 minutes, but um yeah, so straight into it. I already sprayed got some people on my wig cap and I'm just cutting off the excess wig cap, so I can make flowers then, for my trick to hold the whole cap down um. I just cut a slit in the middle of the back and then I just tied like a little shoe lace. You know and just kind of do a little bow and then tuck it under the wig cap done then on to making the cap my color, because it is a liquid light. I'M going to use my Ruby kisses. I forgot what color this is. I think it's in number nine, but then it's low-key a little darker than my yellow key. It is a little darker than my skin tone, but it fits perfectly when I put the wig on so I just go ahead and rub that everywhere on the front and with the the measurement of the 13x4 will be so it covers the entire lace. So you know it looks beautiful and seamless. This is a wig cap. It has a a band attached to it as well. That already came on it, which is amazing, so holds it down even more plop, this baby on measure it to my liking. So I can have ear to ear and not too much over my ear, because I don't want sideburns that go all the way down to my jawline. So now that I have placements already done I'm going to apply my glue, I use my double-sided dual glue. That'S from Kiss cosmetics, um yeah, I'm just going to smear it and make sure about this or glue dries fast and evenly make sure you spread it on thin and then add as many layers as you think you need. But I only wear my wigs but like two days max, maybe three. If I'm feeling it but yes only put one layer and then I forgot to be sprayed on top. So that's why I only put one layer. So I let that dry until it's clear and I don't even know how to style it so yeah. So now I'm about to place this baby on top of the glue that has been dried and I'm just gon na push it into my head and then I ended up taking a comb and also pushing it into my head. So it's flat and there's no bumps because I had when I used to install wigs and there used to be bumps like it looked like of freaking grocery parking lot. So yeah I just you know you see, I'm just pushing it in pushing it in foreign that they also gave me with the wig. I put it on there for like 10-15 minutes, then I go ahead and take it off. I need some blow dryer to make sure it's all the way dry. Then I go on my scissors to take off my extra ear tabs because you know got ta, make sure that my the whole lace look right and then I go on my eyebrow razor to cut off all the excess lace. Tell your friends now! It'S time for the baby hairs, I decided to do four two on top two on the sides for The Sideburns. I guess it's pretty self-explanatory. I cut it to my measuring diagonally, shorter um from the top to the bottom, and then I use my um baby curler flat iron and I curled my little baby hairs to give it a you know a shape, I guess yeah and then I use my Gorilla Glue and it's like a Gorilla Snot, I use my baby hair comb on the back, because it's dual sided and I go ahead and shave them baby into the way I like it. You know what it is and I ended up deciding to go with a side. Part so I decided to do that and um yeah. It came out super cute, so you're gon na see me fix it up and whatnot and yeah. This is my favorite part. I put got to be yeah. I put my Gorilla Glue, snot whatever on the edges. Behind my baby ears - and I push it back to give it a clean look. I said this in my previous video when I was doing another waking saw, and I used my little red tail cone to push back so it's straight and y'all. Then I use a blow dryer conditions dry and it comes out so clean like you just walked out a salon I swear maybe later and of course the final product came out too cute. I didn't have to shape it or anything. Um. Usually I shape my little wigs or whatever, but it's curly straight tube, but yeah. This is the final look hope you guys enjoyed it. All the details will be down below make sure you like comment, share and subscribe, and I will see you guys in my next video bye babies, people gunning

Comments
Boss Queen: Your hair always pretty. Even with the bald cap you a ten.
Ms.lee.__: It’s giving