Following Arrogant Tae'S Masterclass | Ayiyi Hair Wig Customization + Review |Burgundy Dye No B
- Posted on 26 June, 2021
- Color Lace Wig
- By Anonymous
Hey guys! In this video I will be following using Arrogant Tae’s plucking method to customize this wig from Ayiyi Hair! I hope you all enjoy this video and remember to LIKE, COMMENT, AND SUBSCRIBE!
CONTACT ME:
Instagram: madamebrittney
Email: [email protected]
▬▬▬▬▬▬▬▬▬ ♛ #AyiyiHair ♛ ▬▬▬▬▬▬▬▬▬
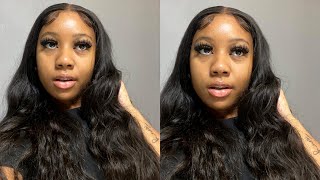
Hair Detail: Straight Transparent 13x4 Lace Front Wigs 20 inch
Direct link to the Lace Front wig in the video: https://bit.ly/2U5uWEA
www.ayiyihair.com Website: https://bit.ly/3h0MrOp
☛ Use Coupon: YTB8 Get extra 8% OFF
Hot Selling Transparent Wigs: https://bit.ly/3dcabhz
Affordable Glueless Bob Headband Wigs: https://bit.ly/3h7lNDq
Ayiyihair Bob Straight Wigs: https://bit.ly/2U1IdOC
Super Saving--4x4 Lace closure Wigs➤ https://bit.ly/3vSNwwX
Colorful Wigs Lace Front Wigs➤ https://bit.ly/2SVswZj
Water Wave 360 lace Wigs➤ https://bit.ly/35QsuEN
Follow Ayiyi Hair On Social Media
Instagram@ayiyihair: https://www.instagram.com/ayiyihair/
Facebook @Ayiyihair: https://www.facebook.com/Ayiyihair/
——————————————————
Contact us:
Email me for all Wig Inquires: [email protected]
Ayiyi Hair WhatsApp: +86 189 3740 8331
Hey guys, i'm brittany, rivers and welcome to my channel. So today i'm going to be showing you all how i customized this wig from ayai hair, i'm going to link the hair in the description box following arrogante's master class. I just love his work. I'M obsessed you all, so i also dyed this hair a little bit, so you all can see it still retains this luster after you dye it, and all of that i'm going to show you how i dyed it and customized it so before we get into this Video, i'm going to ask that you all remember to like comment subscribe, subscribe, subscribe, follow me on instagram at madame brittany and let's get into this video. So first i just want to quickly show you all how i got that burgundy color. So i used 40 and 50 volume developer and l'oreal high color highlights die. So you just mix this with your developer. I used a magenta, a red and i'm not sure what the last color was, but i recommend only using red and magenta that last color just did not lift the hair as much as i wanted to. But this is everything you need so quickly. I'M going to just add the coloring to my mixing bowl just one package at a time and then i'm going to add the 40 volume developer use 50. If you wanted it to be a little brighter. I kind of wish i used 50 but like throughout the whole head, but i only used 40 and that gave me more of a burgundy color, so i just kind of eyeball it and mix it together. So this is the consistency you really want. It'S liquidy and the color is bold, so now you're just going to distribute this all over the hair. The method does not matter until you get to the top so section the hair to where really when you get to the frontal part of the wig. So just section the hair you're just going to lather this all over the wig. Once we get to the top of the hair, we're going to make a middle part, and that is how we're going to section the hair to apply the color to both sides. Of the middle part in the front, y'all see my nails poke through the gloves, but we're just mixing up the third batch of dye - and i zoomed in here, because it's really really important that you do vertical brush strokes at the top. Because you don't want harsh lines and you want it to blend well and because lala's hair had like more dark brown. I didn't go too close to the middle part. Once you get those dark roots, you can just slap on that die on down to make sure you cover the rest of the front section. The same way we were just slapping the dye on in the back. It'S just important that you get your dark roots. If that's what you want so i did really like how aya has a sewn in elastic band already in the wig. So you could definitely make this wig glueless if you want it to be, but let's get into plucking this hairline. So i know i won't put a hole in the lace i'm just going to spray it with some water and then brush it all to the back to just kind of detangle the hair a little bit. So the first thing i'm going to do is take my rat tail comb and just part the first little section out of the hair part it to the front all the way down the hair. You could do it all at once or work in sections. I just decided to work in sections also in his master class. He worked on a white towel on his leg, but i think this is because he was only plucking a frontal. This is an actual 13x4 wig, so it's just easier to work on the mannequin head. Instead of my leg, if you're going to be customizing wigs, you need to invest in a good pair of tweezers. So that's what i have here, a good pair, maybe runs you ten to twenty dollars. You guys so we have the hair all sectioned and now we're going to pull out the hairs right in front of the hairline. So you, i noticed how tay was kind of like using his pointer finger to hold down the baby hairs or the front part you just plucked and using his thumb, to like hold down and give extra tension to the rest of the frontal. So that's what i tried to do here. I kind of switched fingers a little bit because i got tired and i thought one was easier. So you're plucking right at that part where you section the hair and also you're, going to kind of go backwards. A little bit and pluck in the in the hair a little further back to kind of give some variation. You see me kind of doing it a little later so right now, i'm at the temples of the wig, so where the temples will be when it's on your head. Now this area is usually thinner for people, so you're going to pluck a little more heavily than you did on the sides. The sides you're probably gon na, pluck like medium heaviness, the temple's pluck heavy, not too heavy, but heavy you guys and in the middle you're. Barely going to pluck it at all, so once again, we're sectioning the hair a little bit just parting out that little front the front few strands of the middle and now we're moving on to pluck the middle. So here we're barely going to pluck it. I think the main thing we're doing in the middle is to just pluck away the boxiness of the hairline that all wigs have in the beginning right in the middle. So that's what we're doing and over here you see i'm at the temple again. So now i'm plucking heavier once again, so i didn't show the other side, because y'all already saw that, but now we're going to brush those strands up front backwards. So y'all see like how, where the temples are it's kind of a little more ball. So the hair is coming out right now that those are the hairs i plucked you all. The wig isn't shining like that. So now i'm seeing like there are little places where i could pluck the hair a little more, so i'm not plucking the hair at the front front of the hairline, i'm plucking in the wig, so in the middle of the hairs, even though it's not party just Not really at the front and y'all see it's starting to come together, you all and now i'm at the temples over here. So i'm plucking a little more because that area is supposed to be a little thinner than the rest of the hair. But it's coming together. Once again we're at the middle and we're plucking very lightly. We want this to be thicker, but we don't want it to have that boxy shape. So i'm going to plug like a few hairs in the front. Very specific hairs like you, can see in areas where it's a little thicker than others, and those are the areas i'm going to plug okay y'all, so that is it for this video. As for this hair, i think is super duper thick, which i love. I wish it was a little bit longer, so i could really give the lila look. I want it, the hair is beautiful and i just think i think it turned out really well. I feel, like i kind of already did arrogant taste like plucking method myself, but he just does it better? It'S a thing so he's so talented you all, but yeah. That is basically it for this video. The hair is fantastic right. Now. Look at that! Look at that look at that, but yeah. That is basically it for this video. I hope you all enjoyed it like remember to like comment subscribe, subscribe, subscribe, follow me on instagram at madame brittany. Once again, i'm going to link this hair in the description box. I hope you all enjoyed this video and thank you all so much for watching have a great day. You all bye, guys
Comments
M O O N S T A R: The wig looks so natural love it!♥️♥️
Jaliyah Alston: this video came right on time, i need to color my wig this exact color. thank you !!
Ɋㄖ卄乇ㄥ乇ㄒ卄: Honestly, yours look a lot more natural and blends well vs. the photo with Lala—not sure if he took out a little too much in the front. Great job on your unit!
Blake: I never believed in love at first sight, but that was before I saw you… hey I was wondering if you’re an artist because you are so good at drawing me in.
Sansah V: It looks like its growing out of your scalp !!!
Patricia Campbell: gorgeous
Samkeliso: How’s the hair holding up
Patricia Campbell: send that liinnkkk
Tan Eik Fai: Tan eik fai l am 21 years malaysia loph☺