Jet Black Hair | No Plucking Needed!!! Natural Hair Melt | Xrsbeauty Hair
- Posted on 17 August, 2021
- Color Lace Wig
- By Anonymous
♥ INSTAGRAM: https://www.instagram.com/forevercryss...
♥ TWITTER: https://twitter.com/forevercryssy?lang...
♥ EMAIL: [email protected]
♥WEBSITE: https://www.forevercryssy.com (custom new and lightly used units)
♥TICTOK: ForeverCryssy
#BLACK #WATERCOLOR #XRS
Title:⁉️CLEAN HAIRLINE NO PLUCKING NEEDED !!! like Natural Hair | XrsBeautyHair
Description:
▬▬▬▬▬▬▬▬▬♛ Xrsbeauty Hair ♛▬▬▬▬▬▬▬▬▬●
Coupon: "Forever15" for all products 15% off !!!
Coupon: "Forever15" for all products 15% off !!!
▁▁▁▁▁▁▁▁▁▁▁▁▁▁▁▁▁▁▁▁▁▁▁▁▁▁▁▁▁
Wig in the video: https://bit.ly/3pDM9zi
Style: Straight
Length: 20’’
Lace : *NEW* 13*6 Front Clear Lace
Density: 200%
▁▁▁▁▁▁▁▁▁▁▁▁▁▁▁▁▁▁▁▁▁▁▁▁▁▁▁▁▁
New *Clear Lace* & *Clean Hairline*
*Clear Lace* is Melting with Your Skin.
Clear & Transparent for Real!
*Clean Hairline* is Same as Our Own Hairline
Natural Hairline Transition
▁▁▁▁▁▁▁▁▁▁▁▁▁▁▁▁▁▁▁▁▁▁▁▁▁▁▁▁▁
*New* CLEAR LACE is real clear lace, it’s undetectable on your head.
*New* CLEAN HAIRLINE is much more natural than regular pre-plucked hairline, we customized this natural hairline to make it melt skin much perfectly.
▁▁▁▁▁▁▁▁▁▁▁▁▁▁▁▁▁▁▁▁▁▁▁▁▁▁▁▁▁
—Share looks on facebook, instagram , youtube and tag @ #xrsbeautyhair , customers will get $15 dollar for next order.
Contact Us:
YouTube: http://bit.ly/2KXjerD
Instagram: https://www.instagram.com/xrsbeautyhai...
Facebook: https://www.facebook.com/Xrsbeauty
Pinterest: http://bit.ly/38VFY3a
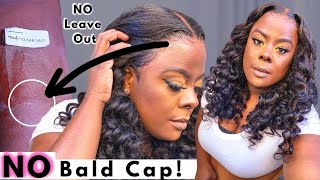
Hey babes, welcome back to my channel if you are new here, welcome now's a good time to go ahead and subscribe, and all that good stuff. Of course, all the details to this unit will be linked down in my description box below, if you guys have not already known about this company, what what in the world are y'all doing. Let'S just talk about that. This is the xrx beauty. This is their straight unit, which actually looks more like a natural wave um, and this is your 13x6. It is pre plugs clear lace. You guys can see the knots on this is already bleached. It'S already been pre-plucked out. You literally, don't have to do anything to it at all. This is actually the packaging which i'm in love with you guys know. I'M a big stickler for packaging. This unit came extremely fast. You guys can see all the goodies that they did provide me. I got a nice little brush to mess with the baby hairs. We got an elastic band clips lashes that, of course i won't use a wide comb and also a wig cap and just a few of the um flexi rods. So, of course, let's jump right into this so for today i'm actually going to be showing you how to do a watercolor. This is something that is almost imperative when you get your units, sometimes they are not the bestly. You know color. Sometimes they do come in. Just more of a natural color, which is more of that dark brown and, in my opinion, sometimes just to take your unit from okay baby - is looking good too absolutely fabulous. You do need to kind of bump up that color, just a teeny, tiny bit. So the way that i do, that is by quickly just dyeing the unit um you guys, are going to get a chance to see exactly how fast it is to do this. Obviously, if you are okay with that dark brown color, then why are we here right, but in my case i've actually fallen in love with jet black hair, and so this is where we are with it right. You guys can see how full healthy long the unit is, but i just again wanted to go ahead and take it up a notch. So i'm using the clairol section tones natural black um and so of course, we're just going to go in and kind of touch up the the edges or kind of the roots of this right. Because we're going to be doing the watercolor - and you guys know that when you're doing that, sometimes that color can get a little bit on the lace and sometimes it's tricky to remove. So i found a way around it. And so what i go ahead and do is just apply a little bit of that dye. Go ahead and shake up the developer and the um. Of course, the color in the bottle together, squirt it into a bowl on the side. And then i use a toothbrush and a comb and, of course, a applicator brush to go ahead and just slowly apply the dye to the roots. Now you want to kind of move in very small sections, because you don't want the product to be too bulky or leak over and spill into other areas. And so, if you do find yourself a little heavy-handed like i did here, go ahead and take a fine-tooth comb just to brush all the product throughout the hair. It'Ll help kind of blend it downward and definitely make sure that none of that dye touches the lace and sticks and just kind of starts to tint it. Because then we have to go to another process which i've already showed you guys, maybe a little over a year ago. So if you do not already have on your post, notifications definitely make sure to turn those on that way. You do not miss any other videos from me, of course, and you guys can already see what the color payoff looks like instantly. The hair is shinier, it appears healthier and just so much fuller until that's the reason that i prefer a black dye over just leaving the color in that natural brown state, you definitely want to keep in mind if you ever have intentions on coloring the hair. Maybe a lighter doing like ombre blonde red, whatever it is you're deciding once you apply this black dye, it is going to be problematic to undo that. So definitely be sure that you are confident about keeping the unit this dark tone color. You should not have to touch it up too much in the future, depending on how long you guys keep your wigs for me, wigs like this will last a good year, two years, probably even more with the proper care. So that's one thing that i love about this um unit. I can definitely tell that the cap was constructed really really well like. I said this lace was their new, clear lace, which is a little bit a step above a transparent lace. Just because you, you literally, cannot see this right, so it's a swiss lace that literally melts into your skin, and that just makes the insulation process super easy. It can also be worn, um gluelessly, so that's something you're curious about not really sure you know about what it is. You need to be doing then listen. This is a beginner friendly unit, where you literally would be able to put it on and go so um again just giving you a close-up on that color and showing you how quick this process is. I literally applied this in five minutes. You guys can see. I don't hope you can tell i did not speed up this process. I did edit it just a tiny bit to kind of move. The you know me pausing in between along, but already we're just under five minutes, and we already have the roots completely covered. So that's good now we're going to go ahead and kind of move on to the next step, which of course, is going to be heating up that water right, so my bathtub luckily gets really really hot boiling water. Almost i'm literally just gon na take the contents of the bottle color. You guys can actually use a um rent for this. If you don't want to use, you know the developer mix completely up to you. You'Ll end up with the same result, but i'm just using another box for clairol um again this is their natural black. If i'm not mistaken, it looks like a 1b. That'S what the box says too. So anyway, you guys can do the jet black blue black green black. Whatever it is, you decide to get this color um and you guys can see how that developer just starts to really heat up and, of course turns into the color that we're looking for. So once you're happy with that, go ahead and start to dunk the unit. Now i don't really like to have stains on my cap, so this is why i'm doing this in a very strategic way. Obviously we could just did this video start to finish. One minute. Go ahead and dip it into the um, the bucket and then kind of go from there. But again you may have trouble with number one unbleaching. The knots which you've already previously bleached or the company did for you and you've paid for that or two. You have a lot of stains on the cap, so you definitely want to take your time with dunking go very slowly just lightly. You know dunk the hair into the water and you guys can see i'm using the help of a comb just to evenly distribute everything. Obviously it's dunked in water. The color should go everywhere, but just to be safe, you don't want any blotchy spots and then of course, go ahead and transfer that into. I just use a very old bowl that i literally only use for hair um and you guys can see what the color looks like instantly jet black super nice shiny, beautiful and we are all set so um. I did go ahead and shampoo condition this with my milani um. I don't remember the exact line, but you guys can use whatever you feel comfortable with. I did go back and forth between my cream of nature, um, uh, mousse and then also the olive oil one. There was no specific reason for doing that. In this case, it was just whatever my hand would grab first and i'm going ahead and just kind of parting this off, so the company did send the unit already kind of pre-styled in a way um, which was just the middle part. So if you want to do a side part, you definitely can again. This is a 13x6 um, so you definitely have a lot of flexibility on if you even want to do a half a path down. But again, i just want to show you a very beginner friendly way to kind of style the unit, something you should be doing right when you get them that way. Once it's on your head, you don't have to worry about burning yourself with the hot comb. You don't have to worry about the hair being wet on your head or really just too much styling right literally, all you should be doing is applying the unit onto your head and kind of going so from here. I'M pretty much just gon na go ahead and use the mousse to mold everything down so that i don't have to do so much work with the hot comb once everything is completely dry, so this ended up being a two day process and the only reason for That is because, typically, i will go ahead and maybe blow dry the hair out or sit it underneath my hooded dryer, but i was in no rush, so i did go ahead and allow the hair to air dry, which of course, in my opinion, further protects the Hair because you are not risking any heat damage or anything like that, um and so of course, boom next day, i'm just going through with the hot comb just to really hit the roots and make sure that everything is flat. But you guys can see the mousse did a really good job of laying it down, and so it took all of the leg work out of this. For me now, you guys have seen me use the um fhi flat iron, a million and one times y'all know we're going on year. Four, i think with this tool. So i'm happy about that and then of course i go back and forth with my camera um or not hot iron spray. What is it? The camera flat iron spray to actually act as like a hold a light hold for the hair um? It actually provides a little bit of shine and definitely just holds everything in place without having any like fly. Aways frizzies and that's another thing that i wanted to point out. This hair was extremely soft, extremely full from root to tip. So you know sometimes you'll get a wig or bundles and it'll have a bunch of flyaways on the way down to the end right. In this case they did not cheat you. So it's definitely worth the money, the investment um and that's another thing. When you get a wig, you want something that's going to last. You should not have hair falling out. They do not over bleach the knots you guys can see how easily it got bone freaking straight, and you guys can see how nicely that black tint just kind of added an extra shine to the hair, and this is with no product at all. Literally, outside of that camera flat iron spray, which, like i said, adds just a small amount of shine when i say small, it's more matte than shiny, but you guys will kind of get to see that as well. You guys can already see how vibrant the hair looks. So i'm just going to go ahead and finish up pretty much flat, ironing this out and then, of course, i'll be back to show you really quickly how i trim the ends and then, of course apply the wig for myself. So so so my all right guys. So don't mind me of course, already pre-prepped with my wig cap um glued onto my head, i'm just going around and kind of evening out the end you guys know. I don't believe that a hairstyle is complete until you have given a little bit of trim and some type of shape to the hair. So i did go in and add my bio silk um serum. It'S just a nice shine to the hair to help kind of boost it even further and boom i've already applied the unit. You guys have seen me do this a million and one times so definitely check out my installs for that. If you want to learn how to do it glue this, i have videos for that. If you want to learn how to apply this with the glue that's available to you as well, i hope you guys enjoyed the video. I love you guys so much stay pretty and i will see you next time. You


Comments
Amanda Edney: YOU’RE SO FREAKIN’ FLAWLESS BABE… 1M likes from me!!
Erica: It looks so good
Deja Smith: I don't know if I'm cheap or not, but 400, 500, etc wigs are not where it's at especially when I only expect it to last 1-2 years. It looks amazing on you, but affordable wigs are what I'm looking for.
Gill Perry: ♀️Beautiful
Shirley Bien-aime: Hey beautiful I'm new to uiur page was wondering if you sell your units after reviewing them