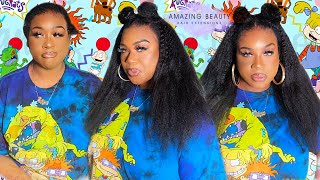
Fire Of Spring!| Detailed Wig Install | 13×4 Highlight Bob Straight Hair Ft. Donmily Hair
- Posted on 18 March, 2022
- Color Lace Wig
- By Anonymous
❤------------------- ❤#DonmilyHair ❤------------------❤
I'm wearing this in video: https://bit.ly/3tcinXq
Use My Special Code For Discount Off: donmily8
https://www.donmily.com/ ➤Top Selling Wigs: https://bit.ly/35VY1Jh
Click To Enjoy Biggest Discount: https://bit.ly/3JwbSod
Hair Info: Donmily Highlight Auburn Brown Bob Straight Hair 14”
Donmily Great Wig’s Sale is Rocking On the Way!!!
Save $5 Over $109 Code: DA5
Save $15 Over $169 Code: DA15
Save $20 Over $259 Code: DA20
——————————————————————
➤ Great Discount V Part Glueless Body Wave https://bit.ly/3w6yKGR
➤ Great Discount V Part Glueless Jerry Curly https://bit.ly/3KLjfYN
➤ Great Discount V Part Highlight Curly Hair https://bit.ly/3wgeB1f
➤ Great Discount Highlight Straight Wig https://bit.ly/3CSZUCn
➤ Great Discount Highlight Jerry Curly Wig https://bit.ly/3tVVI0C
➤ Great Discount Lace Frontal Body Wave Hair https://bit.ly/3i8JyvS
➤ Great Discount HD Invisible Lace Wig https://bit.ly/3JeYOTV
Choose Your Favorite Lace Part Wig☛https://bit.ly/37DHKJv
Big Discount Bundles with Closure/Frontal☛https://bit.ly/36gLy2t
————————————————————————————
Subscribe Donmily Hair on:
Instagram: @donmily_hair https://bit.ly/3MSpI6i
YouTube: @Donmily Hair https://bit.ly/35ZdRTj
Facebook: @donmilyhairbeauty https://bit.ly/3u0LPyH
What'S up gi babies, so we are getting to this install with this cute. You know gingery it's more like a toned down ginger to me, so we're working with don milly hair today and i'm just showing you guys what's inside of the box. Now today's install is going to be a little bit more detailed or getting into the plucking. I didn't have to bleach this unit because the unit was already pre-colored and i didn't have to bleach it anymore, because i felt like the knots were pretty much good and i can work with it without the knots looking crazy. So, first we're just getting straight into the plucking i'm putting my t-pins on my unit and we're going to go ahead and get started so today, i'm only going to only show you guys one side because you'll pretty much get this gist of what i'm doing so. First, what i like to do is just separate the first layer of hair first, and i lay it down with my hot comb and when you're plucking plucking is very easy. It'S just depending on how much pluck that you want the weight to be you're just going from left to right, left to right, just plucking left to right left to right. You see me just plucking, but you have to do it in a continuous motion so that you won't pluck more parts than the other and it will give you that more scalp like feel so. Basically, the whole fundamentals of plucking is the more scalp like you want. It to be, i would say, separate the hairs, more keep separating and um doing layers and then plucking do your layers and then plucking. What i mean by layers is where you separate it, and you see like how i did the first with the hot comb you just separate it all the way back as far as you want it, so this unit it what it didn't, go that far back on The side, so i didn't really have too much to pluck on the sides, but the middle part was it had the most lace on it. But i just went ahead and just did two layers of plucking and then that was pretty much enough for me. So now, as you guys can see, it is giving me a more scalp like kind of look and um like i said before, if you just pluck the continuous motion as much as you would like to, you will get that look that you're looking for so now. We'Re jumping straight into this install and this hair is 14 inches. It'S really really cute um this i was feeling this straight, but towards the end we did curly, but i did wear this hair straight. The first time that i wore it and then i came back and straightened it, but for this install it's pretty much self-explanatory, i'm not going to talk too much for us doing the um glue, but today i am using the kiss glue. I will have the products list down below because i didn't get a chance to show you guys, but right here, what i'm doing is i'm just customizing the wig to my ear, don't be afraid to cut your wig, but don't cut it too much because remember after You cut, you can't go back, but just simply cutting the sides, so it can fit to your face without feeling. Uncomfortable is no problem. Now, i'm not sure how many layers i did. I think i did like three layers in the middle and i think i did like two on the sides, but this kiss glue dries so fast. You guys, i didn't even have to blow dry in between. I literally blow dried my third layer, and then i was good so so after i hot combed everything just to get it just to get it to melt in a little bit more. I like to hot comb right after i've, laid it down and we're going to go ahead and put our elastic band on, and while our hair is melting, while that lace is melting in the elastic band, we're going to go ahead and get this part together and Just kind of you know shape our hair to how we want it before it's time to cut off the lace. Now today i didn't use erasers to cut off the lace. I only just simply lose my scissors and um. You want to kind of do it in like the zigzag motion a little bit just so that it will blend in more and it won't just look like extra extra straight. I like to not cut so much you you guys see. I didn't really cut. I just kind of my scissors are sharp enough that i can kind of like glide it across kind of. Like you see me doing so, i would suggest getting some really really good professional sharp scissors if you're going to do it that way, if you're using regular scissors just try to do it as much as zigzag as you can but um this step that i'm about To show you guys is a step that i sometimes skip over a lot, but i feel like if you want a really really melted good install you. Will you really need to do this step and for my installs for now on? I'M not going to forget this step and i'm going to continue to do this because i've done this in the past, but i don't know. Sometimes i just be rushing and i never get to do it, but before we get into that um, i'm just getting some little spots that the lace i didn't put enough glue on some spots and i just went back put the glue on there and just you Know brushed it through. It'S no problem doing that. You just want to make sure that all of your lace has glue on it where it needs to go. So this is the step that i'm talking about when you're separating your baby hairs. First, we're not getting into baby hairs, yet we're just separating them, because this step is very crucial to having a really really laid install, so just separate all the hairs that you want for your baby hairs and i like to hot comb them down. So i can make sure that they're really really flat and then we're going to go ahead and spray our holding sprays on these areas and then put our elastic band back on. And this is what makes your install very, very, very, very, very late, like every time that i do this. All of my installs come out very, very late. If you skip this step, your install can still look laid, but it's a possibility that it won't look that late so um. This step right here is just so crucial like i don't know why i would skip over this step if you do skip over this step. Make sure that you are having your elastic band on the first time for as much as you need it and make sure that the lace is really really melted into your skin. But this right here is what ensures that it's really melted and i like to go over with my hot comb a little bit more as i'm separating my baby hairs and stuff. Just to make sure that everything is. You know everything is how it needs to be so now i'm putting my hair in a ponytail and then i'm going to take my straight request spray and my even new york spray, and these two sprays will be linked down below the straight request spray. You cannot find it on amazon or anything. You have to get it straight from the website and that will be linked down below this straight request. Spray is really supposed to just kind of like melt, your lace in a little bit more, and i followed it up with the even new york spray, because that's the holding spray as well that you can use for like a glueless unit. So i feel like that. Will ensure that the lace is very, very melted and i put my elastic band back on and just go ahead and blow dry, my hair, i would say i would suggest, to sit under the dryer and sit on a dryer for a good 20 minutes. I think i blow dried this for about 10 to 15 minutes, and i was good, but for just for my beginners, if you just really want to ensure that your lace is going to be really really melted. After this, i would say blow dry for 15. 20 minutes or you can blow dry for 10 minutes and then walk around the house for extra 10, and that would be good as well, but, as you guys can see, you see how melted that is like it. It gets the hair really melted. When you do this, that's why i said i'm not going to skip this so for my baby hairs um, i haven't really changed anything with my baby hairs. I'M just using the regular got to be the only tip that i would say for the baby. Hairs is, of course, get your small hot comb and curl your hair, your little baby hairs before you start them and i would say, keep your blow dryer nearby, because after i do do my baby hairs with the got to be glued gel. I like to blow dry them so that everything can stay in place. Okay, so now that our baby hairs are done um, this hair is super cute straight. I know i told you guys before i did wear this out. I did wear my hair straight for the first day and it was just so so cute, i'm so mad. I didn't take any pictures with it straight, but i really really like this hair straight. It was really really cute and it was just a vibe like it was so cute straight but um. I just went over with my straightener just a little bit more and just to get it a little bit more straight and, as you guys can see, this is how it looks. It'S really really cute. So if you got this unit, i did not cut this hair. This hair is the length that it came and it already came kind of bluntly cut, which i really really like now. This is the next day and i did wanted to add some curls, so i just did some some pin curls and i did curl my hair away from my face and just pinned it up. So i've already took out all of my pin curls and i did have to go over some parts with my curler a little bit more, but i really like the way these curls came out and i really like that. T3 curler. It'S a really bomb curler. If you guys, uh would like to purchase that curler, it is at ulta and i believe it's at sephora, but that curler is so bomb. You guys it's kind of on the expensive side, which is why i'm happy that i got it as a gift. But i would really suggest investing in this curler, because it's a really good color and, as you guys can see, my curls are popping everything is together. I really really like the way this came out. I really love this color in particular on my skin, and i'm really happy overall on how this install came out. If you guys want all the information on this unit, make sure you guys check the description down below, and i love you guys so much. Thank you guys for watching this video and don't forget to like comment and subscribe to your girls. Youtube channel stay blessed. Ti babies be out.
Comments
Kieriese Duquesnay: Not even 1 minute in and I know this look is going to be slayed
BeauTiFul Queen: Beautiful install as always and thanks for the advice because I’m learning so much from your tutorials
donut: So cute pls do a full lace wig
Sammy Da Goat: Third Comment I'm Obsessed With The Ginger Hair Color You Came Through
Mini DIOR: It the color for me
Dima Saranov: 2kseen https://www.youtube.com/playlist?list=PLatBUqXIPJGg77ODNDckYbK6hiRP-ERW8