How To Bleach Your Curly Hair Honey Blonde/ Make A Wig(Easy For Beginners) Beauty Forever Hair
- Posted on 03 February, 2018
- Color Lace Wig
- By Anonymous
Hey guys hope you enjoy this QuicK, EASY, AND BEGINNER FRIENDLY how to make a wig and dye it video
H A I R U S E D
Malaysian curly hair in the video: https://goo.gl/hdpz6z ( 20"×4 with 20" closure)
Malaysian curly closure: https://goo.gl/35vHA8
Malaysian curly frontal: https://goo.gl/tuW8ms
Social media:
‣Instagram: http://bit.ly/IGBeautyForever
‣Facebook:http://bit.ly/2jqoBNP
‣Youtube: http://bit.ly/YouTubeBeautyForeverHair...
__
Contacts: http://www.boulonguise.com/ in hidrocor grey
(CODE RONKERAJI FOR $$ off)
Lashes: http://rougeandrogue.com/ in style miss fury (code ronkeraji for $$ off)
Makeup for melanin girls holiday palette (code ronkeraji for $$ off) https://makeupformelaningirls.com/coll...
__________________________________________
Makeup tutorial, makeup tutorial for beginners, makeup videos, makeup for black women, dark skin, dark women, juvias place, juvias place festival palette
__
S U B S C R I B E!
https://www.youtube.com/channel/UCFav...
__________________________________
S O C I A L
ronkeraji.com
→Instagram: https://instagram.com/ronkeraji
→Twitter: https://twitter.com/raaderdiaries
→Facebook: https://www.facebook.com/ronk3.raJi
→EMAIL (Business/ Collabs) [email protected]
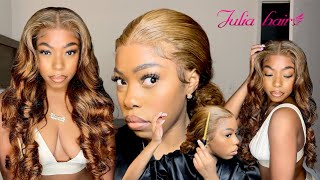
Hello good afternoon guys so today I am going to be doing a tutorial on how I achieved this beautiful blonde wig, I'm gon na make it as detail and beginner friendly as possible. So if you haven't already subscribed to my channel like and comment and let's jump into it so first off, this is a shopping list of all the things that you're gon na need for this. You can pause the video right here and write a little list down. So that that way you can have everything you need. This hair is from beauty forever. I'M gon na link all of the links down below so that you guys can know where I got it is from Malaysian curly hair. I got four twenty inch bundles and a four by four 20 inch closure. So all of it is the same length and, as you can see, it is malesia. This is what the closure looks like it's a regular closure. It has, you know, lace in front of it. You know how it walks with closures and everything you're gon na need bleach. Obviously, you're gon na need a whole tub of bleach, and I use 30 developer because 40 developer is way too much for curly hair. You want the curls to still be intact when you're done bleaching moving on to dyeing the hair, you want to make sure that you're mixing your bleach with a little bit of your developer. You don't want your developer too thick, but you don't also want it too. Runny, so you have to kind of look at a good half point. I use the whole tub of bleach for this hair and I always start from the bottom. The reason why I like to start from the bottom is because the bottom can be lighter than the top, and it will give you a nice ombre effect and also, I always feel like the top, always takes longer to process. So you want to really use a little brush. You can get this brush or spatula in the beauty supply store and what you want to do is lay it down in a well-ventilated area of your sales in my studio and it's actually not very ventilated, but I had to record this for you guys, so you Can see so I applied the bleach, you can really apply it in any way, just make sure all the hairs are covered and you get the back. So you see how I turned it over make sure you get the back. So I also left the color on for about 30 minutes. I didn't want to leave it on for too long, because you don't want the hair to be fried so after you're done putting the bleach in just put it in a plastic bag and wait. 30 minutes set a timer, and your hair would definitely turn depending on what type of hair you have so now going on to making the wig I haven't actually put up in making a video in a while, but this wig cap was way too big. So I actually had to sew across of it and make sure that it was tight first things. First, with the closure is you have to line it up with the wig cap? This is pretty simple to do, as you can see here, and I put the hair up so that it's easy for me to sew. I'M not really sure how to explain sewing, but you just put the needle in and bring it back out as you're. Seeing here what I like to do is I start from the top of the closure, and I work it in. I am NOT a master wig maker. I just started making weeks last year, but I've learned a lot from just making them, and I really hope that you guys can learn this too. If you have any questions about wig making or about color, please let me know in the description down below I'm trying to make this as detailed as possible. So now I'm gon na just so the whole closure around. So you want to start from the front and work your way to the back and then on the other side, work from the front and then work your way to the back until you're done with the whole closure, hair actually took the color very well. It was very shiny, it didn't shed very much and I really loved that about it, had no problems with this hair and trust me. I'Ve had problematic hair. So it's not like I'm just saying this, but I really loved the hair texture. I, like the quality of the hair, it's actually really good hair. I'Ve worked with this company before so. I know that I'm always gon na get good hair from them. So when you're, starting off with the wefts, I usually like to double them, so they usually come either single or double. I like to double it in the back to give the back a fuller appearance. I'M not really sure if this is the correct way to do it, but this is very beginner friendly. So this is for, if you really just want to make a week - and you don't know how to do it so you're, just gon na sew the track on it's pretty simple. I learnt this in literally one video I watched, you just saw the track on make sure the track is well sewed on. You can see the pattern in which I'm showing it on. So I sew it on to the nape of the of the wig cap and you just continue sewing until you get to the top of the hair. I usually like to put on a show. This is nine. Oh two one! Oh! I did a second time, I'm watching this whole show, but I like to put on a show, because just watching something will give you a lot of just help. You know and like it will make you take your mind off the fact that you're sewing for so long because you at least get invested in the show and just be sewing, and next thing you know you're done with the week. So I usually like to do that. So that's what keeps me from getting burnt out from wig making if you just wig make, then honestly, you get tired and I always make my wings in the evening because I just feel like it's very calming just sewing and just watching a movie or something like That, especially if you're somebody who doesn't have patience, it's actually really good to just watch something while you're doing this, so I'm just sewing in any honestly, I'm not even trying to like make EQ or anything. I just want a wig. So during winter I like to wear wigs, if you guys don't know, I have natural hair, and this is just the way I protect my hair, so I don't always have my hand in my hair. So I just like braid my hair down and I wear wigs. I usually get my hair braided professionally, but of course you can always just braid your hair in any type of way, as long as the wig will fit on it. So all you're gon na do is just keep sewing until you get to the closure part. Now the way I put this week, I know it looks weird, but it's because the wig cap was pretty large, so I actually had to stretch it a little bit, but usually you just put the wig cap on and sew it all across. I hope I'm making sense, because I really did this tutorial as detailed as I possibly could, so that if you're a beginner and you've never made a wig you'll be able to understand how to make the wig and I'm also knotting the thread. So, as I'm sewing it, I'm also knotting it at the same time after I'm done with the week, you will see that there is a black part of that where the closure is, you want to cut it, but you want to make sure you don't cut it Too, too close to the thread, because if you cut it too close to the thread, what is gon na happen is your closure is going to slip off. So this is what it looks like without any plucking or anything I like to try and see. If I can get the part, so I put it on my head and you can see it just looks straight, so we need to pluck the part, and we also need to pluck the wig plucking makes it more natural. Do not pluck too much to pluck. You literally just use the tweezers like you would be using it for your eyebrows and it's better to have a very, very tiny part than to have too wide of a part. So you want to make sure that when you're plucking your wig, you don't pluck too much honestly, you could pluck a lot out of the hairline. That'S fine, because it's a middle part you might cover, but your part, you don't need it to be that big. So you can already see the difference between the part I plucked and the other part you can see. The other part looks very straight with curly hair. You have to remember to take out the hairs that you're plucking, so all I'm doing is just using a tweezer and just taking out the hairs. You have to be very careful because you also don't want to rip the lace, so you can see I'm holding the lace while I'm pulling the hairs out of the wig, because you need this to make more of a natural hair line. I didn't tweeze it too too much, but I twisted enough then, as an extra step, even though I bleached my knots, I like to use my dark deepest mineralized skinfinish on top of the list, so that it shows through as my skin color and it doesn't show Through you ask whites, because this lace is why you can never bleach lace, you can only bleach the knots and then I go back and I tweeze a little bit more just to make sure it looks natural onto my head as you can see here then I Add a little bit of concealer concealer will make it look like my scalp, and this is the LA girl Pro concealer and fawn, and I just basically put it into the part. So this is very important, because this is how I got the parts that look very natural. I noticed that a lot of times with these blonde brown hair, it's very hard for you to see the part, especially if you're my skin tone. So I like to put a little bit of eyeshadow a brown eyeshadow. So that way, you can kind of see the part a little more visibly then, after that I cut the least you can cut the list in any fashion, but just make sure you cut it straight and you don't go to in now to lay the wig. I use my gut to be glued. I put the gut to be glued on the front of the hair and make sure that it's on the front where the brains are not so that it doesn't pull off. My edges I put the wig on and - and I just press it down now, if you want to get a better hold with this, make sure you scarf it down for a couple of minutes so that your closure will leave very, very flat. Scarfing it down will make it look like this and it will look more natural. Of course you get better as you make wigs, but if you guys have any other questions, as I said before, let me know in the comment section down below. I hope you've enjoyed this tutorial. I hope you learned how to get this hair color as well as make the week, and I will see you guys in my next tutorial - bye


Comments
LYDIA STANLEY: Wish I could put my hand through the screen and take this wig I’m so clueless with coloring hair .. styling .. anything hair in general .. but I totally love watching you during your hair videos!!! ❤️❤️
Angelle Smith: Very creative!!! Thanks for sharing!!!
Abia.kyarna: so amazing I wanna try
CuttieesGlam: nailed it as usual
Felicia Francis-Edwards: Helpful video.
Cocoa AlmondJoy: Where did you get the extra large wig cap??
emelia agyeman: Thought you were teaching colouring, not weave-on fixing. Hope I'm right? After the bleaching you did not continue for us to know how you achieved it finally. Why?
Camellia et Vanessa: Yeeeeaaah !
Lu Asare: I like how detailed the video is but I am not a fan of the hair color. As you said your trying new things this year, respect that.
Megan Howell: I LOVE YOUR VIDEOS SO MUCH!!!!❤☺☺
elza elza:
Uju mobi: First comment
DUDAKTAN KALBE За Всички Мърши: