Lightroom Tutorial - How To Correct Hair Roots
- Posted on 01 February, 2016
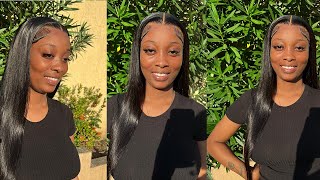
- Color Lace Wig
- By Anonymous
In this free video, I share how to fix roots inside of Lightroom using the Adjustment Brush. We learn how to darken AND add the appropriate color into the mix.
Sign up for my free workflow video series:
More resources:
http://flourish.academy/storefront/
Join us in our private group!
http://facebook.com/groups/wbhcommunit...
Hi everyone: this is heather from weddings by Heather comm, where my goal is to equip you with the best techniques and tips to make you a better and more efficient photographer in this video. We'Re going to look at the adjustment brush inside of Lightroom, but first make sure you check out all of the free resources available on my website. My friend Suzy sent me this photo. She had taken of a senior and she was obviously concerned with her roots. The difference between her roots and the rest of her hair, my friend Suzy, is an amazing photographer. Please I implore you to check out her website. The link is below I'm gon na go ahead and zoom into this photo with a command or control + on the keyboard. I'M gon na hit it twice to get in a little bit closer and then I'm just gon na reposition the photo so that I can see the roots now. This is a little bit different, because typically, a root problem is the opposite of what we're seeing here. That is, the roots are darker than the hair, but in this case they're lighter. So let's go ahead and press k on our keyboard in order to access the adjustment brush. So there are a couple of things I need to tackle here. Obviously I know I need to darken those roots, but that's not going to be enough. I'M going to need to add that red Auburn color back into the mix. So, let's start by pulling down our exposure down on our shadows, I'm going to make sure that the feather of my brush is at 100, but I'm going to set the flow to right around 50 and that's because I'm probably gon na want to build up. This effect slowly and you can think of flow like an airbrush. If you're using an airbrush gun - and you put all of your pressure on the trigger, then it the flow would come out at a hundred percent. But if you just press halfway, you would get 50 percent. So that's the same kind of idea. I'M gon na make this brush bigger with my right bracket key. My density is at 100, so I can build up this flow as much as I need, and I'm just gon na start brushing over these roots dragging over these roots with my mouse in order to darken them a little bit, and you can see that as I'm Darkening them it's looking better, but we're running into this problem with the color now remember. The adjustment brush is interactive, so I can come over here and make that darker or lighter. Depending on what I need, I chose exposure shadows to work on that area. I could essentially impact two different things, but what I'm going to do is add color back into this, so I'm gon na click on the color box and then place my cursor inside of this box. Now, as I do so, what you'll notice is that the color of her hair will change. So if I click on blue, for instance, then her hair just turned blue. Obviously that is not going in a good direction. We want to use the same color as the rest of her hair, so the trick to using this is, you must click inside of this box and then do not let go of your mouse click and drag over to an area in a photograph where you wish. The color to pool from, and that actually looks pretty good, so I'm just gon na continue to brush over these areas of the hair. To add that color now one thing I do notice is that that sort of red Auburn, dark color, is a little more saturated than I would like. So I'm gon na click that color box again and just pull down on the saturation a little bit just so it's not overly red, go ahead and close that box and we're really zoomed in on this photo, and I call that pixel peeping it's it doesn't. Do anyone any good, so I'm gon na go ahead and hit command? That'S control on the PC to back out I'm gon na press H to hide that pin and then I'm gon na press, my backslash key to look at the before and after, and that looks a million times better now. Sometimes you'll have varying issues with highlights and what I might like to do, then, is I'm going to show that node again with H, but I'm gon na grab a new node by clicking and by the way I use the word node and pin interchangeably, because when Lightroom first introduced this tool. These were referred to as notes so they're now pins, but what I'm gon na do is create a new one and then make it a little bit darker and I'm gon na make the size smaller with my left bracket key and I'm gon na kind of add Some dark streaks in different areas of her hair, just sort of you know, blend it in so it's not one solid color and it looks a little bit funny right now, but as we zoom out and also I noticed this highlight right here is a little bit Distracting so I'm just gon na brush over a little bit, it needs a little bit of color in it. So let's go ahead and drag our mouse into her hair again to select that red Auburn color again it's too saturated. So I'm just going to pull down on the saturation a little bit close, that box K to drop the tool commander, control to zoom out backslash key to look at the overall before and after, and I think that looks fantastic, I'm happy with it and just as An aside, this is something that previously I used to accomplish in Photoshop, with varying tools such as clone or maybe even The Healing Brush. I think it's much faster and more effective to do it inside a Lightroom. I hope that you found this useful I'll, see you in the next video
Comments
Abe Galan: This is definitely one of the best videos I could possibly watch right now. The whole world is isolated from CoronaVirus, yet we Photographers can salvage colors and the fresh salon look with these techniques. Thank you very much.
Michael Lombardi: I had a heck of a time getting mine to look good like yours. Eventually, I tweaked the temp & tint and got close enough for government work. Thank you so much! I really didn't want a Photoshop solution.
Taryn Boyd: loved this!! I didn't know you could do this!!!!
Amy Glassner: You are a lifesaver! Thank you so much!!
Kubecca: I've searched how to do stuff on Lightroom dozens of times and NEVER got the quick fix and clear explanation I did like on this one. I stink at Lightroom and don't retain anything I learn (!) but this is my definite go to girl now for eliminating unwanted wrinkles, brightening faces, dying roots (OMG this is effective, easy and clearly presented), etc. Thank you, Heather! You're an asset to these forums!
kennedy johnson: Super helpful thanks
K S: Hi I really like your video. But could you slow down on the verbal instructions? For beginners like me it would be a great help. Many Thanks
K S: Hi I really like your video. But could you slow down on the verbal instructions? For beginners like me it would be a great help. Many Thanks
Corey Perez: HOLY COW, LEGIT! Just worked some magic here in the North Pole!!!
Nico -: Great!!
Aline Designs Photography: When I adjust the exposure it changes the entire photo. What am I doing wrong?
Jess233: I don't know if it's the new lightroom update but my cursor shows a blue dot and i can't figure out how to use it as a brush, it just does the area the little blue dot is in - if that makes any sense
Oumai 009: Can you do the same trick in photoshop? Btw I like your voice ):
Katie Miller: My color doppler (?) isn't choosing the color? have any idea why?
Kubecca: You rock.
Menace Lifestyle: Colson comedy