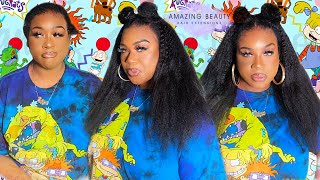
How I Watercolor Dye And Make My Violet Lace Frontal Wig | Gbemi Abiola
- Posted on 09 September, 2018
- Color Lace Wig
- By Anonymous
Please LIKE, COMMENT, and SUBSCRIBE!!! :D
--
Connect with me! ♡
♡ INSTAGRAM ♡: https://www.instagram.com/gbemsabiola/...
♡ TWITTER ♡: https://twitter.com/gbemsabiola
♡ SNAPCHAT ♡: ilovetopurplefy
⇢ For business inquiries ONLY, please feel free to email me at:
--
COUPON CODES:
--
WHAT'S ON MY FACE:
Eyes:
Face:
Lips:
--
MUSIC:
Hey guys welcome back to my channel and if you're here welcome, so today, I'm going to be showing you how I colored and made this vibrant violet purple wig. You guys have been asking me how I make my wigs, so I decided to show you guys today. So if you're interested please keep on watching and if you're not please stop right here, it's not worth your time and effort. So, let's get into a video, so the hair I'm using today is from a black hair company called romaine corporated. I'Ve been wearing their hair for the last couple of months and I really enjoyed their hair, so I want to try out their blonde hair. Today I purchased this hair by myself, so nobody can't say that I I was sponsored I was on sponsor, so I have a 613 blonde, a prefrontal as well as five bundles of hair. I have a tooth I'll have to 26 is at 24 and 822, and a 20 inch bundle. So those are my five bundles. If you're interested in purchasing this hair, I will link them down below and I also have a coupon code too. So I also put it in the video if y'all are interested as well. So for my hair I am using adore purple rage and African violet I'm doing a two to one ratio, because I want my hair to be more purple with like a bluish tint in there. So I have a bucket of warm water, a little shoebox storage container of warm water and I'm just pouring the dye into it. It looks like I'm pouring a ton of dye, but I pre dyed my other bundles before this. So I would just put some water to get some of that excess dye and to use that up but yeah. So that's what I'm doing and then the two bottles that I actually pour like full dye into. I just put some warm water, I'm just shaking them to get any extra dye. That'S sticking to the sides of the bottle. So I'm just pouring that and then I'm just gon na mix that in with an applicator brush, so as you can see, I'm going to take my bundles, I'm gon na dip them into the water. As you can see, I already added rkers to my shortest bundle, because I didn't want like a huge deviation and a deep line of demarcation for when I make my weights, so I am just going to quickly add that into the water I crunched up the hair. So it would all take at the same time and there wouldn't be any lighter parts, and I'm just also gon na go in with my left hand and just mix that in all together. So that's what I'm doing just making sure the hair is fully saturated. Breaking up the hair to see if there's any blonde pieces left and then I'm just gon na set a timer for 10 minutes and then come back so once that's. Why I left it to sit for 10 minutes, I'm just gon na, take it out and squeeze the excess water out as well as towel dry it before I go wash the hair, I wash their hair off camera because it was just taking a lot of time And I didn't really have any good angle shots, so I just wanted to show you what the process was that me just taking out of the water. So that's what the color looks like after I want to cut it bad hair and then this is what it looks like when the bundle in you dry. It'S super duper dark, but it's vibrant at the same times, which I absolutely lutely, lutely love. So for my root, color, moving on to my frontal, I'm going to be using a well a color tangle for BB, dark chocolate brown. When I do color, I usually prefer roots to mine. I feel like it looks more natural than going rootless, so I'm just applying that on with a mascara wand, a disposable mascara one and I'm trying to do as quick as possible, but obviously I'm going actually really slow, because this was my first time routing. On a frontal, so I was trying to be as careful as possible and I wanted one and a half know one-inch roots, that's gon na happen. It ended up being like one and a half two inch roots um but yeah. I was trying to go as fast as I possibly can and not mess up my frontal but um. Yet girl ended up messing her frontal up anyway, so yeah. So that's what I'm just doing so. As you can see, I did mess up my frontal because I went happy with the applicator brush and then went over it, and that was a very stupid move. But now I am just painting on that: adore African, violet and purple rage make sure and I'm just using your applicator brush. To be honest, I was actually rushing when I was colouring the frontal, like the purple part. I was alternating between the applicator brush and my hands and then finally, I just um, it was just scooping it into my hand and then just like slapping the dye on. So that's why I have literally a purple dye all over the gloves and my gloves are not clean, as I would be doing if it were, if I was taking the time with an applicator brush so yeah, that's why my gloves are dirty so yep. So, moving on to the big making portion, this is a cap I like to use I like to use a professional wig cap when it comes to clients. I do not like using this cap. I prefer the mesh dome caps, but I'm going to start off by pinning my frontal to my wig and when I pin the ear tabs, I'm pinning them on the front till I'm pinning it behind the ear tabs on the cap. That lets me know where I have to cut after I finish making you wait. So that's what I'm doing, I'm making sure it's precise, so it fits really really well, and this method has really really helped me when it comes to every wig that I make for myself as well as other people. So now I'm just sewing my wig, my friends. Along while finishing sewing it up and I'm using the loop and pull method, this method of doing the overhand stitch, this really keeps my weight very secure and it makes it easier when I pop a thread in my wig. If I ever do it just makes it a lot easier for me to repair it. If I do and it keeps everything tight and secured - and then I'm just going through by the behind the ear tab into the frontal, like I explained where I pinned it, I'm doing a double stitch sew. The thread does not pop once I put this on so yeah, that's what I'm doing and I'm just gon na, not it twice and then cut now, I'm just installing the bundles. I am sewing underneath the laughs, I'm sorry my hand blocking it. I'M right-handed and I didn't realize I should have been standing on the left side of the screen uh but yeah. I am right handed so I'm doing the loop and pull method and then I what I do when I am going to flip my track. I do the footballer method, so I take the bottom track. That'S underneath - and I sew that down, but I don't sew all I don't attach it to the frontal, as you can see like that, and then I flip it over and I show do that. Um, just the hold part um doubling that bag up and then I just continue sewing loop and pull continuously over and over and over again. So hopefully you guys can see what I'm doing as I'm doing it. This is my first weight making tutorial. So I apologize if I keep blocking it, I'm so so so so so sorry, so as you can see, I'm just gon na still continue to sew underneath the loop and pull normally. I don't sew around the left. I normally sew through the left, but I wanted to try this out to see if we'll make League making faster. For me, it's a lot faster than sewing through the weft like I normally did. This took me only a couple hours to me. I had a break in between because I went with my mom, but um yeah it. This was a lot faster for me to make. So it's just interesting and really really good for me personally. So this is the last one I'm doing um for the last one. I usually single left it because I don't want it to be bulky on top and I want it to lay flat. So that's what I'm doing so, I'm just single wafting it. I actually kind of messed up on this part, because I was single wetting. The top two bundles, which I should have tapped to doing but off-camera I didn't like how I was single wetting, the 22 inch. So I decided to double double it up and then I realized I should have kept a single wafting. The 22 inch bundle but um that kind of messed up my way at the end a little bit but I'll explain it to you as I get to the finishing part of that, but yeah, I'm just finishing that up. So this is the part where I messed up, because I decided to unseal left the 22 inch and double left it. It made me have like big gaps at the top, like bigger than I want to normally between flaps, when I closing a wig like this I'd. Like to have at least half an inch between each wrap and it's single liked, it um because of my dumb self, there was at least, and at least a 3/4 inch for an inch gap. So that's why the spacing looks so big, but this part I am so so so so sorry I messed up but probably once like, I have the change of frontal, owl and remake this way, because that's what I do with all my wigs when I have to Remake the frontal I will fix the whole stitching and what ding and placement I always fix my errors afterwards after when it's time to fix. So that's that's how I am because I was way too lazy to take it apart and then reset you gun. So yeah. That'S typically what I do so, I'm just closing it up right now and then I'm doing a double stitch to hold the end together. Looping it around twice cutting the thread off and then I'm going to bump, tie off and then cut the web. So now I'm just sewing the last left to close up the wig, and so I'm just sewing around the weft, but through the lace, the back of the lace frontal, so there's no gaps, and so everything is seamless and lays flat and is super super tight. So I'm just sewing that and just doing the loop and pulling out there, which is what I've been doing this entire time. So this is the finished unit. I did go in off-camera and add elastic bands combs and tinted my lace as well as well styled it. This is 26 inches, pure violet, vibrancy goodness. I hope you guys enjoyed this video. Let me know in the comments down below if you would like to see other hair videos. For me this was my very first hair video. So I hope you guys liked it. Don'T forget to follow me on my social media, Instagram and Twitter buns Abiola, snapchat I'll burp. I hope you all have a wonderful day and I'll see you all in the next one bye guys


Comments
TeeKea Entertainment: I wanna start making wigs & learn how to dye & allat . I love it it’s beautiful
Tatyana Dekatra: Do you plan on selling this?