New Color Alert‼️|Fiery Copper-Ginger|Water Color Method|Ft. Afsister Wig
- Posted on 24 August, 2021
- Color Lace Wig
- By Anonymous
✦Connect With Me on Social Media✦
https://www.instagram.com/calidreaminx...
and Subscribe
♡ For companies wanting to work or collaborate, Send emails to:
Thanks so much for your Support! Love & Blessings ♡
Exact Link to wig:
Amazon
https://www.amazon.com/dp/B0983MBHJ1/r...
Techy Stuff:
Sony A5100 ➨Cannon EOS M50
Editing:
iMovie
Location:TN
Age:26
Ethnicity:African American
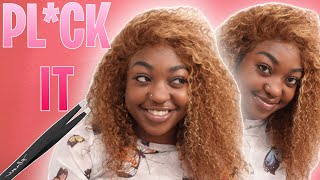
So, what's up y'all welcome or welcome back to my channel this is your girl quanda, coming back to you with another banger, i am showing you how i created this beautiful fire, ginger, copper color on this bong wig, so you guys already know what to do. If you want to know how i achieved it make sure you keep on watching. Thank you so much to af cysterwig for sending me this week to review. I must say before i even get into this video, this hair company is bomb. It'S probably the best one that i've worked with and if you do not know um anytime, i do a hair review, whether i buy it myself or not. I'M going to be giving my honest opinion. Everything about this wig was top notch and great quality. So as y'all can see, this is the original color that it came with. It does have a tea party, so you can only do a middle part, so i also love the fact that it did um come with its own wig band. That'S adjustable as y'all can see, but, like i was saying as far as the color, this is the color that it came in. It'S like a light ginger orange color, but you know i had to amp it up. I had envisioned a color and i will try to um insert like a picture of some inspo that i got on pinterest, so yeah as you can see. I was going for this super fiery. Ginger, copper color, but i didn't want it to be too bright or too orange. Looking so that's why i added the copper brown in there just to tone it down a little bit, but, as you can see also, i am doing the watercolor method for the first time since this wig was already a light color. I figured why not so i used all three full bottles of that um adora, hair color and i'm just mixing it up with my denim brush. That way, i can kind of test out to make sure the color is what i want it to be. So when you see me kind of dragging my brush to the sink and some of that hair, color kind of dripping off, that's how i'm able to tell what what color you know the mixture is. Okay, so here comes the best part. The part where i actually dip it in the watercolor mixture i did use hot water because i did watch a youtube, video or a couple youtube videos saying that it was better to use hot water because it would take the color better. So that's what i did. I used like warm to hot water and i did leave this wig in there for a good, maybe five to seven minutes, and it did soak up the color so good and y'all. Oh, my god, you cannot tell me this color did not come out perfect. Like the picture that i saw that i envisioned versus this color. I think i did a good job for my first time doing this um so yeah this color came out perfect. It matched everything that i wanted it to be um, so i'm not really gon na go over this because i feel like this is kind of self-explanatory. You know using your wax stick and your um hot comb to make sure your your wig is good and flat and then, of course, i went in and plucked a little bit, i'm not the best at plucking, i'm still beginner. So when it comes to plucking and all that i i'm not the greatest - i'm still learning um but yeah, so this video is definitely beginner friendly for you guys. I did the bare minimum, because i did not have time to do all this thing: plucking. Okay! So now i'm just going to take some of my pro conceal, which was probably a tad bit too light, because i do have a little tan. So it was darker than what it used to be. But i'm putting that on my wig cap and i'm going to put a little bit on my wig now that whole ball cap method, it looks good, but i'm not doing all that. That'S too much! Okay, when i put on a wig cap, i wear it just like this and it turns out fine, so you do not have to do the bald method for a perfect, um flawless install one thing i am kind of upset at myself, for, though, is i had Bought bleach and everything to bleach my knots, because i wanted this wig to come out so bomb and flawless and melt so good um. But i kind of looked at it and i was like. Maybe i don't need to bleach the nuts i've, never bleached the nights on any of my wigs before, and this was going to be my first time, but i kind of wish i had did so so i might go back in later and do that just to Make it blend in better, because once i actually put the lace on and put the makeup and all that on, it didn't blend with my skin, like i thought it would, but it might have just been the makeup being too light, but yeah disregard that. Okay, if y'all see that you can still kind of see that my lace is lighter, just disregard that and so y'all know me, i'm always late with everything. I'Ve been wanting to try the bed head for a long time now, because i've heard that it was great and it definitely met my expectations and some more. I think this is probably going to be my preferred method over the got to be number one. It definitely melted better in my skin, without all the little white crusty stuff that they got to be used um, it wasn't as sticky and messy as they got to be and it had a better hold. I was able to wear this wig for at least two days, two or three days actually, and i usually don't wear my wigs that long, i usually take them off like the same day, but this actually gave me that great of a hold now this wig was A little bit too small for my little big head, but you know your girl made it work. Oh, so i didn't want like a a full baby hair. Look with this. This wig - i just did like a little baby hair here and there um, but i probably should have - did a little bit more just because the wig was a little bit too small, but yeah i made it look the best, the best that i could to the Best of my abilities, so just just bear with me: okay, just bear with me - do so now, i'm just going in with a little bit of my hair spray just to give it a good hold, and this crimper that i got from walmart um. I used to have a better crimper than this, but i get i think i gave it to my mom. I do that all the time like i give away stuff because i'm not using it and then i need it like a little while later i wish. I still kept it but yeah, so i did the best that i could with the little walmart crimper. It was pretty good, it was doable, so yeah, i'm just taking it section by section, doesn't have to be little, doesn't have to be real big um and i'm going in again and i'm adding even more hairspray just to make sure i have a good hold. So i went in fluffed up the hair with my hands. A little bit went and got my hair shears. My scissors added a little bit of layering around the face and i was good to go. That'S pretty much it um! Let me know how you guys, like this color, i'm not real big on color, i like to play it safe and keep it simple, but i really didn't want to try this hair color for so long but yeah. Let me know what you guys think like this video make sure you are subscribed and leave me some love in the comments. I will talk to you guys in my next video bye. You


Comments
Amour Euphorie: I just said an hour ago I might dye my hair copper, now here you go uploading this video. The universe is listening The color looks amazing on you! ❤️
Shontay Harrell: Heyyy!! I'm really liking the hair color. Good choice
Aliciamua1: Love the hair color!!! great video!