Dye Wig Red Without Bleach | Bleaching Knots & Styling | Luvme Hair
- Posted on 20 November, 2021
- Color Lace Wig
- By Anonymous
Welcome back to another video Styles Babes!
Don’t forget to like and subscribe if you are new here! Join us become a Styles Babe!
If you are returning make sure to turn on that So you are notified every time that I post! (watch in HD 1080p) #stylesbabe #ROADTO1k ❤️
TIME STAMPS:
Intro: 0:00-0:49
First Dye Attempt: 0:50-3:29
Second Dye Attempt: 3:30-6:28
4 boxes of L’oréal Hicolor Highlights (RED)
L’oréal Oreor Cream 40 Developer
K E E P U P W I T H M E
IG: https://instagram.com/teeonjra?igshid=... @teeonjra
HAIR PAGE♀️: https://instagram.com/oreoniastyles?ut... (oreoniastyles)
Email:[email protected] (For Business Inquires Only!!)
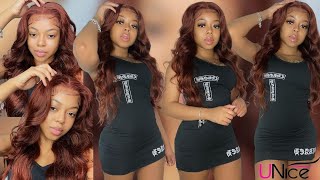
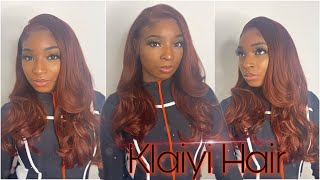
If you want to see how i went from this boring black to this, born dull red to this vibrant red, keep watching what's up style babes, today's video is going to be another tutorial. I'M going to take you through how i die bleach the knots and style the unit. For my client, this is the wig. It is from love me. It'S a 360 lace, frontal wig. It has elastic band inside of it. Three comes in the front one comb in the back, that is the lace on my skin, i'm using the l'oreal high color in the shade red and i'm using 40 volume developer from salon care. I messed up because the color actually ended up being darker, but i'm going to show you how i fixed that, so i parted off the front tool. The frontal is a 360 like i said so. It'S lace around the head and then in the middle is tracks, and that is what i do first, i do the lace first and then i do the tracks after okay, so boom um. This is pretty simple. I actually have another tutorial of me doing. The red, burgundy hair and it's a similar way you just want to apply it - avoid getting any on the lace because it will stay in the lace and you know that's just extra headache for yourself. So yeah the dye is really liquidy. As you can see, it's like watered down basically, and that is not what you want. That'S my fault. I messed up because i use the 40 developer from salon care you're really supposed to follow directions and use the exact die that loreal has specifically made for this die. It'S like the order die. I'M going to show y'all later on the video and yeah you're supposed to actually use that because it won't be as bright as it's supposed to be because you'll see like after i wash it out. It is darker than what it's actually supposed to be. It'S supposed to be lighter, so yeah, i guess don't really pay too too much mine to it, but i did want to show you guys my mistake because that's what youtube is about. You know you go on youtube to figure out what you did wrong. So i'm just going to show you all my mistakes and then show you how i fix it. You make me all right, as you can see like i said that is extremely dark compared to what the the product shows you, when you're at the salon store or the hair store, whatever it's supposed to be way lighter than that, it's like a dark magenta, slash. Burgundy color, and that is not what my client wanted. So i'm gon na go in and use four more boxes of the l'oreal high color in red and i'm gon na use the right developer that you're supposed to use. I'M going to show you all in a minute but yeah, i'm just showing you. There is a couple dark spots in there, so i did have to go over it either way like it's still tones of dark. Like you know, it's clearly still black a little bit in the middle too. For the second process, i used about four boxes. The first process i used five. Oh, i feel like it's. The color is too dark. My client didn't want the red to be that dark. So i'm gon na do it a second time and i'm gon na use the actual developer that they tell you to use on the box. I think that's why it's not a bright red like it's supposed to be because it is supposed to be brighter than that. I'M gon na actually follow the directions i didn't. I don't usually follow directions. That'S why the color doesn't turn out to be a bright red like it's supposed to be. So that's what i'm going to do now, all right. So, as you can see, that is a major difference. It'S even brighter than what it was and it's thicker than what the last batch was. The last batch was watery and it was all liquidy. This is like a thick pink paste consistency, and that is what you want. That'S what they tell you on the directions in the back of the box. Make sure you get this developer instead of the developer that you normally use the die needs a certain consistency in order for it to work so yeah learn from my mistakes. That'S why i said follow this portion more than the first portion um, because if you do then you'll have to diet a second time. But if you do it right, the first time you won't have to do it twice. It'Ll be a bright red like you want it to be so yeah um. I still wanted to show you guys because, like i said before, this is youtube, like people make mistakes and they want to fix it. That'S why you come to youtube so yeah, i'm just showing you all the mistakes and how i fixed it personalities you make me all right. So after i apply the dye, i put a plastic bag over it just to incubate it, and i let that sit on for about four hours. Remember the longer that you let it sit on is the brighter that it will get. As you can see. This is how the hair looks. It is a major difference from what it used to be. It was a dark red. Now, it's a bright, vibrant red and you just need to follow my directions. Make sure you follow the box and use the right developer and you will not have any issues you will not have to dye. It twice just make sure you use that developer and you could just do it one time all right. So i'm going to take some gotcha spray to make sure the flowers are back, because you do not want any extra hair to get bleached by accident and yeah, i'm going to start the bleaching process. So i use my bw2 power from clairol and i use 30 developer. You can use 40, but 30 is less harsh for me and it works for me and i like to make sure it's like a thick consistency like that, if you could flip it over like that, that's how you know that it's ready and i apply it onto The lace, you know be gentle and i start from the back and move up to the top. I let that bleach for about 25 - maybe 30 minutes. It really depends on the lace and like the knots so yeah 25-30 minutes. You know just keep an eye out on it, so i'm gon na use this fantasia heat protectant and i use it to press out the front tool. Usually i like to use a wax stick, but i wanted to try something different and this worked out perfectly fine for me. So it's really your preference. What you want to do, and now i'm gon na use this one and one one and one fourth inch curling iron from hot tools. It heats up really quickly and it curls just fine. I heard that this is a good brand too. To use they got good. Curling irons: this is my first time ever using one of their curling irons and the curls went out well, it was the way that i wanted it to be, so all right. So now i'm going to use my razor comb just to make some layers to frame my client's face. Foreign me until you reach me is all right, and that is the finishing look. I hope that y'all enjoyed the video that you'll learn something and use my tips and tricks don't forget to like and subscribe. If you are new here become a styles babe today. Follow me on all my socials down below and i will see y'all in my next one: bye style, babes


Comments
nalashay: Its beautiful!! where did you get the wig mannequin?
LEONIE Hamilton: Lovely