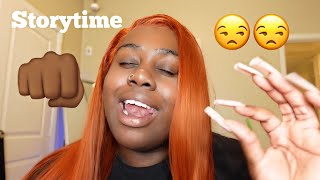
How To Dye Black Virgin Hair/Bundles Red Without Bleach: Beginner Friendly Step By Step | Angeliejb
- Posted on 21 August, 2021
- Color Lace Wig
- By Anonymous
HOW TO DYE BLACK VIRGIN HAIR/WEAVE RED WITHOUT BLEACH: STEP BY STEP | angeliejb
current subscriber count: 1,034.
hey babes! so my birthday is coming up and I decided to go red! in this video I will be showing you step by step how to dye your weave/bundles red without using bleach. don't forget to like this video and subscribe to my channel to join the family. (I forgot to add the picture of what I was going for but I got exactly what I wanted!! :))
WHAT I USED:
7 boxes of Loreal HiColor H8&H9
volume 30 developer
aluminum foil
trash bag
mixing bowl and brush
shampoo
silicone mix
HAIR LINK: https://www.aliexpress.com/item/100500...
CONNECT WITH ME ON SOCIALS:
Instagram: angeliejb
Tiktok: angeliejb
Hey guys, the grand jury welcome back to my channel, so today, you're going to come along with me to attempt to dye my birthday hair. So i'm going to be turning this hair from 1b slash black to i want to do like a red or like as red as i could get without. You know using bleach so um i've done it before, like you know, dyed some black hair to burgundy, but this time i want to go a little brighter. I'M gon na put a picture of like how it looked the first time. I did it like back in december, so this time i'm trying to go for like a missing picture like as close to this picture as possible. So before we hop in i'm just um tell you where this hair is from. Since i got a pair from the vendor, you know the regular regular vendors that you find sorry for the noise um some hair deep. This is a frontal, i think, a 13x6 pencil with a 26 28 30.. So right now it's like 8 30 in the morning. I got ta go to the hair store, so by the time i take you guys, along with me, to the hair store and then we'll come back and we're going to hop right into it. If you know my channel make sure to like subscribe and comment down and we're going to pray that this hair comes out, the right, color or as close as possible, so i'm going to get back on here when i go to the hair store or if i Don'T record like when i go to hair store, i will come back on here and i'm going to tell you guys everything that you need to turn black hair into burgundy red without bleach, so let's hop into it all right. So what you just saw me do was prime i've been prying, but so i just like laid a um trash right over my counter and the countertops are white and i'm buying hair red. So you know just a little extra protection, so my colors don't get like that. So from the resupply store, i went ahead. I got six of these, so the inches i'm dying are pretty long like 26. 28. 30. So you know the more bundles or the longer inches the more dye you're going to need. So i got seven so the colors i got. I got h8 and h9, so i got red fire and red hot. If it focuses the high colors is the only hair that i use for red hair and you can find at your nearest box store. I got 30 developer and aluminum foils will help um. You know speeding up speed up the dying process, so you're gon na need this also a mixing bowl and spatula thing whatever. Let'S move this stuff out of the way, and let me just show you what i got laid out so again: seven boxes of these aluminum foil, they're developer. I use 30. You could use you know whatever number you want depending on how bright you want it and these - and this is how my counter looks so again. These are the bundles and the principles i'm gon na leave like the vendor name in the description box. But again this isn't a um again. This isn't a you know, hair review, but i will let you know how the hair takes the color so yeah. So now i'm gon na just go ahead and open up the colors, so we open the box. This is what comes in the box so yeah, so i'm gon na go ahead. You either do one tube at a time or you could just do it all in a really big container me. I think i'm just doing like two tubes at a time just like i like know where everything is going, so i'm going to mix a h8 which is red fire with the h9, make sure you get all these all this all this in there and then go Back and push it all up, and then you open this little thing, which is like the color and you just squeeze the color in you know i would highly recommend gloves, but i don't have gloves at the moment so so the more developer. You add, the looser. The mixture is going to be, and then that will just you know the more the love you add you're going to have looser mixture, which will mean kind of more. You know dye to work with, but yeah. So now you just go ahead and mix it. We'Re going to take it out, be sure to keep this rubber band because you're going to need it as far as the end so and then how the window looks feels really good. So now i'm going to pop it open it's already doubled, so we're gon na arm apple, you're gon na want to unravel your bundles, because it's gon na help evenly distribute the dye which will give you like even colored, hair. You don't want, like patchy hair. All right so now take your pot and just start, you know applying you want to hold the. This is why you need gloves already: okay and flip it over. So so just a quick update. These are three bundles one. Two three like i. This is already like getting hot, so a quick like pro tip when you're wrapping your bundles in aluminum foil, make sure you do not bend the aluminum foil like um horizontally, because you're going to create a crease in the color in your hair. So how i do it with the shell i get like some really long foil and i put the bundle in the middle i fold, half of it and that's the other half and i just like crinkle the ends just to seal all the heat in. I couldn't get the top just to seal. The heat in like the key to this is making sure that the aluminum foil is helping the developer and the color stick onto the hair and change the hair color. So i'm going to now move on and do the principle so now we're going to move on to the frontal. This is a 20 inch principle. So to me, the frontal is the hardest part. So what you're going to do, you're going to lay the frontal lace down on a part of your you know like tar fit or, like you know, plastic bag that doesn't have any color. So, for me, i'm a little principal right there, i'm going to show you so this is where i laid my frontal as you can see under you know it's on nothing. So that's how it should look so now same kind of process, we're going to get the dye because consistency and where she's, going to right now, i'm starting at the bottom first because, like i said like this, is really hit or miss not really hitting this. But like it's inevitable that you're gon na get color on your lace and if you do i'm going to show you how to get the color off, but we're just going to try to get as least color, you know as possible and now this is right. There get your brush and just brush that color through the french one color. You use this, then okay, so eight nine hours later, i'm about to wash this stuff off like that. So now look i'm gon na wash this stuff off one bundle at a time. So, okay, so now that i washed out all the dye - and i shampooed it - this is how it's looking i'm about to go in with my silicone focus, i've been going with silicone mix and i'm going to drench this in silicone mix and let it sit in A plastic bag, let it sit in a plastic bag overnight, so let's hop right into it. So so, as you can see, the bundles are in the bag. I'M going to wrap this up and then i'm going to come back tomorrow when i wash the silicone out and then i'll be back again when i let it air dry, so you'll see a final product today is tuesday. Do i'll show you my product on thursday so and i all right, all right y'all. So now it's the next day, it's like it's like 2. 2, 30 p.m and i left it in the bag yesterday, but i put it in the bag yesterday at like 11 o'clock at night, so it's been sitting in silicone mix for over 12 hours and i'm going to wash it out and let it air dry on This towel in my window, sill and then i'm going to show you guys the finished product once it's done completely air drying. You can already see the color yarn, so i'm so excited i'm so excited and then just to start out the lace real quick. So we did get some color on the lace, but you know it's not really that big of a deal, because once my hair stylist and starts it, she knows how to like. You know conceal that up and just make that blend right in, like i was gon na try to get into the hair like this silicon mix is the freaking truth. I just cannot wait to see the color once the hair is dry, okay, y'all. So this is the hair um all combed out rinsed out no product, i'm let this air dry um. Realistically, this could take up to like a day and a half to completely air dry. So i'm gon na do that and i'll show you guys the color whenever it's done. Okay, i'm trying to find like some good lighting, to show you how to color the hair. So this is the color um i feel like, and you know more sun. It would be brighter. This is the frontal and it's like pretty bright. These are the bundles like in the sun. Y'All, see that, like this is the real color in the sun, so the bundles definitely match the frontal. It'S just like. I don't know lighting, but i'm trying to focus this but yeah. I think overall for me to not have used bleach like for me to not you see. There goes that's the real color for me to not have used bleach. It came out really good, like i'm. Really excited, i feel like it's not like. You know completely 100, like dry dry dry, but this is the color and i'm happy with it and follow me on instagram to see how it looks once it's installed. I'M going to leave my instagram name right here on the screen. Also like this video subscribe to my channel, join my family and talk to you guys in my next video bye.

Comments
Anita Serrano: A word of advice: talk about fast hair growth shampoo to double hair growth.