Let'S Make A Slime Green Wig | I Dyed My Hair In Water In Mins
- Posted on 22 October, 2018
- Color Lace Wig
- By Anonymous
HEYYYY Babes Let's make a wig
Don't Forget to SUBSCRIBE TO MY CHANNEL https://www.youtube.com/user/MsRoshPos...
HAIR INFO : Princess Hair Plug
Peruvian Straight Hair 613 Blonde ( Human Hair ) LUXE BUNDLE GRADE9A Hair
Hair Length 22" 22" 22" Frontal 20"
Check out TYMETHEINFAMOUS Channel https://www.youtube.com/user/TymetheIn...
to learn more about this hair
CONNECT WITH ME :)
INSTAGRAM @MSROSHPOSH
SNAPCHAT ROSHPOSH1684
BUSINESS EMAIL [email protected]
PRODUCTS USED
KISS Express Semi Permanent Lime Light
ION Brights Semi- Permanent Colour Brilliance ( SHAMROCK )
WIG Dome Canvas head
https://www.amazon.com/Canvas-Block-Ma...
WIG CAP
https://www.amazon.com/Pack-Qfitt-Mesh...
Ghost Bond Lace Glue
https://www.amazon.com/Ghost-Bond-Hair...
Wig Tripod Stand
https://www.amazon.com/Smilco-Adjustab...
Camera Canon 6D Mark II
Final Cut Pro to edit
Music : NCS Cade Get The Party - Non Copy written music
Wig color inspired by INSTAGRAM @Arrogant_tae123 Check out his work
This Water Colour Technique was inspired by a Few ladies that I watch here on youtube
Arnell Armon https://www.youtube.com/watch?v=pn2nCA...
Laurasia Andrea https://www.youtube.com/watch?v=fxNpnH...
THIS VIDEO IS NOT SPONSORED
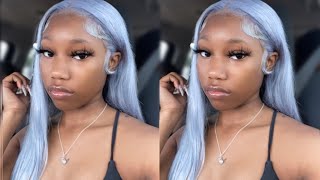
Hey everyone, its Michelle and welcome back to my channel so today, I'm gon na be doing this slime green hair slave. For you guys this one was highly requested. A lot of you guys requested me to do this hair look. So, of course, I have to do it for you guys and I'm gon na show you guys how I made this week from start to finish and how I color it. So if you want to see how I achieve this hair look, then please continue to watch all right. Let'S make this wig, so the first thing you're gon na need is some hair. So today I'm using the princess hair plug, and this is their six one. Three go on Peruvian hair in 22 inches. So you guys I've been wanting to try out the princess hair plug here for quite some time now, and this hair is actually by time. The infamous she also does YouTube videos. She has amazing makeup. Tutorials, her hair always looks bomb and I'm a huge fan of her channel. So I will link all the hair info and I'll also link her channel in the description bar down below. So you guys can go ahead and check her out. So the front row that I'm using today is also from Princess hair plug, and I love this frontal because I felt like it didn't, really require a lot of tweezing in the front to get it to have a natural hair line. Alright, so we're gon na move on to the fun part and I'm gon na do the watercolor technique. I did the same technique in my last hair video. I actually filmed both those videos on the same day so he's seen my minty green hair. I filmed this video the same exact date, so you need a bucket just fill it up with some hot water, not all the way to the top, alright guys so to achieve the slime green hair color that we are going for today, I'm gon na be using The kiss Express semi-permanent hair color in the shade lime light and I'm also using the ion bright, semi-permanent hair color in the shade shamrock. So it's like a darker green shade and you're gon na need a mixing bowl to mix the product in. So I'm gon na go ahead and apply the kiss color into that bowl and I'm only using half a bottle and then I'm gon na go in with the iron brights. As you can see, the consistency of this one is a lot thicker, so you really have to mix them together and I'm using half of the iron brights as well. I really wanted to use a different brand to get a green that shade, but that's the only thing I could my sally's and you guys after I mix them together. I'M just gon na pour all this stuff into the hot water, and then we are going to go ahead and mix that up mix it up. So once a day is mixed into the water. We'Re gon na go ahead and grab our first bundle and make sure you're wearing gloves when you do this guys, because it will stain your freaking fingers and you do not want that. Okay, my nails were stained when I try this out for the first time and it was it took forever to get it off. Anyways, I'm just gon na dump that hair right into that bucket and look at that green like I got the perfect shade of green. That I wanted to get so I got excited, and I put a little bit more of that hair dye into that bucket for my second bundle of hair and you guys as soon as I put the hair into the bucket, it literally took to the color right Away like I don't even think this took me two minutes to do. I didn't really time it, but it changed right away. I don't even think I had it in there for a minute. It was probably in there for maybe 49 seconds or so, but it wasn't in there very long and a lot of you guys asked questions about the last video I did. As for the frontal, it does not get stained whatsoever. I didn't put anything to protect the frontal, so, as you can see, there's no stain on the frontal at all, like the frontal, is perfect. I love this technique for frontals, so the lace is absolutely perfect. There is no stain on it and this whole entire process. Dyeing the bundles and the frontal, it probably took maybe five minutes to do, and I only use one and a half bottle of the kiss color and I use one of the shamrock ion brights colors. So I didn't really use a lot of dye or anything I'll put everything in a description bar down below as well. Alright, so now we're gon na go ahead and make this wig and you are gon na - need a dome style. Wig cap, I usually get mine at the beauty, supply store or on Amazon, I'll link it in the description bar down below. I love the stretch mesh one because I just feel like it fits so much better on my head, alright guys. So I already know my measurements for my head. My head is 21 inches, but I put the front hole on top of the wig cap, and so this is how I measure my front towles to make sure they fit perfectly. I just marked the top of it because that's where the frontal ends, and also on the ear where I would put the frontal. I hope this is not confusing for you guys, but there's plenty of videos on how to measure your head on YouTube. Alright, so I'm gon na be using a wig canvas head. That'S what I used to make all my wigs. I prefer to use this over these styrofoam head and this one is 21 inches, just like my head size and I'm gon na post. The link where I got this as well in the description bar down below and you're gon na need some t pins. So I'm just gon na use the T pins just to pin that lace frontal onto my weight cap as you can see, I'm placing it in all the areas where I marked so right by the air and at the top, and as for the frontal, I pulled A little bit of that frontal down, so it goes a little bit over that wig cap, and this is gon na be helpful once the wig is done, because when we apply it on the head, we just want a little bit of lace going over the forehead. That way, the weight fits perfectly on our head and you guys I'm just putting all that hair away and then we're gon na start sewing on this frontal. So you are going to need a weave variety. You can use blonde thread EP prefer. I really don't care because you're not gon na see the third, when I'm done making this week anyways and also a weave needle I'm gon na start out. By doing my first stitch right at the center of the frontal - and you just want to make sure that you stitch that down very very flat, so you don't have any bumps, because that's the worst when you're stitching are not flat and you have bumpy front holes Like that's, no fun your front old and not lay flat if it's all bumpy okay, so just take your time with it and just sew. But once I get to the end, I'm gon na go ahead and cut that thread. And then I make a double knot, because I don't want it to come and done you guys. Whenever I make my wigs and I sewed them down, nothing like the web's, nothing is falling off like they are stitched on perfectly like they do not come off at all, so I'm gon na go in with my first track. My first bundle and I'm just gon na go ahead and put the T, pin and pin it onto the very back of the wig cap and then we're gon na. Do the same thing go ahead and sew and again you just want to make sure that the stitching is nice and flat. That way, your ways are not bumpy and I'm doing the fold-over method so I'll go ahead and fold the track. Instead of cutting the track and we're just gon na go ahead and sew, you guys I'm gon na be honest with you. It took me a while to make the wig, because my thumb my nail broke, you know when your nail, like literally, is broken and it's hanging and it's like attached to your natural nail. I know it sounds so gross, but it was really really hurting my finger and my long nails were like literally causing me to so super super slow that day. So it took me a while to make this way, so I'm just gon na continue to do the fold-over method, and I'm just gon na use my teeth, pins to secure the web and we're just gon na go ahead and continue to show honestly is literally the Same steps over and over so you guys can just watch what I'm doing. Okay, so now that I'm getting closer to the top, I'm gon na go ahead and start cutting the tracks of hair and I'm just going to start sewing them straight across. Instead of doing the fold-over method and the stitching is the same - just keep it nice and flat and yes, we are on our final and last track. The hard part is over, the wig is pretty much completed. I shouldn't say a hard part: it's just that! It'S very time-consuming you guys, so that's the wig cap, underneath we are gon na cut off that extra part in the front, because we absolutely do not need this once the wig is completed, so we're just gon na cut that part off, and that is what it Looks like I use an elastic band in my way to keep my wig secure and fit on my head perfectly. This band that I got. I got it from Amazon and I'll link it in the description bar down below. I love that the band is so thick. So I put the elastic band onto the wig cap ear to ear, so I don't put it on the lace front, while you guys so on the wig cap - and I just saw it ear to ear alright, so this week obviously needs some more work. We need to fix up that hairline. You guys, and I like to go in with a water bottle just to wet the hair, because it's a lot easier for me to tweeze the hairline and you need a good good, tweezer, okay and I like to tweeze behind the hairline. That'S how you ensure that you do not over tweeze your front tools. You don't want to over tweeze it because if you tweeze too much in the front, you can end up with some bald spots in the front, and you don't want your front toes to have bald spots like it's, not cute. It'S happened to me before so I tweeze behind the hairline. You guys this part can be time-consuming as well, but just take your time with it and be patient and just tweeze behind that hairline you guys and just to make sure that I don't over tweeze. What I do sometimes is. I actually tried the wig on just to make sure that I'm not over tweezing it and I'll even tweeze the wig, while it's on my head just to ensure that I'm not overdoing the hairline as well, you guys so yeah. It'S pretty much the same steps over and over tweeze behind the hairline. Alright. So now that we're all done, tweezing I'm gon na go ahead and get my blow dryer and blow her out and we're gon na go ahead and style that wig. So we can get her all the way together. Alright, so I'm gon na go in with a flat iron. It'S pretty easy to straighten here. I'M pretty sure you guys already know how to use a flat iron, so the flat iron that I'm using it's by ion and I'll just link that in a disc Jabar. If I can find it because I've had it for four years now. I think, but it's a really good flutter, and you guys, I must tell you this hair is so amazing, like it is silky. It is smooth like this is probably one of the best six one three hears I use like. I really really really love the quality of the princess hair plug and I also use some Chi. This is their hair serum and I apply that into the hair as well. Alright. So this is what our wig is. Looking like right now, she's sitting a little high on my head, because I don't have a wig cap on so everything was nice and flat under there, okay, but anyways. I just want to show you guys this step right here, because I never really show this part where I caught my lace. It'S a little hard for me to film this part on camera. Actually, because my mirror goes to the side and it's hard to look into the viewfinder and cut my lace, and I did not want to ruin my lace, you guys, so I cut it as close to the hairline. But I do leave a little bit of lace, because I need something to pull onto my forehead and with the six one three here. The lace is a little bit on the transparent side, so it's kind of white. When I do glue this down, I usually put foundation onto my lace, so it matches into my skin perfectly and it just blends right in so yeah. That'S pretty much how I cut off the excess lace. I usually cut a little bit more when I'm gluing down the way. You'Ll see that in my last video that I did my last video, I cut a little part of the lace when I was gluing it down and to apply my wig. I use the gold spun lace glue. I absolutely love this glue. It is amazing and I did the melting technique. I didn't show you guys how I apply my wig in this video, because I already have a video of that on my channel. So I'll just link it in the description bar down below or you guys can just go ahead and check it out. It'S very detailed and, as you can see, I go back in with that tweezer just to tweeze up that hairline a bit more and apart and our wig is a late hunty. I think Simba really really loved this one. He was feeling it look at his Aires and you guys you can pretty much rock this in any style, so you can do a center part. A side part you guys on the side, part kind of girl, and I also did a wet look kind of hair. Look as well, if you want to see at the tour and how I achieved the wet look comment down below and let me know, let me know what hair looks you want me to create. Next, I had so much fun, creating this video for you guys. I had so much fun making this wig, you guys, I really really do enjoy making these videos for you guys. So, please, let me know what you guys want to see next and I'll see in another video very very soon. I love you guys so much and thank you so much for watching.

Comments
Anna Luiza: How does it feel to be a different woman every time you want?
Gee Esler-Box: omg wow! can you do the water dye with other semi permanent brands? thinking of doing it x
Aleek: you should do a baby blue color wig
K’MyaDanae: Ive seen so many videos...this...one look like its coming out your hair follicles...this is amazing sis
TymetheInfamous: Absolutely beautiful babe! Thank you for featuring us! You are KILLING this wig! I can’t wait to try this dye method
Renee Shead: SLAY JUST SLAY.... I never thought a wig that colour could look good.... until I watched this video. Keep it up babes
Uriel Carrupt: The level of FIERCE in this intro is SO INTENSE, that everytime I need to level up and get me together, I come here! SLAY GIRL!
Melanated Slay: Tyme is a OG I love her
Bonnie Corban SFX: This is STUNNNNNING! Amazing work x
SpaceBoi 666: I’m glad you decided to dye the bundles BEFORE you made the wig this time. The color comes out much more consistent that way. Instead of missing a few spots. This unit fucking SLAYS!!! you look so incredibly beautiful.
Claudia: we definitely need a tutorial on the wet look!!!
CellarDoor: You're so precise and great at sewing your pieces to the cap. You look amazing!
Uriel Carrupt: Girl, let me tell you something, I’m ADDICTED to your videos, I’m really into starting wearing some dope wigs and I really want one made by you! You are so talented and so beautiful! Thanks for sharing your knowledge! ❤️
Dana May: You make it look so easy! Never even wore a wig in my life and I’m tempted to make one after this!
WildFlowerPower: This was amazing. I can see myself having fun on vacation in this color. I have never created a wig but you have inspired me to do so with such an simple and clear tutorial. Thank you. New subscriber.
Victoria Gunther: I've never made a wig but you inspire me so much! I've been binge watching all of your videos, you are so helpful and informative. You are SO talented it blows my mind. P.S. Simba is so cute!!!
CuriousBadger: This is a very helpful video! I do a lot of steampunk and cosplay and i cant always achieve the hair I want. So thank you so much for making a video like this. Very easy to follow and understand. That color hair is stunning on you!
mamaghoul: I'm a Hairdresser and wig making is such an amazing and fascinating thing to me! Thank you for all of your videos! They're like hair poor and inspire me to switch up my current look!
Naughtia Steffano: I am in love with this! This is the color I been wanting to do for this summer
Real Vessel Gem: You made making this wig so simple. Thank you because YouTubers be tripping. ❤
Adore Zariaa: So much positive energy in this video I love it!! You got you a new subscriber ❤️
Nicole Giddens: This is the first time I saw a wig made! It was so cool to watch and it's absolutely beautiful!
Emily Nixon: wow the color was amazing!!!!!! you do such a great job on making wigs!!
Agatha Dolan: Gorgeous wig! I’ve never worn wigs before but this video is making me want to make myself one just like yours! Absolutely love it!!
lizzie fink: You are sooooo drop-dead gorgeous, love! This was super informative and fun to watch, too. Will be returning!
Biohazard Waste: the color is just absolutely amazing i’m truly stunned as to how it just took literally under a minute for that hair to dye and get such a pigmented bright and even color throughout
The MetatronGirl: Oh how I wish I could wear this color... It looks so stunning on you! I love it!
Ebony Johnson: This hair looks so freaking luxurious omg ❤️
Rae Rae Sims: That hair looks so nice and of good quality
Andy: I've been bingeing all your wig videos and honestly, I love them so much?? You show so much personality in your videos and its amazing
ColdBlooded Casey: You slay every color!
Adedoyin Ijiwole: Very detailed. Exactly what I was looking for. Thank you
Tanaya Talks: New Subbie I love the color and I’m so thankful you explained everything in detail!
Tracey S: I NEVER thought for one second a wig in that color would look good. It looks AMAZING!!!! I'm glad you proved me wrong! Completely slayed it!
I, DON'T, EXIST: I just have to say, Mad Respect! I could never make a wig from scratch like this. I don't wear wigs but my mom just started to have to wear them because of her cancer treatment and my mom doesn't know anything about wigs so I try to watch videos to help her. Granted she would never wear a lime green wig, it caught my eye and I had to watch the video for myself.
worstly: Nobody: Me seeing the first modeling seconds: Yesss queen rock that wig
Renique Hadaway: I preferred the wet look!! That was everything!! Sooooo gorgeous
Mayra Konwinski: Omg I love your wigs! they look so good and of course you rock them you're so beautiful.
Nora S-K: That wig looks amazing!
Audrey P: When I seen it wet I screamed YASSSSS BIHHH
Elizabeth Rosales: this is so bomb !!!! i had a moment seeing this being done !!!
MzGlamourAddict: Fabulous!! Simple Steps & Easy to Follow.. Thanks for sharing!!
Chante Shivaughn: You can pull of ANY colour Girl and look FABULOUS !!! I Enjoyed this video and learned something new- stitching the frontal from the middle first!! I was wondering why my closure was bumpy the first time I made a wig!
Britt: WOW WOW WOWWW.... this video was PERFECTTTT!!! The color of the wig, the simple technique, the instructions, the styling, the makeup....just perfect!! Big up uself my girl
Nicola Bless: I followed your instructions step by step and my hair came out the exact colour. Loving the colour. I look completely different; Time for a change x
Freya Christina: You are killing it with this colour honey it is beautiful and I love it! You should try that glow in the dark neon colours
Veronica Fernandes: Gurl, you are SLAYING the HELL outta that wig! It looks SOOOOO good on you! And the top... The top is so, SOOOOOOO BEAUTIFUL, it looks wonderful with the wig... I'm just in love.
Sandra Conway: Wowww Gorgeous thanks for bringing Vivid Color to my day, you can work any color and SLAY IT! You definitely show the world of YouTube that you are an Original!
Brandon W.: Wet look tutorial pleaseeeee I want to learn how because I have an event coming up and want my hair to be SNATCHED like yours
CourtttGraham: Thank you for doing the hot water method. It seems so much easier!
Ilytaehyun: Omggg you look beautiful with and without makeup you’re skin is so clear ❤️.
SuperFangirl818: So not fair that every color goes with your skin tone. You look amazing in every color. Love you.
Shante Dion: SOOO FARRER THIS HAS BEEN ONE OF THE BEST WIG CREATION VIDEO I HAVE SEEN ... this was very detailed from the color to the installation!!!! love this color Rosh!!!!
Pamela Ramos: i literally love watching your wig videos they are so satisfying ❤️❤️❤️
The kyle: She honestly slays any color. Queen!
Hannah Montoya: This is so beautiful I wish I knew how to do stuff like this
Sha’Kenya V.: Love this Tutorial! So BOMB !
Myrka Elizondo: Your wig videos make we want to dye my hair crazy colors ! I live for them tho they’re so beautiful
Mabel Richard: I don't really watch hair tutorials, I love mostly makeup tutorials but your hair tutorials, I always love to watch. They are so detailed.
CocoaBeans: all your wigs are sooo good, i love them
Chloi Hunter: How many bundles did you end up using? It looks fantastic as always ❤️❤️❤️
Nadiyah Kennedy: Just beautiful! Please do a wet hair look tutorial
Danna Banana: Its so green!! I'm here for it mama!!!!! You did that
ruben mendez: Yes girl please do an orange next time, much love
Leslie Holt: I never thought that color would look good but it is absolutely breathtakingly gorgeous
Delicious Atomic Bomb: So wait let me get that straight. You're gorgeous, your makeup skills are OBV, and you create the most stunning wigs YOURSELF too ? Girl wtf ? I low key hate you but high key love you
JeauxJeaux76 Laurent: My Gawd!!! She killed this look!!! The hair, makeup, and top!!!
Lorrayne: I love your videos. You’re talented. I can never do this lol
Daniel: The definition of GLAMOUR.
Semaj B Morrow: You gained a new follower today ! Very detailed very professional ugh I loved this !!!
MEB 1997: OMG that wig is so beautiful! its my favorite color too. And I love the length.
Karma Da' Bitch: I need that wet look tutorial please, looking great sis!
MONIQUE NICOLE: WTH! You literally look good in any haircolor!
Melanin Monroe: Love it! I would love to see a orange-ish burgundy on you for the fall. I feel like you can wear any color
Rocki_Dimplez: WHY DO YOU KEEP SLAYING US WITH THESE WIG LOOKS!!!! I CAN'T TAKE IT
msjayman2: This was a very detailed video I love it Thank you
LittleGothGirl: Bish, you make me wanna start making wigs.
Spongeyolboi: I absolutely LOVE this!!
Se En Park: I WATCHED THIS VID 3 TIMES ALREADY. IM LIVING FOR THIS GREEN OH MY GOODNESS. Also your videos are addicting to watch ILY
Sarai: I bumped into your channel and I loveeee it!!! Even tho I don’t wear wigs lol. But looks very interesting and the whole process was amazing! Def subscribed!!
Troy Michael: OMG You are literally the baddest. You always serve fire looks but I am living for this highlighter green on you! You should totally do like a peacock teal-ish color one next! Or a bright magenta bob? Although it honestly doesn’t even matter what you do next cuz we all know you gon slay it no matter what color it is; and girl I am % HERE FOR IT.
Dyzhae Dixon: Absolutely amazing!!! You can rock any color
Tatiana Santos: So BOMB!!!! I enjoyed every second.. ps I would love to see a video on how you achieved the wet wavy hair look.
bebe rivera: Snatched tf outta all my edges with this one!!! Please do something blood red/ deep wine soon
Goddess Oyaa: Even though this video is a tad bit old you just showed me a easy method to starting my wig creations for this year. I really love your step by step and it was not an overload of info. You are definitely awesome with wig creation !!!
RoflKitten: this video makes me want to get back into cosplay. I also feel like it was the last thing I needed to see to figure out what I want to do with my life. So thank you. =D
Only_Thee_Ash_C: This is pretty!!! Love the green! and girl you are so pretty like Beyonce and Kim K. mixed together!!
Unicorn Spoon: That acidic green has the most fascinating shift to it... from some angles part of it will look darker and then you move and it's super bright! SO COOL!!
Vic: This is perfect for cosplay! I'll use this technique to make my Kujo Jolyne wig <3
𝕾𝖙𝖔𝖗𝖒𝖞 𝖑𝖊𝖊: It looks awesome on you!
LaTisha M Moon: this color is beautiful on you!!
Iycesis Ayanna: can you do a how to lilac/lavender colored wig or a rosy pink wig?
London Tipton Reacts: Tutorial on the wet look please
Hennessy Williams: honestly girl you are so talented, this is unreal
Eléa Semoff: Magnifique ! J’aime beaucoup la façon que tu as d’expliquer ce que tu fais ! Tu à gagner une nouvelle abonnée ❣️
CynthiaLeeFontaineVEVO: Thank you for share ! This is amazing ! And you look gorgeous !!!
Emma Melz: Really want to see the wet look
TDK'S WICKED QUEEN: I like that color it's FLY! good job on that wig girl!
loonaplum: I just found your channel and I’m loving these videos! Keep it up ✨
Mari Mari: Wet look please!! Love the color