Whole Tutorial Of Install Ginger Orange Frontal Wig | Luvmehair
- Posted on 01 September, 2021
- Color Lace Wig
- By Anonymous
Here is a detailed Review and Tutorial on Ginger Orange Frontal Wig From @Luvme Hair
HAIR DETAILS:
Direct Link for the wig: https://bit.ly/3DmmO4Z
More Frontal lace wig: https://bit.ly/3kvPMXo
Luvme Hair Website: https://shop.luvmehair.com/
Extra 23% Off Coupon Code: Beautii
FOLLOW LUVMEHAIR
Instagram: http://www.instagram.com/luvmehair/
Facebook: http://www.facebook.com/luvmehair/
YouTube: https://bit.ly/3wBUhF0
MAKE UP ARTIST
Instagram: @Evalastingcosmetics
Website: http://www.evalastingcosmetics.com/
BEAUTIIBYDAY
Instagram: @BeautiiByDay
Instagram: @BeautiiByDayCollabs
Appointments: https://BEAUTIIBYDAY.as.me/
Collaborations: [email protected]
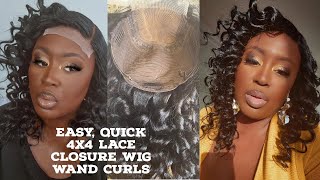
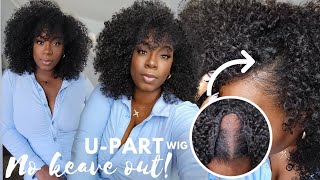
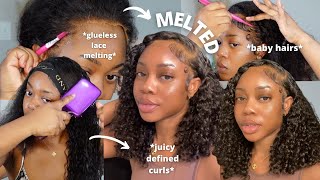
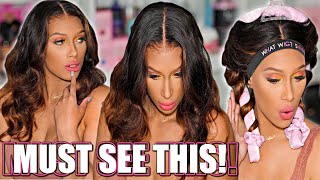
Hey beauty, queens welcome back to my channel, i'm so happy to be bringing you guys, some great content. This is going to be a very detailed tutorial, slash review so get your pen and paper handy. If you need to this is a beauty by day, collaboration with love me here. This is their ginger orange unit. Um, it is a 13x4. It is glueless, i'm not going to be doing in glueless. I'M going to be glowing my way down. I just like a good melt. That'S just my preference um! So right here, i'm molding the wig, because it's very convenient for you to do everything that you can do off of your head. This way, when you put it on it's already pretty much styled like you. Just got to do like the last finishing touches um, so it just makes it more convenient and then you can really see what you're doing when you have the mannequin on. You know the mannequin stand and you're styling it. So let me give y'all the tea on this unit, how i really feel about it. Um the unit is on the thinner side is 150 density. Um. If you wanted something thicker, if they have that option, please pick that option if you'd like to thicker hair, but that's my preference like i like full hair, because i like to layer my wig, so you need it to be full, so it doesn't look flimsy um. It was not bad on the shedding. I did get some shedding, but it wasn't horrible um. It took to curl really well. The lace was really um good um. It is a swiss lace. It was a really really good, um lace, it blended. I was able to tint the lace and it blended really. Well, it was um thin um. The parting is a 13x4, so you know you can't get like a really really deep part, but we made it work. So lately i've been really really digging the side. Part on me, like i've, been really feeling the side part like i'm, usually a middle part, girl, pocahontas straight long middle part. But recently i don't know the side part's been given. So i've been doing side parts so yeah, i'm about to freak the side. Part real, quick, now yeah see it already looked done. Then, when you get it on, you don't got to worry about your hands, getting tired. None of that. You do everything off of the wig. I mean off of the off of your head. You know so that you do less work when you actually have it on your head. Okay, so, as you can see, you know, the lace is white. We can't have that. We can't leave that like that, so i'll go ahead and color. My cap i like to color my cap before i take it off, so it doesn't leave a line on your head, the less you have to clean off when you actually want to put your lace on um. So i do that first and then you know you just get rid of the excess. You guys know this part. This is not nothing new um you get rid of all of the excess cap. I usually sew the back of the cap down to the anchor braid, but i'm not doing that for me because nine times out of ten, i'm not gon na leave this on for a long time, and i don't want the hassle of having to take the stitches Out so yeah so make sure you get as close, you want to get everything off get all of that excess cap off before you lay your lace down now you want to tint your lace, um. I do the same thing. I use the same exact color that i use for the cap and i you know you put it on your hand and then you put the brush, you wipe it on the brush and then you just coat it on the inside until it starts to change the Color of the lace, you don't want to press too hard because you don't want it to be too thick um because it can turn orange. You can turn a whole nother color. You have to make sure that the concealer doesn't go on the lace super thick. So you want to wipe lightly another thing: i'm gon na tell you guys. I hate color, like i mean not any color um, not subtle, colors like i'll, do like a red or like a a honey blonde, or something like that or like highlights, but you would never catch me with a color like this. This is like way out of my comfort zone, but you know it wound up, looking really really nice, so you know, but then i thought i think too, like when you wear these type of colors, you got to have yeah makeup done. You got to be dressed up like you got ta all go together. You know certain things are just not for everyday weird, but this one it was cute. It was cute. I am using beauty by day's beauty bond to get this lace melted. This is the only thing that i use um. I have the glue and the remover, but we're installing them right now. So yes, i'm using the beauty bond lace, glue now, okay! So it's almost clear! I don't let it get all the way clear, but it's almost completely clear, so we're gon na go ahead and we're gon na lay it down. You know what guys i honestly did not think that this was gon na look as bomb as it does. I'M not even gon na hold you because, like i said, i don't really like color anyway, so i wasn't really happy about it, but it wound up. Looking really really really good. You know, so it's the first time for everything. So now i'm using my handy dandy, beauty band. We just want to get that lace pressed into the skin. We want to get it, you know secure on there. We want to make sure all the you know all the lace all across it here is secure and melted in. So while i have that on there i'm going to just perfect the part, i'm gon na get the fly-aways away. I'M gon na just get everything basically ready for me to style it. Okay, so we took our band off and now i'm gon na get rid of the excess lace. Now i do not cut all the way to where the hair is. I leave a little bit of the lace still there um, i feel like that is a crucial detail that you need to do. You want it to look natural and if you cut it all the way to the hair you're not going to get that natural look. So leave a little bit of lace ahead of the hairline just a little bit, not a lot. I mean when i say a little bit. I mean a very very little bit not a lot at all and then i'm going to go back in and i'm going to add some more of um the beauty blonde just to get the pieces that are not stuck down. Listen to me, your part, is everything. Okay, your part is just as crucial as the hairline. You want it to look realistic, so make sure you perfect your part not too wide, not too small. You know you want it to mimic a natural hair line, so now we're going to put it back on now that i've added the second um the glue to the second part where the leaf wasn't laid down. I want to just make sure that is melted in so now i'm going to go ahead and put my band back on while i curl it, so i wanted the curls to be really really loose. So i didn't do a whole lot and then, like i told you, the hair wasn't really thick, so i didn't have to do a lot like a lot. Usually i parted um like in go row by row or do like two rows at a time, but this wasn't it wasn't thick for me to have to do that to still get you know the look i was going for um. So, as you can see, look at this melted so now we're gon na go ahead and take out what we're gon na use for baby here, um i'm using the hot comb just to make sure that it's going towards the front um! You can curl it. If you choose to you know, if that makes it easier for you guys to lay your baby hairs down, i don't really do that. I just use the narrow bead to put the baby hairs in place. Now, i'm only going to do baby hairs on this one side, i'm not going to do it on both sides. So you're not going to see the other side, so we don't really need it. You know it's not necessary, but listen look it. This is beauty by day with love me hair. This is the ginger orange color, frontal wig um. You can use cold beauty to get 23 off your purchase and you can follow them on instagram. Definitely follow me on instagram biddy by day or beauty by day collabs, and i will see you guys next time.


Comments
Shaprecia Jones: Did you wash the wig first and does it make a difference when styling the unit?
QueenModeGaming: I’m kinda looking at this color for myself …some ppl been saying they send u a synthetic blend and it’s just for this color . How is yours holding up today specifically with how well it holds the curls ?
Tiffany Garner: What is the spray you used? Also can’t find a direct link for the beauty bond on your website
nyiah jackson: What Inch Was The Wig ?
lady newgrowth: What is the spray your using I n the wig?
Alisha Taylor: ✔
rachel orange: Luv luv luvmh glad to see using this product girl I really need u to do my hair so please reach out I no your in nyc
Parris Jewel: I'm so scared its gonna rip my edges off
Iam ChandraRachelle: Yesss