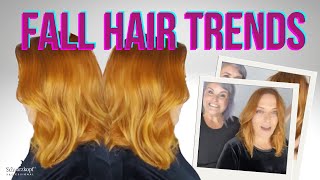
Perfect Fall Color For Black Women | Alipearl Hair Is The Best
- Posted on 09 October, 2019
- Fake Scalp Wig
- By Anonymous
●▬▬▬▬▬▬▬▬▬♛Alipearl Hair♛▬▬▬▬▬▬▬▬●
Hair info: Body wave 3*18 with 18 inch closure 6*6, free part,
❤Shop same hair→http://bit.ly/2mXYIv6
Body wave lace front wig→http://bit.ly/2mRIHGR
Body wave 3 bundles with 4*4 closure→ http://bit.ly/2os3zVB
NEW 6inch deep part lace wigs→ http://bit.ly/2ow4rbC
Website, BEST DEAL→http://bit.ly/2mWoHD8
➤10$ Off in Store use Code: alipearlyoutb
♡Instagram @"alipearl_hair" → https://goo.gl/SjMrzq
♡Want to win free hair? Click here → http://bit.ly/2H0Gmmc
Alipearl Hair Amazon Store: https://www.amazon.com/alipearl
3D&5D Mink Eyelashes: https://www.amazon.com/dp/B07S1DRY7F
Alipearl Wig Grip Band: https://www.amazon.com/dp/B07R12QXXJ
E-mail: [email protected] (Provide Wholesale)
WhatsApp: 0086 17719937661
FaceBook @"Ali Pearl Hair" → https://goo.gl/GFnwNk
Twitter@"Ali Pearl Hair" → http://bit.ly/2Wb7J08
#alipearlhair #bodywavelacefrontwig #closurewigtutorial #transparentlace #preplucked #makeup #tutorial #affordable #bobwig #wiginstall #hairfromamazonprime
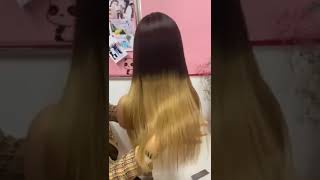
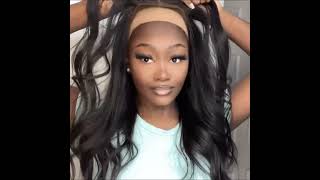
You you you what's up good people, so jump straight into the video we are going to do. A nice perfect fall, color fall season is here so it's time to get it poppin. So the hair that we were using today is from Ali pearl hair, and I have their body wave texture and I have three bundles of 18 inch and 18 inch. 6X6 free part closure. Now, as you can see, these bundles are pretty full, especially because the lanes are a little shorter but jumping right into it. All I did was bleach the ends of the hair, so I used my L'Oreal quick blue bleach and I had some. I think it was 20 volume developer and I used that to bleach the ends of the closure in the bundles just to begin the whole entire process. I don't really show the whole entire bleaching process. I kind of show like one bundle, one or two bundles each, because bleaching is pretty easy and it's kind of boring so, but a little about the hair. This is the best closure, bundles everything that I've ever used. In my whole, entire, like this hair career, like for real I'm, not cap in know that this is nothing but nothing but facts with this process and then the next process that we go through, I actually bleached his hair twice. It still came out silky and just luscious, and it was still soft and, like I didn't, have any problems with bleaching it. It came up perfectly the knots bleached perfectly on the closure. What else like this hair is just banging, and then the closure was like the perfect size. I think 6x6 closures may be like my new go-to, because I'm in love, I'm in love with the overall result of this hair. I'M just I'm just excited for this one. So if you follow me on snapchat, then you kind of already know what the outcome is going to be, but if not, let's get it so now. This is the second process. The hair was kind of damp, but not like soaking wet. So I undid the bundles and then I proceeded with the same bleach in the same developer and I bleached the hair again so this time I went over the part that I had previous well as all the way up to the actual weft. For this look, you don't necessarily have to go all the way up to the West, but I just wanted the full effect like I didn't want. If the wind blew my hair one way, you would still see like brown and black hair, like you know, dark brown or black, whatever you want to call it hair um. I want everything to be perfect, so, like I said, I brought the bleach all the way up to the West, and then I did have on gloves so after I felt like I covered it enough in Bleach. I just kind of massaged the bleach into the hair, and literally I did not leave this on for long. I bleached the first bundle and by this time I got done the second bundle. I went and rinsed out the first bundle and then I will bleach the third bundle um and then, by the time I got finished. The third bundle i rinsed out the second bundle - and I just did it that way, because I didn't really need it. Super bright. Color, because of the brown that I just wanted, the roots I just wanted, it lightened up a little bit, so the brown would it would be like. I want it to be like a chocolate type of brown, so you don't really have to leave the bleach on. For a long time literally, you can see it the other bundles sitting on the side. It'S like lightening up a little bit so once I seen that I finished the second bundle and I went and rinsed it out and, like I said I did this whole entire process for each bundle as well as the front zone after rinsing everything out. I proceeded with the hot water method and I used a door, honey brown and a Doric Asian spice like two parts: honey brown in one part, Cajun spice now for the hot water method, you don't have to let your hair dry. First literally, I just rinsed out the hair and came back with the hot water, because it's going back into water anyway, and I dipped the top half of the closure in the bundles in that mixture. First, to get the chocolate brown color that I was going for and then and I let it sit in the water, maybe for like about two minutes and then I kind of did the you know, dunk method and just kept like dunk in the hair. I poured out that water and came back with some more hot water and I used a door spice and amber and ginger, and I did two parts ginger and one part spiced amber, and I did the same thing except I just dip the ends of the hair And I did dip a little bit deeper, just so like the ginger color would meet the brown color just so like there was no like it was a perfect transition like so there was no blotchy parts or anything like that. After this dipping process, literally the hair was good to go. I washed a hair, conditioned it and style it. So here's a quick look of like what the color kind of came out to be, and I was in love um. So what I did was part up. My baby hairs and kind of flattened out my part and everything so all I had to do was just put on my wig and I didn't have to style it on my head. So as far as the closure goes, I didn't really pluck that much you'll see in this clip that I literally plugged like a little teeny bit from the front but like it came, pre plucks and the baby hairs were already kind of parting off. So I just kind of tied those away until it was actually time to cut them down, and then I proceeded to curl the hair with my flat iron and as I curled the hair, I just wanted to show that little this little snippet because it just the Hair looks so silky, it just looks so luscious and I love the color. The finished look is just it's bangin, so I did use my scissors. I couldn't find my hair scissors, so I use my craft scissors, but excuse me jumping up and down. I had to use the bathroom, but I did use my scissors to cut like little teeny layers in there, so the hair would fall perfectly and then I proceeded to just put the wig on and this wig was made on the sewing machine. So if you haven't seen that video make sure you tune in and watch it very easy method and I did apply like a little teeny bit of powder makeup to the closure, because it is transparent lace. But do y'all see how, like just perfect. That looks like I'm in love, and I think Brown is officially my new color. So, after putting on the wig and kind of figuring out where my part was gon na, be all that good stuff, I did proceed to cut off the lace and I did use got to be glued, so just kind of like tack it down just a little Bit nothing too serious but, like I said I think, 6x6 closures or any closure bigger than this is actually my new go-to because frontals I love frontals, but the ear tab is what kills me. It kind of itches my ear sometimes so. This was kind of a relief like I felt free when I was wearing this wig and it was like the perfect fit like everything was just perfect. I was in love, everybody kept asking me about this hair, so here is but yeah. So once I used the got to be to kind of tack it down a little bit, I went in with my new favorite moves and it is from Pantene. I got it from couponing at CVS, but yeah it is my new favorite mousse. So I always use this to kind of lay my wigs and my baby hairs as well. I did not use any gel to lay my baby hairs, which was very relieving because, Jo, like they got to be Jo, can get kind of hard, sometimes so the baby bears but be like really stiff. So with mousse, it's easy to create like wispy looking baby hair, especially after they set, you can kind of brush them back out and they'll. Look exactly like a real baby hairs. So I did the edges down and everything after I kind of my baby hairs and everything scarf all scarf off and I was like it looks so good, like literally just in love, and then I use my hot comb to kind of just pull the roots back. A little bit so it wasn't falling all in my face, but this is pretty much a alie pearl hair out has outdone themselves. This was definitely like a 10 out of 10 I'm in love with this hair. I cannot wait to work with this company again, but I hope you guys enjoyed this cute fall. Color slay all fall period. I love you guys and see you in the next one. You
Comments
Dayna Bledsoe: Love this color on you !
Fashion Tendencies YT: Beautiful
H I D D N B E A U T I E: I looove closures lol and ive been eyeing brown colors for mt hair for awhile so glad u did this video
Cici: I'm loving this color in you ❤️
Jade Armanii: This is too cute !!
shamya peace: will this unit be for sale ?
Darrean Van Zandt: come on COGIC youth department!!!!!!!!!!!!
MadeByMahii: You’re intro song isn’t playing Why pantene mouse ??
Elene Farmer: Where’s the intro song
Jasmine Simmons: You ever thought about going to hair school