From Bundles To Scalp: Quick Diy Transparent Closure Wig | Unice Hair X Lovelybryana
- Posted on 19 September, 2019
- Fake Scalp Wig
- By Anonymous
twitter/ig/snap: lovelybryana
●▬▬▬▬▬▬▬▬▬♛UNice Hair♛ ▬▬▬▬▬▬▬▬▬ ●
Overall 6% off for new season,code:AUT2019
Exclusive For Students 8% off from Sep 19th-Sep 23rd
★The same hair in this video➤ http://bit.ly/2lZbSHq
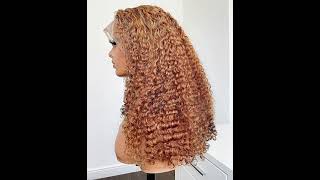
Hair details: Peruvian Straight 3*26'+20'Closure
Buy hair on www.unice.com➤ http://bit.ly/2m1HA6z
90% girls choose this 6*13 Lace frontal Straight wig 150% density➤ http://bit.ly/2m0V6Hz
Add $5 to get one wig➤ http://bit.ly/2m19EHa
The Best Hot Sale Body wave ➤ http://bit.ly/2lUMhiG
https://www.unice.com/ ➤ http://bit.ly/2m1HA6z
Aliexpress UNice hair store ➤ http://bit.ly/33N5JiR
Amazon UNice hair store ➤ https://amzn.to/2zxP2gm
Follow UNice hair on social media:
Instagram @unicehair: https://www.instagram.com/unicehair/
YouTube @UNice: https://www.youtube.com/c/UniceHair
Facebook @UNiceMall: https://business.facebook.com/UNiceMal...
~~~~~~~~~~~~~~~~~~
Products I Use:
Silicone Strip (ScarAway) : https://go.magik.ly/ml/q9y2/
Lace wig grip : https://amzn.to/304dylZ
Sally Hansen Leg Spray Medium Glow - https://go.magik.ly/ml/kizp/
Wig Grip - https://amzn.to/2W8mOjh
Wig Stand - https://amzn.to/2W8mFfJ
Wig Head - https://amzn.to/2TbZMGg
Scissors/ Shears - https://amzn.to/2RT00F9
Tweezers - https://amzn.to/2CCfW54
Lotta Body Foam Wrap_ https://amzn.to/2TZloX3
Got 2B Glue Freeze Spray - https://amzn.to/2BiTm1G
Clear Got 2b Glue (Black tube) - https://amzn.to/2Q8viXA
Yellow Tube Got 2B Glue - https://amzn.to/2ZEShhA
Conair Infiniti Pro BlowDryer - https://amzn.to/2DxWd8z
Pressing Comb - https://amzn.to/2HPKEMd
BabyBliss Pro Titanium Flatiron - https://go.magik.ly/ml/ltc8/
LovelyB's Edge Control - AmazonPrime https://amzn.to/2QaGZNr or www.LovelyBs.com (Also Amazon Canada)
Sephora Foundation Powder - Golden Almond - https://go.magik.ly/ml/kizh/
BH Cosmetics Foundation Powder - 240
~~~~~~~~~~
Helpful Videos:
Bleaching Knots
https://www.youtube.com/watch?v=tccwTD...
Bleaching Knots vs Foundation
https://www.youtube.com/watch?v=2ORjQ3...
Plucking a Natural Hairline
https://www.youtube.com/watch?v=mYr2tx...
Melting Lace No Baby Hair
https://www.youtube.com/watch?v=3sQOpN...
Melting Lace With Baby Hair
https://www.youtube.com/watch?v=xr2x7Q...
FTC disclosure: This post or video contains affiliate links, which means I may receive a commission for purchases made through my links
I said welcome back to my channel so today, I'm pretty much showing you guys a beginning to enslave literally from bundles. To is that your hair, so we're gon na start up now by showing you guys exactly what I have so this is the unis hair and I got what they have listed as a transparent closure, and I got 326 inches of Peruvian straight hair. I couldn't not say that three bundles, you guys, so that is what I got. This is what the funders look like: a pretty decent size. The hair feels super soft and it's pretty much even all the way down to the bottom, and these are the dome caps that I like to use. When I make my wigs, even when I glue them, I like to use these as well. So first I'm just gon na go ahead and position the wig cap onto my mannequin head and then you want to pull the back down a bit. So you just want to go ahead and take it and kind of just stretch it down a bit like I'm showing right here, just because this is normally how your head is shape. Unless you shave the back, it would be a little bit more rounded, but we're gon na go ahead and pull this down and then begin to pin the wig cap in place. So it's not moving all over the place and then we're gon na move into the closer. So you want to take your closure and you want to pull it up. I say about like half an inch. You don't want to directly line the hair line up with the dome cap. You want to pull it up a bit like I did, and then you just want to go ahead and pin it in place and pin it around. If you want, you can sew this down from the beginning like right now you can sew it down or you can outline it. You could do whatever you want. I'M gon na wait till. I begin sewing the tracks up a bit before I sew the closure into place, so I just went ahead and pin it up out of the way and then now we're gon na move on to this, then this is right. Now, I'm just basically creating where I'm going to place the tracks. It doesn't have to be perfect. You guys I'm just using a white eyeliner and I'm just basically mapping out exactly where I'm going to place each track, and this will help me do the next step that I'll show you guys in the second and basically I'm going to pre-cut all of my tracks. So I'm going to use these white lines as like my kind of measuring tool and I'm going to measure out every track that I'm going to sew onto this way. Cane and it's just gon na make it so much easier. And it's gon na make the time go a lot more quicker. So this is what your cap should look like. Once you complete your outline from the back going up almost to the top of the hint they're, just pretty much straight lines, kind of creating like a C shape, and then it starts to form into a. U and then, when you get to the top top they're kind of just going from left to right, just because that's the way that it will lay the flat is to me so right now, I'm doing what I said and I'm just pre cutting my tracks and Then, as you cut them, you want to keep them in order, because you don't want to get them all jumbled up, and it would just make it so much easier if you keep them in the exact order that you cut them like this. That way, when you're grabbing them you're, not all over the place, you can just grab and sew and grab and sew, and I also like to pre thread as many needles as I have, which I only had before this time. I usually have more, and it just makes the process go by so much quicker, and then I just begin sewing. So I like to take a clip. You can use any type of clip that will slide under the cap and just hold the end of the track. In place and then I begin sewing the part: that's not clipped up and you just move as quick as you can. Basically I don't do any type of special sewing or threading or anything like that. As long as you can go in and out of, like the dumb crap in the track at the same time, you are pretty much good with this, and then you just knock the end, cut it and then start all over again. So I basically continued the process. All the way to I get to the top of where the tracks start to meet up with the closure like where the end start to touch, and after I get to this point, this is where I stop sewing the tracks and I sew the closure down. So I basically just sew around that. You part the back basically of the closure like this starting at the beginning, just go ahead and sew this down and then once I so. The closure completely down I'll begin sewing on the rest of the pre-cut tracks, and I promise all of you, the sour taste, the wash, because I promised you promised for the last track. I like to get it as close to the closure as possible. This is basically in my head. This is what I'm doing, I'm like uniting the closure to the track into the captors to make sure it stays all increase. So once the last track is in place, you can go ahead and take the wig off of your mannequin head and then this little pocket right here we're going to cut out. This is underneath the closure, and this is going to be your scalp area. So you just want to go ahead and take your scissors and cut it. You don't want to cut too close to the thread because you don't want to give it any wiggle room to like unravel cuz. Then the closure will separate from the spandex cap and you have to keep them sewing it back. So you just want to go ahead and make sure you leave enough room that it has enough wiggle room to stay in place, especially when you stretch it. To put it on and then here I'm just showing you guys how much of the hair I had left. So I pretty much used all three bundles, except for this little strip right here and now I'm going to begin working on the hairline area. Before I apply the unit, if you guys want a detailed video on how I pluck my units I'll go ahead and leave one down below in the description box, along with any other helpful videos, direct links to the wig and anything that I'm using in this video. Like my wig head, my tweezers, my mannequin head everything you guys so I'm just thinning out the front right now and then I'm going to cut a few tiny baby hairs and slip them into place. So once I have the hairline how I want it, I decided that I wanted to cut a few just small layers in a unit like nothing, crazy, just to frame it a bit. So I'm just gon na go ahead and take my razor you guys. I still have a lot of new razor and I go to Sally's like once a week um thank you. Bye broke razor and I'm just gon na go ahead and create a nice kind of just a layered effect in the front, not too high up, and then I'm just going to take a little bit of oil. Rub it through the hair flat iron. It a bit and then we can put this baby one. So here is the final product and I am so proud of myself. You guys I haven't made a wig in so long and she came out so Bom, okay, so now time to put her on you guys, I really took you out through the whole process, but I ended up sewing an elastic band in it. Just because, when I make my waist, they tend to be a little bit too big for me, even when I sew them or glue them like it doesn't matter they still a little bit too big. So I did sew an elastic band in and I put my silicone strip in my parting area. If you guys watched a few of my videos, so you know I like to do this in a party area, because a camouflage is the great part. So when you go outside in like natural light, you can't really tell - and I get this with CVS or Walgreens or Amazon I'll leave a link down below for you guys, but I just went ahead and put this baby on and now I'm gon na use the Yellow got to be glue just in this area in the front I did the stocking cap method, but just literally in the front of my hair, if you guys want to see a video on how I do this I'll leave that down below as well but yeah. I'M just gon na go ahead and put this unit in place. Blow-Dry it fit fix the baby hairs, and that is pretty much it for this video. You guys, I hope you guys enjoyed it if you're not subscribed, go ahead and hit that subscribe button and hit that little notification bill, so you're notified every time I post. I love you guys, and I will see you in my next one.


Comments
D Daniel: Great easy-to-follow lesson, thanks, Bryana!
CurlsNCoils: Thanks for going into detail on how to make a wig. I've been wanted to make my own for awhile now. Love the hair and robe.
Jennifer Cruz: Yasss Bry! Your wig came out BOMB!! And the way you did it and explained it, was so easy to follow. Thank you so much! I love your channel.❤️
Topaz P.: Simply slayed you made that look so easy!
makeda ahmirh fareed: You did such a great job, Sis! I hate making wigs cause i feel like it takes FOREVER. Im gonna try it like you did it— pre-cutting and outlining. You are seriously the best wig guru on youtube. I have learned soooo much from you over the years! Like why doesnt everyone wear a wiggrip and silicone strip under their wigs???? #saveyaedges #nobackslidin #whatlace? #noglue
dariusz mirosz: you are very creative, not everyone can afford an expensive wig, fantastic job.
Lynette Smith: Lovely Bryana, your so talented! You made making that unit look effortless. Great video and can't wait to see more.
Syd: You make it look so easy
Gabby: I never can get mine to lay right whenever I’m making my own wigs . I’ll have to try the white pencil method. Anywaysssss, cute as always
kwan southerland: I luv it!❤❤❤
dw29376: I never glue my wig down by the ears, I only use gel at the front like you and that has saved me time and edges. lol I glue all around if I'm going swimming only
Lex Go Financial: Thank you for this video!!!
Belgian Bae: Please make a video on you getting your 2 braids did ...love love love it ...how long does it normally last for ?
Michelle Reyes: Love everything about you
Duchess: OMG, Bry this turned out gorgeous. You should be proud of yourself. Dang, why do I have to live in Atlanta, having you as a neighbor would be a dream come true. JK, I wouldn't bother you except maybe once to help me be more confident with wigs.
Tiana Marchelle: Girl, I just bought a wig from Hairvivi now I want to make a wig ♀️
Doshha Brianna: Your abs just told me to get my life together and get in the gym
Tee Bina: One of my faves!
Myrna J: #LovelyBrySquad!!♀️❤ Love this!!✔ Bryana can you Recommend some good Curly clip ins ? Thank you in advance. Oh and can we get a video on the Two French Braids please and thank you.
This Ain't What You Want Period Poo: Let me finish watching this ad so I can go see the slay
LAKETA KEATON: Sorry, Late comment... LovelyB was looking serious sewing up that 1st track...Great Job!
Crystal Kran: where'd you get the strip in middle of lace from?
Belgian Bae: Damn You finesse all the time #loveyourvideos
Heaven G: ❤️❤️❤️
Keyosha Whitaker: Wtf this on pointttt ‼️
Amelianna: Have you ever considered selling your units?
Melanin Monroe: You are sooo pretty!
Yolie: Wow wow wow wow that's all I can say
Syre828: I was staring at those abs more than the hair
Butterscotchchick: If you must do baby hairs, then they should look like this.
likewaterforchocolate: Why do you cut the tracks instead of fold over method?
Boitshepo Tshepi: Please sell your wigs. I really don't know how to customize a wig
Iluv Hotpink:
likewaterforchocolate: BTW both links for melting are broken or the video is private
Annie Finley: why are you cutting the tracks
عاشقةbts عاشقةbts: Am Eman from Iraq Baghdad Am Moslem❤❤❤❤❤