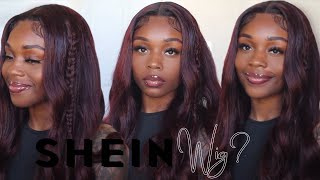
Unice Jerry Curly Wig| Amazon Wig Review
- Posted on 20 November, 2020
- Fake Scalp Wig
- By Anonymous
20. Instagram: @Brelicious_Feelings @Bremonetgraphics
Tiktok: Brelicious_Feelings
Email: [email protected]
Snap Chat and Twitter: Brelieve_Me
Amazon Gems Finds link: https://amzn.to/3eUguot
♡HAIR INFO♡
Direct Wig Link: https://amzn.to/2KtRJFB
What is up you guys welcome back to my channel and if you're new here my name is bree monet and today's video is going to be another amazon wig, but this time from eunice hair. So what came in the box was some lashes, their business card and some wig caps, so they were kind enough to send me a curly wig that was 18 inches and it also came with a fake scalp. This is my first time actually seeing a fake scalp, but this is what the inside looks like, and it also has three combs. So without further ado, let's get into the video so first thing: first, i'm just going to use my got to be glue and i'm just going to put it in the section where my closure is now i'm just going to take my free spray and spray that, On top of it, then i'm just going to blow dry it to make it a little bit sticky and we're going to wait until it gets tacky to place the wig on top of it. Next, i'm just going to go in with my tweezers and fix the hairline. I know it already says it's pre-plucked, but i just wanted to go in a little bit more, so it could look a little bit more natural. Next, i'm just going to take my razor and i'm just going to make some baby hair. They already said that they did have baby hair for this wig, but, as you can see, i i didn't see any so i had to make my own. I start off long in the beginning, because i want to see where the swoop is going to stop and once i see where the swoop stops, i normally just cut it off. Next, i'm just going to add some nairobi across my hairline. Then i'm just going to go in with my hot comb and to make sure that my part stands out. I'M just going to use some foundation in the middle of my part and also where we put the baby hair. You just want to go into the lace and put a little bit of foundation there as well, and the last and final part is to put water in your hair with any products that you would like. Normally i like to put conditioner in water in my hair and then go in with a curling mousse. Okay, you guys. So this is the finished look. This is what it looks like. The first thing that i see is the curl pattern. The curl pattern is really defined as soon as i wet it. Also, the hair holds on to water in the product that i put in my hair, really really good. So that's a good thing, and then this is what the parting looks like. So what i did was for the parting i just put foundation on first. The reason why i put foundation on is because i really wanted it to look like my skin color. Even though there is a fake scalp underneath um, i wanted to make sure the parting stood out. Then i went in with some powder almost like a lighter colored powder and that kind of gave it like this blur effect. I want to touch base more with the fig scalp, so this wig is kind of made for girls that don't know how to do a bald cat method or girls that don't really feel like doing a ball cap method like me. So once i opened up the box - and i saw that i didn't really have to do anything to this wig - i was sure enough happy. Yes, i was. I also wanted to tell you guys: what's the difference between a closure and a lace front, because a lot of you guys have been asking me and i'm not even gon na lie at first. I was like what is the difference: uh closures is definitely beginner friendly and lazy. Girl friendly first of all, amazon said that this was a glueless wig, don't believe that she was definitely slipping and sliding, and she was definitely talking at the table when i wore her. This wanted to be in the conversation too. Basically, she definitely had a lot to say just glue this part down and let it be so basically, a closure is a u-shaped um parting space. Mine stops like right about here, so this is where my clothes stops. So i have all this parting space right here to work with with a lace front um, it's laced all around and i kind of like lace fronts more. If i'm going for maybe a swoop or a side part, you can definitely wear in a middle part. You can do the whole nine with a lace front, so hopefully i kind of helped. You guys understand the difference between the two. Only cons that i have with this wig is when it was dry. For some reason, it was definitely hard to kind of get through for some reason the ends would be tangled, and this is like the shouting wasn't too bad. I'M not gon na lie. The shedding was not that bad. So this is how much judding i got from it, but yeah when it's dry, i get tangles at the bottom. I know y'all was like um brianna. Where is your um video of the week um good question? Why don't you ask my professors, because they want to give me midterms and let me tell you something we gon na give to god. Let me get up and show you guys what it looks like on me. So this is how long it is. This is what the back looks like. So if i had to rate this from 1 to 10, i would give it a. I would give it a ten. I don't really have anything wrong, except for the part when it gets dry. It like tingles at the bottom. A little bit but other than that, i don't really have a problem with it, and on top of that, i'm wearing the lashes that they gave in the box. They are cute, so you guys already know what it is. If you're looking to purchase this wig make sure you check out the description box down below also while you're there make sure you check out my amazon storefront, follow me on all my social medias and if you have not already make sure you like comment subscribe, and I will see you guys in my next video bye


Comments
Myah Savage: The wig was pretty
jassy parrish: Love these videos ❤️❤️
Lina P:
Shuni The Flower: New subbie
glambydeeep: Made it early this time!!
Bellathadiva: Hey bre how tall are you. ?
Mariah Jones: Weakkk “why don’t you ask my professors”